Table of Contents >> Show >> Hide
- What Are Collard Greens, Exactly?
- Best Climate and Timing for Planting Collard Greens
- Soil Preparation: Giving Collards a Good Home
- How to Plant Collard Greens
- Watering and Fertilizing Collard Greens
- Ongoing Care: Mulching, Weeding, and Shade
- Common Pests and Diseases in Collard Greens
- When and How to Harvest Collard Greens
- Storing and Using Harvested Collard Greens
- Common Mistakes When Growing Collard Greens
- Real-World Tips and Experiences from the Collard Patch
If you’ve ever eaten a bowl of silky, smoky collard greens and thought, “I could eat this every day,” good news: you absolutely can, and you don’t have to rely on the grocery store to do it. Learning how to grow and care for collard greens is surprisingly simple, even if you’re new to gardening. Give them sun, decent soil, and a little attention, and these leafy powerhouses will reward you with big, beautiful leaves for months.
In this guide, we’ll walk through everything you need to know about growing collard greens at home: when to plant, how to prep your soil, the right way to water and fertilize, how to outsmart the bugs, and the best tricks for harvesting sweet, tender leaves. We’ll also wrap up with real-world, hands-in-the-dirt experiences so you can skip a few rookie mistakes and head straight for success.
What Are Collard Greens, Exactly?
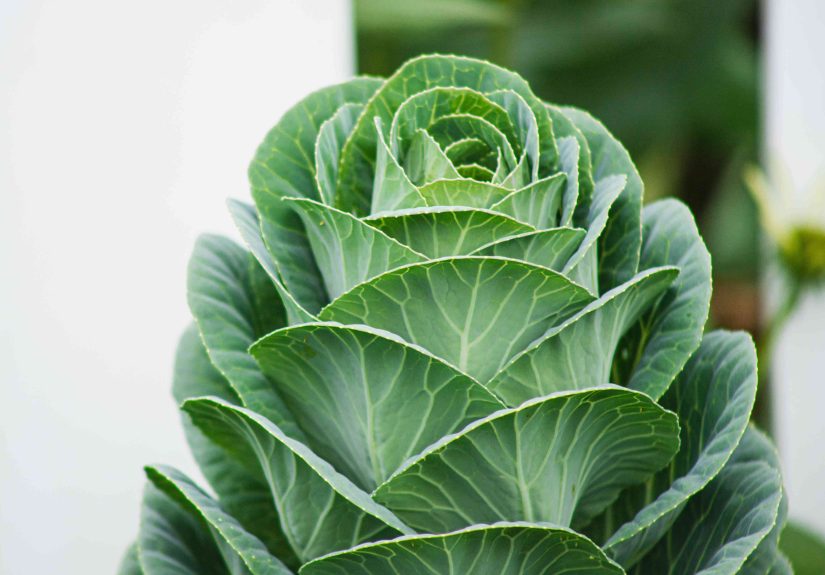
Collard greens (Brassica oleracea var. viridis) are part of the brassica family, which includes cabbage, kale, broccoli, and Brussels sprouts. Instead of forming a tight head like cabbage, collards grow as an open rosette of large, flat leaves on a central stem. Flavor-wise, they’re hearty and slightly earthy, and when grown in cool weather, they develop a subtle sweetness that makes them a staple in Southern cooking.
From a gardener’s point of view, collard greens are:
- Cool-season crops that thrive in spring and fall, and often overwinter in mild climates.
- Cold tolerant down into the upper 20s °F, especially with some mulch and basic protection.
- Generous producers that can be harvested leaf by leaf over a long season.
- Nutrient dense, providing vitamins A, C, and K, plus fiber and minerals.
They’re tough enough for beginners yet rewarding enough that experienced gardeners plant them year after year.
Best Climate and Timing for Planting Collard Greens
Collard greens like it on the cooler side. You’ll get the best flavor and texture when plants mature during cool weather rather than hot midsummer heat.
When to Plant in Different Regions
- In the South and warm regions:
- Plant in late winter to early spring for a spring crop.
- Plant again in late summer for a fall and winter crop.
- In the Midwest and similar climates:
- Start seeds indoors in late winter and transplant in early spring.
- Or sow directly outdoors as soon as the soil can be worked.
- For fall crops, sow seeds in mid to late summer so plants mature into cool fall temps.
- In colder Northern regions:
- Use transplants or start seeds indoors to get a head start.
- Focus on late summer planting for a fall harvest and sweeter leaves after frost.
Most collard varieties reach maturity in about 60 to 80 days, but you can harvest baby leaves earlier if you’re impatient (which is completely understandable).
Soil Preparation: Giving Collards a Good Home
Collards are not fussy, but they do have preferences. Think of them like someone who “can eat anywhere” but has a favorite restaurant.
Soil Type and pH
- Soil texture: Loamy, well-drained soil is ideal. Heavy clay can be improved with compost; sandy soil needs organic matter to hold nutrients and moisture.
- pH range: A slightly acidic to neutral soil, around 6.0 to 7.0, helps collards access nutrients efficiently.
If you haven’t done a soil test in a while, this is a great crop to justify one. A basic test will tell you if you need to adjust pH with lime or sulfur and whether you need to add phosphorus or potassium.
Improving Fertility
Collard greens are leafy, and leafy crops are hungry for nitrogen. Before planting, work in:
- 2 to 3 inches of compost or well-rotted manure over the planting area.
- A balanced organic fertilizer according to label directions, or a simple 10-10-10 or similar if you’re using conventional products.
Rake everything in evenly so roots have easy access to nutrients right away.
How to Plant Collard Greens
You can grow collards from seed or transplants. Seeds are cheaper and give you more variety options, while transplants offer a head start if your season is short.
Planting from Seed
- Depth: Sow seeds about 1/4 to 1/2 inch deep.
- Row spacing: Space rows about 24 to 36 inches apart so you can walk and weed between them.
- In-row spacing (final):
- 10–12 inches apart if you plan to harvest smaller, half-grown plants.
- 15–18 inches apart for full-size plants with big leaves.
To make life simple, you can sow a bit thicker and then thin seedlings once they’re 3 to 4 inches tall. Eat the thinnings as baby greens in salads or sautés. No waste, just extra snacks.
Planting Transplants
If you’re using nursery starts or seedlings you’ve grown indoors:
- Harden them off for about a week, gradually exposing them to outdoor sun and wind.
- Plant them at the same spacing as above (about 12–18 inches apart).
- Set the transplants in the soil up to their first true leaves, firm the soil gently, and water well.
Growing Collard Greens in Containers
Short on space? Collard greens are perfectly happy in pots, as long as they have enough room.
- Use a 5- to 7-gallon container for each plant.
- Fill with high-quality potting mix, not plain garden soil (which compacts and drains poorly in pots).
- Make sure the container has good drainage holes.
- Place in a spot with at least 6 hours of direct sun.
Container collards will need more frequent watering and regular feeding, but they put fresh greens within arm’s reach of your kitchen door or balcony.
Watering and Fertilizing Collard Greens
Water and fertilizer are the two big levers you can pull to change how well your collard greens grow.
Watering Basics
- Collards prefer consistent moistureaim for about 1 to 1.5 inches of water per week from rain or irrigation.
- Water deeply at the soil level rather than overhead whenever possible. This encourages deep roots and helps keep leaves dry, which reduces disease.
- Mulch around plants with straw, shredded leaves, or grass clippings (that haven’t been treated with herbicides) to hold moisture and suppress weeds.
If leaves droop during the day but perk up at night, it’s often a signal that the soil is drying out a bit too much between waterings.
Feeding for Leafy Growth
Because collards are heavy feeders, a little extra nutrition during the season pays off:
- Side-dress with compost or a nitrogen-rich fertilizer once plants are 4 to 6 inches tall.
- Repeat light feedings every 4 to 6 weeks during the growing season.
- Organic options include fish emulsion, blood meal, or alfalfa meal applied according to label directions.
Just don’t overdo it. Too much nitrogen can encourage tender new growth that’s extra attractive to pests.
Ongoing Care: Mulching, Weeding, and Shade
Once your collard greens are up and growing, most of the work is simple maintenance.
- Mulch generously once seedlings are a few inches tall. This keeps soil cool, moist, and less weedy.
- Weed regularly, especially when plants are young. Collards don’t like competition for water and nutrients.
- Provide light shade during extreme heat with shade cloth or row covers if you’re trying to get them through a hot summer spell.
Healthy, unstressed plants are naturally more resistant to pests and disease, so think of this as preventive medicine for your garden.
Common Pests and Diseases in Collard Greens
If collard greens have a downside, it’s that pests love them almost as much as we do. The key is to catch problems early and act before damage gets out of control.
Common Pests
- Aphids: Tiny soft-bodied insects that cluster on stems and leaf undersides, sucking sap and causing curled, sticky leaves.
- Cabbage worms and loopers: Green caterpillars that chew holes in leaves and leave behind dark frass (droppings).
- Flea beetles: Small, jumping beetles that create lots of tiny “shot holes” in leaves, especially on young plants.
- Slugs and snails: Nighttime feeders that leave ragged edges and slime trails.
Organic Pest Management Tips
- Use floating row covers early in the season to keep egg-laying moths away from plants.
- Handpick caterpillars and squish them or drop them into soapy water.
- Encourage beneficial insects like ladybugs and lacewings by planting flowers nearby and minimizing broad-spectrum insecticides.
- Use bacillus thuringiensis (Bt) products carefully for caterpillars if handpicking isn’t enough, following label directions.
- For slugs, try beer traps, iron phosphate slug baits, or handpicking at night with a flashlight.
Regularly walking your garden and turning leaves over to inspect for eggs or small larvae is one of the best habits you can develop as a collard grower.
Diseases to Watch For
Collards can also be affected by fungal or bacterial problems such as downy mildew, black rot, and clubroot. To reduce disease risk:
- Rotate where you grow collards and other brassicas every 3–4 years.
- Avoid overhead watering late in the day to keep foliage dry overnight.
- Remove heavily infected plants and destroy them (don’t compost if you suspect a serious disease).
- Plant disease-resistant varieties if they’re available in your area.
When and How to Harvest Collard Greens
Here’s the fun part: harvesting. Collard greens are very forgiving in how you harvest them, but a few simple rules will keep plants productive for longer.
Harvesting Individual Leaves
- Start harvesting when leaves are about 6 to 10 inches long.
- Pick the outer, lower leaves first, leaving several inner leaves and the growing point intact.
- Snap or cut leaves off close to the main stem without damaging the stem itself.
- Harvest regularlyevery few days or at least weeklyto encourage more fresh growth.
This “cut-and-come-again” method can keep a plant producing for months, especially in cool weather.
Harvesting Whole Plants
If you prefer one big harvest or your plants are starting to look tired:
- Wait until the plant has formed a nice rosette of mature leavesoften 60 to 80 days from planting, depending on variety and conditions.
- Cut the plant at the base just above the soil line.
In some climates, plants will even regrow from the stump, giving you a second, smaller harvest.
The Secret of Frost-Sweetened Collards
Many gardeners swear by collard greens harvested after a light frost. Chilly weather encourages the plant to convert some starches to sugars, which helps protect cells from freezingand makes leaves taste sweeter and less bitter. If your climate allows, time your fall planting so plants are mature but still actively growing when cool weather arrives.
Storing and Using Harvested Collard Greens
Once you’ve picked your collard greens:
- Rinse leaves well to remove soil and any hitchhiking insects.
- Pat dry and store them loosely in a produce bag or container in the refrigerator.
- Use within 5 to 7 days for the best flavor and texture.
For long-term storage, collards freeze beautifully. Blanch leaves for a couple of minutes in boiling water, plunge them into ice water, drain thoroughly, and pack into freezer bags. Future you will be delighted.
Common Mistakes When Growing Collard Greens
Even though collards are fairly easy, a few missteps can lead to tough, bitter leaves or pest-ravaged plants. Try to avoid:
- Letting them bake in high summer heat without shade or sufficient water.
- Overcrowding plants, which reduces airflow and increases disease risk.
- Ignoring pests until leaves look like green lace.
- Allowing the soil to stay soggy, which can invite root problems.
If you keep an eye on spacing, moisture, and early pest control, collards usually repay you with more greens than you thought possible.
Real-World Tips and Experiences from the Collard Patch
Gardening guides are great, but nothing compares to what actually happens when you step into the garden in your oldest T-shirt and start negotiating with nature. Here are some practical, experience-based tips that often don’t make it onto seed packets.
Start Smaller Than You Think You Need
New growers often plant an entire long row of collard greens because the seedlings look so delicate and innocent. A month or two later, those “cute” seedlings have turned into a forest of leaves big enough to shade a small dog. Unless you’re feeding a crowd or plan on freezing a lot, a modest patchsay 5 to 10 plantsis plenty for a small household.
Think of it this way: even a single healthy plant can provide several harvests of leaves. If you’re experimenting for the first time, grow a mix of varieties in a smaller bed so you can compare which ones you like best for flavor and texture.
The Magic of Morning Harvests
Many gardeners notice that collard leaves harvested in the early morning are crisper and sweeter than those picked in late afternoon. Overnight, plants have had time to rehydrate and rebalance their sugars. On hot days, afternoon leaves can be slightly wilted and stressed, which translates into tougher texture in the pot.
Make it a ritual: quick cup of coffee, quick walk to the collard bed, quick trim of the lower leaves. You’ll start the day with a small win and a big bowl of potential dinners.
Mulch: The Low-Effort Superpower
If there’s one habit that consistently separates “meh” collards from “wow” collards, it’s mulching. A generous layer of straw or shredded leaves around your plants does several jobs at once:
- It keeps the soil evenly moist so plants don’t swing between drought and sogginess.
- It blocks many weed seeds from sprouting, saving you time and your lower back.
- It buffers soil temperature, which is especially helpful in areas with hot days and cool nights.
Gardeners who mulch early and heavily often notice that their collards look less stressed, stay tender longer into warm weather, and require fewer emergency watering sessions.
Don’t Let Perfect Be the Enemy of “Still Delicious”
If you’re growing collards organically, expect a few holes in the leaves. A handful of flea beetle bites or a couple of spots where a caterpillar got curious isn’t a reason to give up on a leaf. Simply trim damage off when you cook or ignore minor cosmetic issues entirelyafter cooking low and slow, nobody will know.
Experienced gardeners quickly learn that “pretty enough” is a more realistic standard than “picture-perfect.” What matters most is that the leaves are healthy, green, and coming from soil you trust.
Succession Planting Keeps the Harvest Coming
One quietly brilliant strategy is to sow or transplant a few collard plants every 3 to 4 weeks during the appropriate season. Instead of having all your plants peak at once, you end up with waves of fresh, vigorous greens. When one set of plants starts to get tall, tough, or overly buggy, the next group is just hitting its stride.
This approach also lets you continually tweak your technique. Maybe you’ll realize that one bed gets better afternoon shade, or that a particular variety shrugs off pests better than others. Each new planting is a small experiment, and your collards improve as you go.
Grow What You Actually Like to Eat
Finally, the best collard growing advice is simple: grow the amount and type of collards you’ll genuinely enjoy cooking. If you love long-simmered greens with smoked turkey, plant enough for hearty batches. If you prefer lighter, sautéed collard ribbons with garlic and lemon, you might lean toward more frequent small harvests of younger leaves.
When your collard patch lines up with your dinner plans, it stops feeling like “maintenance” and starts feeling like a really fun, really tasty habit.
By paying attention to timing, soil, water, and a bit of pest management, you’ll quickly get the hang of how to grow and care for collard greens. And once you taste those frost-sweetened leaves straight from your own garden, there’s a good chance collards will become a permanent fixture in your planting plans.


