Table of Contents >> Show >> Hide
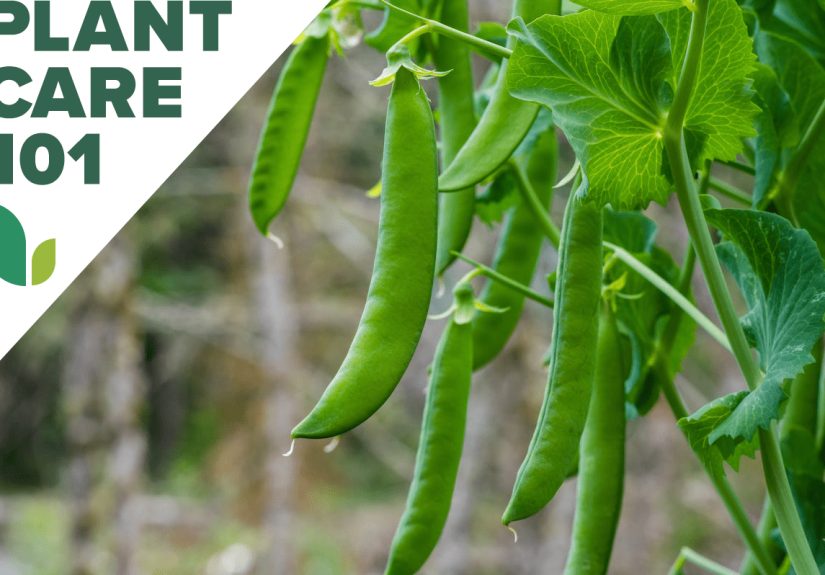
Few gardening moments are as satisfying as popping a sun-warm pea straight from the vine into your mouth.
Fortunately, peas are one of the easiest cool-season veggies to grow, even if your gardening “experience” so
far is mostly keeping a pothos alive on your windowsill. In this guide inspired by the practical,
fix-it-yourself spirit of Bob Vila, we’ll walk through exactly how to grow peasfrom picking the right variety
to setting up a trellis, avoiding rookie mistakes, and harvesting at just the right time.
Whether you’re working with a big backyard, a modest raised bed, or a single sunny balcony, peas don’t ask for
much: cool weather, decent soil, and something to climb. Give them that, and they’ll say thanks with sweet pods,
nitrogen-rich roots, and a garden that looks like it’s wearing green jewelry.
Pea Basics: Know Your Pea Personality
Before you grab a seed packet, it helps to know which kind of pea fits your cooking style and space. All peas
are cool-season plants, but different types shine in different recipes.
Main Types of Garden Peas
-
Shelling peas (English peas): You grow these for the sweet little peas inside the pod.
The pods are inedible and get tossed in the compost. Great for fresh snacking, soups, and freezing. -
Snow peas: Flat pods with tiny seeds that you eat whole. These are the peas you see in
stir-fries and saladstender, crisp, and mildly sweet. -
Snap peas (sugar snaps): A cross between shelling peas and snow peas, snap peas have plump,
edible pods and sweet peas inside. You can eat them raw, sautéed, or tossed into pasta and grain bowls.
Within each type, you’ll find bush (dwarf) and vining (climbing) varieties.
Bush peas typically stay under 2–3 feet tall and may need minimal support, while vining peas can reach 5–6 feet
or more and really appreciate a solid trellis. If you like the look of a vertical garden and want to maximize
space, go for climbers.
When and Where to Plant Peas
Peas Love Cool Weather
Peas are classic cool-season crops. They dislike hot summers much more than they dislike chilly springs.
In most U.S. climates, you’ll:
- Spring crop: Sow outdoors as soon as the soil can be workedoften 4–6 weeks before your last frost date.
- Fall crop (in milder climates): Sow in late summer for a fall harvest, timing so plants mature before hard frost.
As a rule of thumb, peas germinate best once soil temperatures are around 45–60°F, and plants grow happily
in cool, bright conditions. If the soil is still icy cold and sticky, wait a little or start seeds in containers
and transplant once the ground is workable.
Picking the Perfect Spot
Peas aren’t picky, but they do have preferences:
- Sun: Full sun (6+ hours) is ideal, but they’ll tolerate light afternoon shade, especially in warmer zones.
- Soil: Well-drained, loose soil is key. Standing water and soggy clay are a no-go.
- pH: Slightly acidic to neutral soil (around 6.0–7.5) generally works best. If your soil is acidic, a bit of lime can help.
- Wind: Tall vines can act like sailboats in a storm. Try to plant where they’re sheltered from strong, drying winds.
Soil Preparation
Peas are light feeders, but they still appreciate good soil structure:
- Work in a layer of finished compost before planting to improve fertility and drainage.
-
Avoid heavy doses of high-nitrogen fertilizerpeas fix their own nitrogen and too much extra nitrogen gives you lush foliage
and fewer pods. -
If your soil tends to crust or compact, loosen it 8–10 inches deep and remove rocks and big clumps. Your peas’ roots are tiny;
they don’t want to wrestle boulders.
How to Plant Peas (Step-by-Step)
Once your soil is prepped and the weather is cool but not frozen, it’s time to plant. Think of this as your “Bob Vila–style project
plan” for peasmeasured, simple, and effective.
1. Set Up the Trellis First
For vining peas, install supports before you plant so you don’t disturb roots later:
- Use netting, wire mesh, cattle panels, bamboo teepees, or a simple string trellis.
- Make the trellis as tall as your variety needs (often 4–6 feet for climbers).
- Place it on the north side of shorter crops so it won’t shade them out.
2. Mark and Dig the Planting Trench
A straightforward approach:
- Draw a shallow trench about 1–1.5 inches deep along the base of the trellis.
- For double rows, dig a second trench 6–8 inches away to maximize space.
3. Sow the Seeds
Here’s an easy spacing guide:
- Depth: 1–1.5 inches deep.
- Seed spacing in row: About 1–2 inches apart for most varieties. You can thin later if needed.
- Row spacing: 18–24 inches between single or double rows, depending on your garden layout.
Drop seeds into the trench, cover with soil, and lightly firm the surface with your hand. Don’t stompthis isn’t a dance floor.
4. Water Gently
After sowing:
- Water with a gentle spray or watering can so you don’t wash seeds out of place.
- Keep the soil consistently moist but not waterlogged while seeds germinate.
5. Container and Raised-Bed Options
No in-ground garden? Peas are surprisingly container-friendly:
- Choose a pot at least 10–12 inches deep with drainage holes.
- Use high-quality potting mix, not heavy garden soil.
- Insert a small trellis, bamboo canes, or a tomato cage for support.
- Sow seeds 1–2 inches apart around the edge for a “pea hedge” look.
Caring for Pea Plants
Watering
Peas like even moisture, especially as they flower and set pods:
- Aim for about 1 inch of water per week from rain or irrigation.
- Water deeply at the base rather than sprinkling lightly on foliage.
If the top inch of soil feels dry, it’s time to water. Fortunately, peas are more forgiving than many veggies,
but consistent moisture makes the difference between “pretty good” and “wow, these are sweet.”
Mulching
Once seedlings are a few inches tall:
- Apply a 1–2 inch layer of straw, shredded leaves, or grass clippings (dried first).
- Mulch helps keep soil cool, holds moisture, and reduces weeds.
Feeding
Peas don’t need heavy fertilizing. In fact, overfeeding them can cause more leaves than peas. If your soil is poor:
- Mix compost into the soil before planting.
- If you must fertilize, choose a low-nitrogen, balanced fertilizer and use it sparingly.
Training the Vines
Pea tendrils will usually find the trellis on their own, but sometimes they need a nudge:
- Gently guide young vines toward the support and wrap them once or twice to start.
- Check every few days and tuck stray stems back onto the trellis.
Common Pests and Diseases (and How to Stay Ahead)
Pests
-
Aphids: Small, soft-bodied insects that cluster on new growth. Blast them off with a sharp
spray of water or use insecticidal soap if infestations get heavy. -
Pea weevils and beetles: Can chew on leaves or pods. Handpick when you see them and keep
the garden clean of debris.
Diseases
-
Powdery mildew: White, powdery coating on leaves, often appearing later in the season or in
crowded plantings. Improve air circulation, avoid overhead watering, and remove heavily affected vines. -
Root rots: Often due to poorly drained soil. The best prevention is good drainage and avoiding
overwatering.
Practice crop rotationdon’t plant peas (or other legumes) in the same bed year after year. Waiting 3–4 years
before returning peas to a particular spot helps break disease cycles.
When and How to Harvest Peas
Harvest timing is where pea-growing truly becomes an art. Thankfully, the plants give you visual cues:
-
Shelling peas: Pods should look plump and rounded, with peas filling out the pod but not yet
tough or starchy. If the pod is rigid and the peas feel hard, you waited a bit too long. - Snow peas: Pick when pods are flat but fully elongated, with tiny seeds just beginning to appear.
- Snap peas: Harvest when pods are plump but still crisp. They should snap cleanly in half.
Use two hands when harvestingone to hold the vine and one to pull the podso you don’t tear the plant. Visit
your pea patch every day or two during peak production; the more you pick, the more the plant produces.
Fresh peas are best eaten right away, but you can refrigerate them in a breathable bag for several days. Shelling
peas also freeze beautifully: blanch briefly in boiling water, cool in ice water, pat dry, and store in freezer bags.
Good Pea Varieties for Home Gardeners
Seed catalogs can feel overwhelming, so here’s a simple way to choose:
-
For snacking and salads: Look for sugar snap peas described as “sweet,” “stringless,” or “crisp.”
These are great eaten raw right in the garden. -
For stir-fries: Snow peas with flat, tender pods are ideal. Look for varieties noted for
heavy yields and disease resistance. -
For freezing and cooking: Traditional shelling pea varieties bred for sweetness and uniform size
are your best bet. - For small spaces: Choose dwarf or bush types that max out around 2 feet and need minimal support.
Check the “days to maturity” on the packet. Early-season varieties give you harvests sooner, while mid and late-season
types can extend your pea season.
Real-Life Experiences: “Easy Pea-sy” Lessons from the Garden
After you’ve read a few guides, growing peas looks beautifully simple on paper. In real life, peas teach you a handful
of small but memorable lessonsmost of them the fun kind.
The Early-Bird vs. The Impatient Gardener
Many new gardeners either sow peas way too early or way too late. One common story: a gardener enthusiastically seeds
peas into soil that’s still half-frozen and sticky. Germination is slow, a few seeds rot, and frustration sets in.
The next year, they wait until the soil is just workablecool, but not icyand the difference is dramatic: fuller rows,
faster growth, and fewer gaps.
On the flip side, the late-sower drops peas into the ground when spring feels “perfect”which usually means it’s already
warming into summer. The plants sprout, look good for a few weeks, then suddenly stop flowering as the heat ramps up.
The takeaway: peas truly are “plant early or miss the show” crops. Mark your calendar with your average last frost date
and count backward 4–6 weeks for dependable timing.
The Trellis You Thought Was “Good Enough”
Another classic experience: underestimating how enthusiastically peas climb. Maybe you used a few short sticks and twine,
thinking, “That should be fine.” A month later, your peas have sprawled everywhere, tangled like headphones in a pocket,
shading each other out. Harvesting becomes an awkward game of “find the pod.”
Gardeners who’ve been there tend to overbuild next time: sturdier stakes, taller supports, better anchoring. Not only
does this keep plants upright and reduce disease, it also makes picking peas much more enjoyable. Future you will thank
present you for building a trellis with confidence.
The “Too Much Nitrogen” Surprise
Because peas are legumes, they partner with soil bacteria to fix nitrogen at their roots. Gardeners used to feeding
tomatoes and peppers heavily sometimes carry that habit over: they apply high-nitrogen fertilizer, the plants explode
with lush green foliage, and thenwhere are the pods?
The real-world fix is simple: keep peas on a lighter diet. Compost and a balanced, low-nitrogen fertilizer (if any)
are usually plenty. Many experienced gardeners use peas as part of a rotation to add fertility to a bed before planting
hungry crops like brassicas or corn. When the pea crop is finished, they chop the vines and leave the roots in place,
letting the nodules break down in the soil.
Peas and Kids: The Gateway Vegetable
Ask gardeners what crop their kids will actually eat straight from the garden, and peas are often in the top three.
There’s something irresistible about pulling a crisp snap pea off the vine, hearing the “snap,” and crunching into it.
Many parents report that children who refuse canned or frozen peas at the dinner table happily help harvestand snack
their way down the row.
If you’re gardening with kids, consider planting an extra “snack row” of peas just for them. It’s a fun way to introduce
children to where food comes from and to make the garden feel like a place of discovery instead of a chore.
Extending the Season Like a Pro
In cooler or variable climates, gardeners quickly learn that a few simple tricks can stretch the pea season noticeably:
- Using lightweight row cover to protect early plantings from frost and wind.
- Planting in raised beds, which warm up faster in spring.
- Sowing a second wave of peas a couple of weeks after the first for a staggered harvest.
Combined, these tricks can turn a short, single flush of peas into a longer, more generous harvest window. That means
more stir-fries, more salads, and, let’s be honest, more garden snacking.
The Final Verdict: Peas Are Beginner-Friendly but Reward Experts Too
What makes peas such a favorite among home gardeners is that they forgive small mistakes but still respond beautifully
to good planning. If you plant a little early, give them a sturdy trellis, keep the soil cool and moist, and harvest
frequently, they’ll repay you with crisp, sweet pods that taste far better than anything from a bag in the freezer aisle.
Whether you’re channeling a classic Bob Vila “let’s fix this” attitude in the backyard or just dipping your toe into
vegetable gardening for the first time, peas are an ideal starter project: low risk, high reward, and delicious proof
that a bit of know-how and a few seeds can turn a bare patch of dirt into something special.


