Table of Contents >> Show >> Hide
- Before You Start: What “Good Housing” Actually Means
- Quick Shopping Checklist (So You Don’t Make 12 Trips)
- The 13 Steps to House a Pet Axolotl
- Step 1: Confirm It’s Legal Where You Live (Yes, Really)
- Step 2: Pick the Right Tank Size (Bigger = Easier, Not Just “Fancier”)
- Step 3: Place the Tank Like You’re Avoiding a Tiny Aquatic Heatstroke
- Step 4: Choose Gentle Filtration (Strong Current = Axolotl Annoyance)
- Step 5: Lock In Cooling (Temperature Is Not a “Later” Problem)
- Step 6: Select a Safe Substrate (No Gravel. Not “Small Gravel.” No Gravel.)
- Step 7: Add Hides and “Axolotl-Friendly Interior Design”
- Step 8: Condition Your Water (Chlorine/Chloramine Are Not “Character Building”)
- Step 9: Cycle the Tank (The Step Everyone Wants to Skip… and Shouldn’t)
- Step 10: Do a “Dry Run” Week (Because Surprises Are for Birthdays, Not Water Chemistry)
- Step 11: Acclimate Your Axolotl Slowly (No Cannonball Entries)
- Step 12: Set a Feeding Zone and Routine (Less Mess, Better Water)
- Step 13: Maintain Like a Pro (Because Stability Is the Secret Sauce)
- Common Housing Mistakes (And How to Dodge Them)
- Real-World Experiences: of “What Keepers Learn the Hard Way”
- Conclusion
Axolotls are basically the underwater equivalent of a smiley, feathery-gilled alien… with the delicate constitution of a drama kid during flu season.
House them well, and they can thrive for years. House them poorly, and they’ll let you knowusually by looking offended, refusing food, or growing
questionable fuzz that nobody asked for.
This guide walks you through 13 practical steps to build a safe, stable, low-stress axolotl habitatcomplete with real-world setup tips,
water-quality logic (not vibes), and a few “learn-from-my-mistakes” moments so you don’t have to earn your aquarium badge the hard way.
Before You Start: What “Good Housing” Actually Means
A solid axolotl home is less about fancy décor and more about environmental stability. Axolotls are cold-water amphibians with sensitive skin and
gills that respond fast to bad water. In practice, “good housing” means:
- Cool, consistent temperature (think “spring creek,” not “hot tub”).
- Fully cycled filtration so ammonia and nitrite don’t creep in like unwanted relatives.
- Low flow because axolotls prefer calm waterno one wants to do CrossFit just to exist.
- Safe substrate (or none) to prevent swallowing hazards.
- Routine maintenance that keeps nitrates down and stress lower.
Quick Shopping Checklist (So You Don’t Make 12 Trips)
- Tank (ideally long footprint) + sturdy stand
- Secure lid or mesh top
- Low-flow filter (sponge, canister with spray bar, or baffled HOB)
- Air stone (optional, but helpful for oxygenation and gentle circulation)
- Thermometer + cooling plan (fans or chiller if needed)
- Water conditioner (dechlorinator) + liquid test kit
- Substrate: bare bottom, tile/slate, or fine sand (only for larger axolotls)
- Hides (2+), plants (live or silk), smooth décor
- Siphon/gravel vac + dedicated bucket (aquarium-only)
The 13 Steps to House a Pet Axolotl
Step 1: Confirm It’s Legal Where You Live (Yes, Really)
Pet laws for axolotls vary by location and can change. Some jurisdictions restrict possession or transport, and there are also federal rules that affect
importation and certain types of shipping. The safest approach: check your local fish & wildlife rules before you buy, and plan to source your axolotl
domestically from a reputable breeder.
Step 2: Pick the Right Tank Size (Bigger = Easier, Not Just “Fancier”)
Many keepers start with “the minimum,” then upgrade once they realize axolotls are basically adorable compost machines. A larger tank gives you
more stable water parameters and more room for hides and clean zones.
- One adult axolotl: aim for at least a roomy, long tank footprint. Bigger (29–40 gallons) is often easier to maintain than a small tank.
- Two axolotls: only if they’re similar in size, you’re prepared for extra filtration/maintenance, and you have enough space to reduce nipping risk.
Shape matters: a longer tank footprint improves oxygen exchange and gives bottom-dwellers more usable space than a tall “column” style.
Step 3: Place the Tank Like You’re Avoiding a Tiny Aquatic Heatstroke
Put the aquarium away from windows, radiators, and direct sunlight. Temperature swings stress axolotls and can trigger appetite issues, illness risk,
and ongoing water quality problems. Choose a low-traffic spot if possibleless vibration, less chaos, fewer “why is the room shaking?” moments.
Step 4: Choose Gentle Filtration (Strong Current = Axolotl Annoyance)
Axolotls don’t love a brisk current blasting their gills like they’re standing in front of a leaf blower. Pick a filter that’s effective but adjustable:
- Sponge filter: great for low flow and easy maintenance.
- Canister filter: excellent filtration if you diffuse output (spray bar aimed at glass, plants, or décor).
- HOB filter: workable if you baffle the flow.
Tip: If your axolotl is constantly “treadmilling” or hiding like it owes money, the flow may be too strong.
Step 5: Lock In Cooling (Temperature Is Not a “Later” Problem)
Axolotls are happiest in cool water. If your room runs warm, plan ahead:
- Clip-on aquarium fans: can reduce temps through evaporation (works best in dry climates).
- Frozen bottles: useful short-term, but avoid sudden swings (rotate gently, don’t yo-yo the temperature).
- Aquarium chiller: the most stable solution for consistently warm homes.
Use a reliable thermometer and aim for steady, not “perfect for five minutes then chaos.”
Step 6: Select a Safe Substrate (No Gravel. Not “Small Gravel.” No Gravel.)
Axolotls hunt by suctionmeaning if it fits in the mouth, it might get inhaled with dinner. Gravel and pebbles can cause impaction. Safer options:
- Bare bottom: easiest to clean; add traction with tile/slate or a textured mat if needed.
- Tile/slate: looks nice, adds grip, stays easy to siphon.
- Fine sand: only for larger axolotls (many guides recommend waiting until they’re around 6 inches long). Keep grains very fine.
Step 7: Add Hides and “Axolotl-Friendly Interior Design”
Axolotls like shade and security. Provide at least two hides so they can choose a favorite (and so you can clean one without triggering betrayal).
Use smooth décor onlyno sharp edges.
- PVC pipes, ceramic caves, smooth rock shelters
- Silk plants or hardy live plants (low light)
- Open floor space for feeding and cruising
Step 8: Condition Your Water (Chlorine/Chloramine Are Not “Character Building”)
Tap water must be treated with a water conditioner to neutralize chlorine/chloramine before it touches your axolotl or your beneficial bacteria.
Match the temperature when adding watersudden shifts can stress amphibians fast.
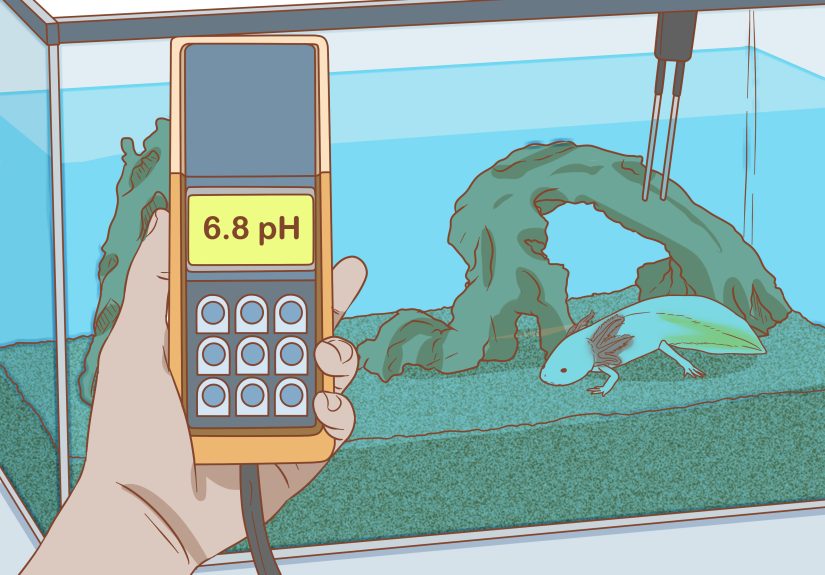
General parameter goals many vets and care sheets use:
- Ammonia: 0 ppm
- Nitrite: 0 ppm
- Nitrate: keep low (many aim under ~20–40 ppm, with lower being better)
- pH: stable within a reasonable range (stability matters more than “chasing a number”)
Step 9: Cycle the Tank (The Step Everyone Wants to Skip… and Shouldn’t)
“Cycling” means growing beneficial bacteria that convert toxic waste (ammonia) into less harmful compounds (nitrate). Without a cycle, a new tank can
poison an axolotl even if the water looks crystal clear.
A fishless cycle typically involves adding an ammonia source, running the filter, and testing regularly until the tank can process ammonia to
0 ammonia and 0 nitrite within a day. Then you do water changes to bring nitrates down before your axolotl moves in.
Step 10: Do a “Dry Run” Week (Because Surprises Are for Birthdays, Not Water Chemistry)
Once cycling is complete, run the tank like it’s occupied for at least several days:
- Test daily at first (then weekly once stable)
- Confirm temperature stays in range day and night
- Make sure filtration flow is gentle
- Check that hides are stable and nothing is sharp or tipping
This is where you catch problems earlylike discovering your “quiet filter” is actually a whirlpool generator.
Step 11: Acclimate Your Axolotl Slowly (No Cannonball Entries)
When you bring your axolotl home, reduce stress with a calm, slow transition:
- Dim the lights
- Float the container to equalize temperature
- Gradually mix in small amounts of tank water over time
Avoid handling whenever possible. If you must move your axolotl (tank cleaning, transport), use a smooth container or cupnets can damage delicate
skin and gills.
Step 12: Set a Feeding Zone and Routine (Less Mess, Better Water)
Axolotls do best with a consistent feeding routine and prompt cleanup. Common staple foods include worms and quality pellets formulated for aquatic
carnivores. Remove uneaten food so it doesn’t rot and spike ammonia.
- Juveniles: usually eat more often (smaller meals, more frequent).
- Adults: often eat several times per week depending on size, condition, and temperature.
Practical trick: feed in the same spot every time (or on a feeding dish). You’ll train your axolotl and make cleanup faster.
Step 13: Maintain Like a Pro (Because Stability Is the Secret Sauce)
The best axolotl tanks are “boringly consistent.” Create a maintenance routine you can actually keep:
- Weekly: test water; siphon waste; partial water change (often ~20–30% depending on tank size and nitrate levels).
- Monthly-ish: rinse filter media in old tank water (not tap water) so you don’t nuke beneficial bacteria.
- Daily: quick look at gills, appetite, and behavior; remove visible waste and leftover food.
Remember: ammonia toxicity is influenced by factors like temperature and pHkeeping things cool and stable helps on multiple levels.
Common Housing Mistakes (And How to Dodge Them)
- Uncycled tank: the #1 “new keeper” issue. Cycle first, always.
- Too warm: chronic warmth increases stress and can invite health problems.
- Gravel substrate: impaction risk. Choose bare bottom, tile, or very fine sand for larger axolotls.
- High flow: constant current can stress them out; baffle the output.
- Overfeeding: leftover food rots and wrecks water quality.
Real-World Experiences: of “What Keepers Learn the Hard Way”
Most axolotl housing “wisdom” comes from a predictable storyline: you set up a tank, it looks fantastic, you feel like an aquatic interior designer…
and then the water chemistry reminds you it has a PhD and you do not.
One of the biggest lived lessons is that small tanks punish you faster. In a tiny aquarium, a missed water change or a forgotten chunk of food can
snowball into measurable ammonia overnight. In a larger tank, the same mistake might still be a mistakebut the bigger water volume buys you time.
Many keepers eventually realize that upsizing wasn’t about spoiling their axolotl; it was about making the entire system easier to stabilize.
Temperature control is another “experience teacher.” Plenty of people start with the plan of “my room is usually cool.”
Then summer arrives like a flamethrower. The first time you see your tank creep into the 70s (°F), you understand why keepers talk about fans, chillers,
and tank placement with the seriousness of meteorologists tracking a hurricane. The best advice that surfaces again and again is: solve heat before it happens.
It’s cheaper and calmer than emergency ice-bottle juggling.
Flow is a sneaky one. A filter can be rated “quiet” and “gentle” and still create a current that makes an axolotl look like it’s perpetually walking into
a strong wind. Keepers often notice subtle signs first: the axolotl chooses the one dead spot behind a decoration and refuses to leave, or it curls its tail
more often, or it seems weirdly “busy” for an animal that normally embraces the art of doing nothing. The fix is usually simplespray bar, baffle,
plants, redirecting outputbut you only learn to respect it after you watch your axolotl silently judge your choices.
Substrate stories also repeat: someone tries “small gravel because it’s cute,” then panic-googles “axolotl swallowed rock” at 2 a.m.
The keeper community becomes passionately, relentlessly anti-gravel for a reason. The lived experience is that bare bottom or tile is not “ugly,” it’s
peaceful. If you want a natural look, fine sand can work once the axolotl is large enoughbut even then, many keepers discover they prefer the
cleanability of hard surfaces.
Finally, there’s the emotional experience: axolotls train you to become consistent. The keepers who thrive long-term are rarely the ones with the
fanciest aquascapes. They’re the ones who test on a schedule, do partial water changes before nitrates climb, feed cleanly, and treat stability like a
lifestyle. In other words: axolotl housing rewards the kind of responsible routine that also, inconveniently, improves your life.
Who knew a smiling salamander would be your accountability coach?
Conclusion
Housing a pet axolotl isn’t difficult, but it is specific. If you nail the fundamentalscool water, gentle flow, safe substrate, and a fully cycled tankyou’ll
set your axolotl up for a calm, healthy life (and save yourself a lot of late-night testing-kit stress). Build for stability, keep your routine simple, and
let your axolotl do what it does best: quietly exist while looking like it knows ancient secrets.


