Table of Contents >> Show >> Hide
- What Is an Undergravel Filter and How Does It Work?
- Before You Start: Tools, Materials, and Tank Prep
- Step-by-Step: How to Install an Undergravel Filter
- Fine-Tuning Your Undergravel Filter Setup
- Maintenance: Keeping an Undergravel Filter Healthy
- Troubleshooting Common Undergravel Filter Problems
- Real-World Experiences: What It’s Like Living with a UGF
- Conclusion: Is an Undergravel Filter Right for You?
If you love a clean aquarium but hate staring at bulky equipment, an undergravel filter (UGF) can feel like a bit of old-school magic.
Hidden under the substrate, it quietly turns your gravel bed into a giant biological filter. The trick, of course, is installing it
correctly from the start.
In this guide, you’ll learn how an undergravel filter works, how to choose the right gravel and equipment, and how to install a UGF
step by step. We’ll also talk about real-world pros, cons, and common mistakes, plus share practical experiences from hobbyists who
have lived with UGFs long term. Consider this your complete walkthrough picture notes included.
What Is an Undergravel Filter and How Does It Work?
An undergravel filter is a flat plastic plate (or several plates) that sits on the bottom of your tank. One or more uplift tubes rise
from the plate to the top of the aquarium. An air pump with air stones or a small powerhead pulls water up through those tubes,
creating a gentle upward flow.
That flow draws water down through the gravel and across the plate before it goes back up the uplift tube. As water moves
through the gravel, beneficial bacteria living on the substrate break down fish waste and leftover food. In other words, the gravel
becomes a massive biological filter bed rather than just decoration.
UGFs are:
- Great at biological filtration when flow is steady and the substrate is sized correctly.
- Inexpensive and low-profile compared with canister or large hang-on-back filters.
- Low-tech no fancy controller or Wi-Fi app needed.
However, they also come with trade-offs:
- They can trap detritus under the plate if you don’t gravel vacuum deeply and regularly.
- They don’t play well with fine sand or very heavily rooted plants that can block flow.
- They’re easiest to install during the initial setup of a tank, not after it’s fully stocked and decorated.

Before You Start: Tools, Materials, and Tank Prep
Recommended Equipment
Here’s what you’ll typically need to install an undergravel filter in a freshwater aquarium:
- Undergravel filter plate(s) sized to cover the tank bottom
- Uplift tubes and tube elbows (usually included in the UGF kit)
- Air pump or small powerhead for each uplift tube
- Airline tubing and air stones (if using an air pump)
- Aquarium-safe check valves and a gang valve or splitter (for multiple lines)
- Aquarium gravel, typically coarse to medium (about 3–5 mm pieces)
- Dechlorinated water and water conditioner
- Gravel vacuum/siphon for future maintenance
Choosing the Right Gravel
Gravel size matters a lot with UGFs. Pieces that are too fine pack tightly and restrict water flow; pieces that are too large
allow waste to fall straight through without being processed effectively.
For most UGF setups:
- Use coarse or medium gravel around 3–5 mm in diameter.
- Avoid sand or very fine substrates they can clog the plate and uplift tubes.
- If you want a planted tank, stick with lightly rooted plants in pots or use root tabs carefully so roots don’t completely choke the plate.
Tank Preparation
A key rule: installing an undergravel filter is a lot easier (and cleaner) when the tank is empty. If this is a brand-new
aquarium, perfect. If it’s an existing tank, you’ll need to move fish into a temporary container with a heater and a cycled sponge
or hang-on-back filter while you tear the tank down and install the UGF.

Step-by-Step: How to Install an Undergravel Filter
Step 1: Clean the Tank and Rinse the Gravel
Place the empty tank on its stand in its final location. Make sure it’s level and properly supported. Wipe out any dust or packaging
residue with a damp, clean cloth (no soap).
Next, rinse your gravel in a bucket. Swirl it under running water until the water runs mostly clear. This removes dust that would
otherwise cloud the water and clog the plate during the first few hours.

Step 2: Lay Out the Filter Plates
Place the undergravel filter plate sections on the bare glass bottom. Most kits use interlocking panels. Snap or slide them together
so they cover as much of the tank floor as possible, leaving minimal gaps around the edges.
Make sure:
- The plates sit flat and stable no wobbling or rocking.
- The slits or holes in the plates face upward.
- There is enough room for uplift tubes to reach the water surface without hitting the lid.

Step 3: Attach and Position Uplift Tubes
Attach the uplift tubes to the designated openings in the plates. Some systems use elbows or connectors double-check the
instructions that came with your specific kit.
Position the tubes near the back corners or along the rear wall of the tank, where they’ll be easy to hide behind decorations or plants.
Adjust the tube height so the tops sit just below the tank’s rim but above the future water line.
If you’re using air stones:
- Attach the air stone to the bottom of each uplift tube using airline tubing.
- Run the airline tubing up and out of the tank toward your air pump location.
- Install check valves outside the tank to prevent back-siphon if the pump loses power.
Step 4: Add the Gravel Substrate
Now it’s time to bury the hardware. Carefully pour the rinsed gravel over the plates. Spread it gently with your hand to avoid
knocking the uplift tubes out of position.
General guidelines:
- A gravel bed of about 1–2 inches (2.5–5 cm) above the plate works well for most UGFs.
- In total, you’ll usually have 2–3 inches of substrate thickness in smaller community tanks.
- Aim for even coverage so water can pull through the entire bed without creating dead spots.
If you plan to add décor like rocks or driftwood, place larger, heavier items directly on top of the plate before finishing the
gravel layer. That way, they don’t crush or crack the plastic later.

Step 5: Connect the Air Pump or Powerhead
With the substrate in place, you can hook up your flow source:
- Air pump setup: Connect airline tubing from each uplift tube’s air stone to a gang valve, then to the air pump. Adjust the valves so you get a steady stream of small bubbles in each tube.
- Powerhead setup: Mount the powerhead on top of the uplift tube according to the manufacturer’s instructions. Make sure the flow direction is upward.
For many community tanks, a gentle to moderate flow is ideal. You don’t need a fire hose. The goal is slow, consistent movement of
water through the gravel bed so bacteria can do their job while fish stay comfortable.
Step 6: Fill the Tank and Check Flow
Place a plate or plastic bag on the gravel and slowly pour dechlorinated water onto it so you don’t blast craters into the substrate.
Fill the tank to the desired level.
Plug in the air pump or powerhead and watch:
- Are bubbles rising smoothly through each uplift tube?
- Is the water circulating gently from bottom to top?
- Are there areas in the gravel where debris seems to settle heavily and not move?
Adjust the airflow or powerhead strength as needed. Once everything looks good, you can add heaters, decorations, andafter cyclingyour fish.

Fine-Tuning Your Undergravel Filter Setup
Air Pump vs. Powerhead
Both options work. Which one you choose depends on your goals and your fish:
- Air pump & air stones: Gentle flow, higher surface agitation and oxygen, classic “bubble column” look. Great for bettas, small community fish, and low to moderate stocking.
- Powerhead: Stronger, more directed flow and more turnover. Better for larger tanks or messier fish, as long as they tolerate the current.
Fish and Plants That Work Well with UGFs
Undergravel filters are especially popular in:
- Lightly to moderately stocked freshwater community tanks
- Smaller tanks where space for hang-on-back filters is limited
- Display tanks where you want to hide equipment as much as possible
They are not ideal for:
- Heavy diggers like large cichlids or goldfish that constantly rearrange the substrate
- Heavily planted tanks with deep-rooted plants that can clog the plate
- Tanks that require very fine sand substrates
Combining UGF with Other Filters
Many aquarists pair an undergravel filter with a small canister or hang-on-back filter. The UGF provides broad biological filtration,
while the external filter handles mechanical polishing and optional chemical media (like activated carbon).
This combo lets you:
- Keep the tank visually clean (equipment mostly hidden)
- Improve water clarity and remove fine particles
- Back up your biological filtration in case one system fails
Maintenance: Keeping an Undergravel Filter Healthy
A well-installed UGF can run for years, but only if you maintain it. The main task is regular gravel vacuuming.
Weekly or Biweekly Maintenance
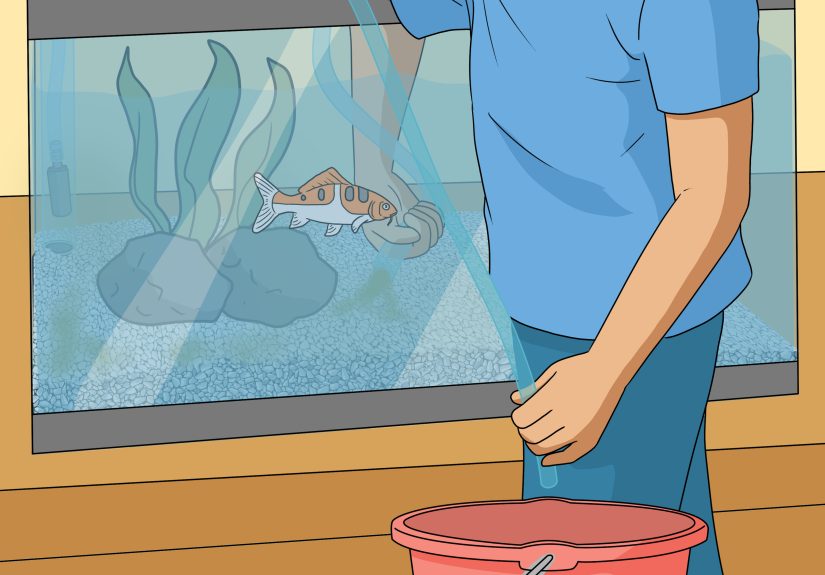
- Perform partial water changes (about 20–30% of the tank volume).
- Use a gravel vacuum to clean sections of the substrate each time.
- Push the siphon tube down into the gravel until it reaches near the plate, then let debris be pulled up and out with the water.
Don’t try to vacuum every inch of the tank in one day for a heavily stocked aquarium; rotate sections so beneficial bacteria aren’t
disturbed all at once.
Deep Cleaning (Occasional)
Over time, especially in tanks with big eaters or messy fish, waste can build up under the plate. If you notice persistent cloudiness,
bad odors (like rotten eggs), or stubborn nitrate issues, it may be time for a deeper clean:
- Temporarily relocate fish to a holding tank.
- Remove the gravel in portions, keeping it submerged in tank water if you want to preserve bacteria.
- Lift the plate carefully and siphon out accumulated sludge from underneath.
- Reinstall the plate, return the gravel, and refill with conditioned water.
You won’t need to do this often if you stay on top of regular vacuuming, but it’s good to know how if the system becomes overloaded.
Troubleshooting Common Undergravel Filter Problems
Problem: Little or No Flow
Possible causes:
- Air pump too weak or failing
- Clogged air stones or uplift tubes
- Gravel packed too tightly or substrate too fine
Fixes:
- Replace or clean air stones.
- Check tubing for kinks and make sure the pump is above minimum output for your tank size.
- Stir the very top layer of gravel gently or mix in slightly coarser gravel during a partial teardown.
Problem: Cloudy Water That Won’t Clear
Possible causes:
- Overfeeding or overstocking
- Insufficient vacuuming and water changes
- Filter was just installed and the tank is still cycling
Fixes:
- Cut back on feeding and make sure you’re not adding too many fish too quickly.
- Increase the frequency of gravel vacuuming and partial water changes.
- Test ammonia, nitrite, and nitrate; allow time for the beneficial bacteria to establish.
Problem: Rotten Egg Smell or Gas Bubbles Under the Gravel
This can indicate anaerobic pockets forming in the substrate where oxygen is low and waste is decomposing in a
harmful way.
Fixes:
- Do an immediate partial water change.
- Vacuum the gravel more deeply and more often.
- If the problem persists, remove sections of gravel and check under the plate for sludge buildup.
Real-World Experiences: What It’s Like Living with a UGF
Aquarists who have used undergravel filters for years tend to describe them as “quiet workhorses” not flashy, but surprisingly
capable when matched with the right tank and maintenance routine.
Experience 1: The Beginner-Friendly Community Tank
Imagine a 20-gallon long aquarium set up for a new fishkeeper. They choose an undergravel filter because it’s inexpensive,
straightforward, and doesn’t clutter the tank with equipment. They pair it with an air pump, two uplift tubes, and a coarse gravel bed.
At first, their main focus is simply keeping the water clear and the fish alive. The UGF helps by providing wide-area biological
filtration; as long as they follow a basic schedule weekly water changes, gravel vacuuming in sections, and not overfeeding
they find the tank stays stable with relatively little fuss.
Over time, they add a small hang-on-back filter for extra polishing. The result is a tank that looks clean, runs quietly, and gives
them a lot of confidence as a new hobbyist. For this kind of lightly stocked community setup, the UGF feels like a win.
Experience 2: The “Too Much Fish, Not Enough Maintenance” Scenario
Now picture a different aquarist who loves big, messy fish and feeding time a little too much. They set up a UGF under a thick
layer of gravel, add several large cichlids, and only vacuum the surface every once in a while.
At first, everything looks fine. But after a few months, the nitrates start creeping up, the water gets hazy, and a funky smell
appears whenever they stir the gravel. What happened? The UGF was quietly collecting debris and fish waste under the plate. Without
consistent deep gravel cleaning, sludge built up and created pockets of anaerobic decay.
When they finally do a deep clean, they’re shocked by how much gunk has collected under the plate. It’s a classic lesson: UGFs are
not “set and forget” systems in high-waste tanks. They reward regular maintenance and reasonable stocking; they punish neglect.
Experience 3: Combining UGF with Modern Filtration
Another hobbyist decides they want redundancy and stability above all else. They run a UGF powered by air plus a small canister filter.
The UGF keeps the entire gravel bed colonized with bacteria, while the canister traps fine particles and offers room for specialized media.
When they clean the canister, they notice the water clarity improves dramatically afterward, but the core water chemistry remains
steady even if maintenance runs a little late. The undergravel filter is quietly providing a safety net as long as they keep up
with gravel vacuuming, the system handles small mistakes without drama.
Experience 4: Decorations, Plants, and Layout Tricks
Many aquarists learn to “design around” the UGF. They use rocks, driftwood, and low-growing plants to disguise uplift tubes and
create a natural look. Instead of deep-rooted plants, they favor species that can be attached to décor (such as Java fern or
Anubias) or planted in small pots that sit on top of the gravel rather than pulling roots deep through it.
They also discover that keeping the gravel bed a bit shallower over the plates improves flow and reduces dead zones. Instead of
towering hills of substrate, they create gentle slopes and use décor to build visual height. This keeps the filter efficient while
still allowing creative aquascaping.
The big takeaway from these real-world experiences is simple: undergravel filters work best when you accept their personality.
They like coarse gravel, sensible stocking, regular vacuuming, and compatible plants and fish. Treat them like quiet partners in
your filtration system, and they can serve your tank well for years.
Conclusion: Is an Undergravel Filter Right for You?
Installing an undergravel filter isn’t complicated, but doing it right makes a big difference. With the correct plate
layout, appropriate gravel size, and a gentle, steady flow of water, your UGF can turn the entire tank bottom into a powerful
biological filter that’s nearly invisible.
It’s not the perfect choice for every aquarium. If you love deep sand beds, heavy root-feeders, or ultra-packed monster-fish setups,
you may want to lean on canister or sump systems instead. But for many freshwater community tanks, a well-installed UGF can be
an affordable, reliable, and surprisingly effective piece of classic aquarium tech.
Set it up carefully, keep up with gravel vacuuming, and your undergravel filter will quietly do the heavy lifting while you enjoy
the fun part watching your fish.


