Table of Contents >> Show >> Hide
- Why homeowners level a sloping garden
- Step 1: Assess the slope before you move a single shovel of soil
- Step 2: Choose the right leveling method
- Step 3: Plan for drainage first, not last
- Step 4: Mark the layout and call before you dig
- Step 5: Excavate and shape the soil
- Step 6: Install retaining walls if the slope needs structural support
- Step 7: Improve the soil and finish the surface
- Best plants and finishes for a leveled sloping garden
- Mistakes to avoid when leveling a sloping garden
- When to hire a professional
- Real-world experiences with leveling a sloping garden
- Final thoughts
A sloping garden can be charming in the same way a mountain goat is charming: impressive, dramatic, and not always easy to live with. One minute you are imagining a lush lawn, tidy flower beds, and a cute little seating area. The next minute you are watching water race downhill like it is late for an appointment.
The good news is that leveling a sloping garden is absolutely possible. The even better news is that “leveling” does not always mean turning the whole space into a giant pancake. In many cases, the smartest approach is to create a series of flatter, usable zones while keeping enough grade for proper drainage. That gives you a garden that is safer, more attractive, easier to maintain, and much less likely to turn into a muddy slip-and-slide after every storm.
In this guide, you will learn how to level a sloping garden step by step, when to use cut-and-fill grading, when terraces make more sense, how to deal with drainage, and when to bring in a pro before your yard starts auditioning for a landslide documentary.
Why homeowners level a sloping garden
There are several practical reasons to level a sloping backyard or front garden. A flatter outdoor space is easier to plant, mow, irrigate, and enjoy. It can create room for raised beds, patios, play areas, or a vegetable garden that does not require mountain-climbing equipment. Leveling can also help slow erosion, reduce runoff, and improve how water moves through the landscape.
That said, the goal is not usually a perfectly flat yard from fence to fence. A garden still needs a controlled slope so water drains away from the home and does not pool near foundations, paths, or retaining walls. The best landscape grading plan balances usability with drainage and soil stability.
Step 1: Assess the slope before you move a single shovel of soil
Measure the steepness
Before you decide how to level the garden, figure out how steep it really is. The basic formula is simple: rise divided by run, multiplied by 100, gives you the slope percentage. For example, if the ground drops 2 feet over 20 feet, that is a 10% slope.
This matters because a gentle slope may only need minor regrading, while a steeper hill often needs terracing, retaining walls, or a more engineered drainage plan. In plain English: a small slope is a weekend project; a large slope can become a “why is there a mini excavator in my yard?” project.
Check where water goes now
Walk the garden after heavy rain. Look for puddles, muddy channels, washed-out mulch, exposed roots, and any place where runoff heads toward the house. These clues tell you whether your biggest problem is uneven ground, erosion, compaction, poor drainage, or all of the above working together like a very rude team.
Study the soil
Clay-heavy soil drains slowly and can put extra pressure behind retaining walls. Sandy soil drains faster but can shift more easily. Compacted soil is another common issue, especially in yards that were graded during construction with heavy equipment. If water sits on the surface or roots struggle, soil improvement may need to be part of the plan, not an afterthought.
Step 2: Choose the right leveling method
There is no single best way to level a sloping garden. The right solution depends on the size of the area, the steepness of the slope, your budget, and what you want to use the space for.
Option 1: Regrade with cut and fill
This is the classic method for mild to moderate slopes. You cut soil from the higher side and use it to fill the lower side, then compact and smooth the surface to create a more usable grade. This works well for lawns, planting beds, and broad open areas.
It is often the most natural-looking option, but it requires careful shaping. You do not want to create a flat bowl that traps water. You want a stable, gentle surface that still drains properly.
Option 2: Build terraces
For a steeper garden, terracing is usually the smarter move. Terraces break one long slope into a series of shorter, flatter sections. Each level area can become a planting bed, seating nook, or lawn panel. Terracing also helps slow runoff and reduce erosion.
This option is especially useful if you want a decorative garden, a kitchen garden, or multiple functional zones. It is also easier on your knees, which deserve nice things.
Option 3: Use raised beds or a deck instead of regrading everything
Sometimes the most efficient fix is not massive excavation. Raised garden beds can create level planting areas on a slope with less soil movement. A deck can also provide a level outdoor living area over uneven ground. If your main goal is usable space rather than a fully leveled yard, these alternatives can save time and money.
Step 3: Plan for drainage first, not last
If you remember one thing from this article, make it this: drainage comes first. A beautifully leveled garden with poor drainage is just a future swamp with better branding.
Your finished grading should direct water away from structures. In many residential settings, best-practice guidance recommends a gentle slope away from the house rather than dead-flat soil against the foundation. Swales, drain tile, gravel backfill, and French drains may also be needed depending on the site.
Common drainage solutions
Swales: Shallow, sloped channels that guide runoff across the yard.
French drains: Gravel-filled trenches with perforated pipe that move excess water away.
Retaining wall drainage: Crushed stone, filter fabric, and drain pipe behind the wall to relieve water pressure.
Surface grading: Gentle shaping that keeps water from collecting near the house, patio, or garden beds.
If you skip this step, water will eventually redesign your garden for you, and it will not ask for your approval.
Step 4: Mark the layout and call before you dig
Use stakes, string lines, marking paint, and a line level to map out the new levels. Mark the top and bottom of the slope, the edges of future terraces, and any drainage channels. This is the moment when your project starts looking less like a vague dream and more like an actual plan.
Before any excavation, contact 811 to have underground utilities marked. Even small landscaping projects can hit buried lines. Digging blindly is a terrible strategy unless your goal is to turn a garden project into a very stressful afternoon.
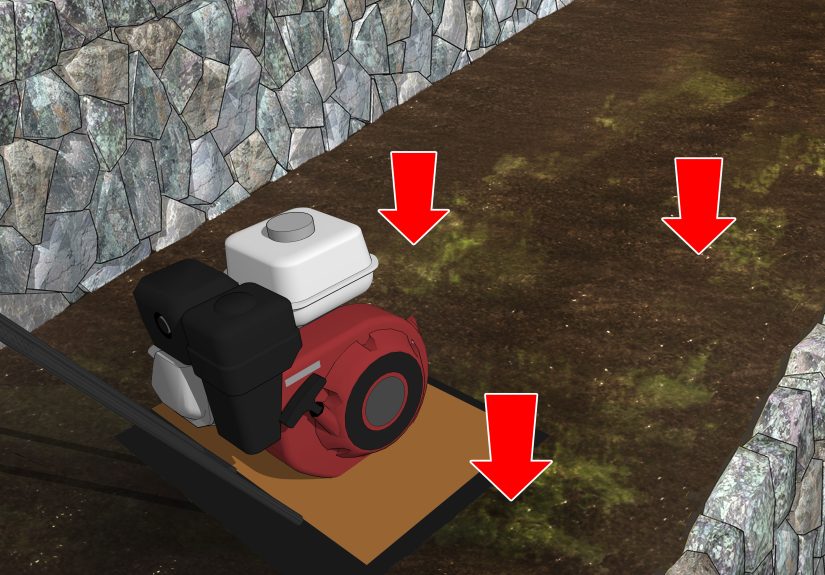
Step 5: Excavate and shape the soil
For small slopes
Remove turf if needed, then cut high spots and move the soil to lower areas. Spread fill in thin lifts rather than dumping one huge pile in place. Lightly compact each layer as you go. This helps prevent settling later.
For terraces
Start at the bottom of the slope and work upward. Cut into the hill to create a level shelf. Build the retaining structure, backfill with the right materials, then move to the next tier. Working from the bottom up gives each new level a proper foundation.
Save the topsoil
If possible, strip and save quality topsoil before heavy grading begins. After shaping the subgrade, return topsoil to the surface. This gives plants a better growing environment and keeps you from trying to grow a lush garden in what is essentially compacted construction leftovers.
Step 6: Install retaining walls if the slope needs structural support
Retaining walls are often necessary when leveling a sloped garden, especially with terraces. They hold back soil, create flat areas, and reduce erosion. Common materials include concrete retaining wall block, natural stone, timber, and poured concrete.
Important retaining wall basics
The base must be level and properly compacted. The first course matters more than people expect; if it is off, everything above it will proudly continue being off. Many retaining walls are built with a slight backward lean into the retained soil for strength. Drainage behind the wall is essential, usually with gravel and a perforated drain pipe.
Do not assume every wall is a DIY project. Very low garden walls can be manageable, but taller walls, walls supporting surcharge loads, or walls on tricky soils may need permits, engineering, or both. Some jurisdictions exempt certain walls under 4 feet, while others require permits sooner or under specific conditions. Always check local rules before building.
Step 7: Improve the soil and finish the surface
Once the rough grade is complete, add topsoil and compost where needed. Compost can improve soil structure, aeration, and water-holding capacity while also helping drainage in many landscapes. Rake the surface smooth, then seed, sod, mulch, or plant groundcovers depending on your design.
On slopes and terrace edges, groundcovers, shrubs, ornamental grasses, and mulched planting beds can help stabilize the soil. Deep-rooted plants are especially useful for erosion control. Bare dirt on a slope is basically an invitation for rainfall to make a mess.
Best plants and finishes for a leveled sloping garden
For erosion control
Use spreading groundcovers, native grasses, and shrubs with strong root systems. These plants hold soil in place and soften the look of retaining walls.
For a neat, structured look
Terraced beds with edging, stone steps, and repeating plant groups create a clean design. This works well in suburban backyards and formal gardens.
For edible gardens
Raised beds on leveled tiers are excellent for vegetables and herbs. They warm up faster, are easier to weed, and make irrigation simpler.
Mistakes to avoid when leveling a sloping garden
Making the garden totally flat: Flat sounds good until water stops moving. Keep a controlled grade for drainage.
Ignoring runoff: Water from higher ground can still affect lower terraces, so plan the whole site, not just one patch.
Using poor fill: Random rubble, trashy fill, or unstable soil will settle and fail.
Skipping compaction: Loose soil sinks later, and then your “level” garden becomes a wavy memory.
Building a wall without drainage: Water pressure destroys retaining walls faster than optimism can fix them.
DIY-ing beyond your comfort zone: A shovel and confidence are great, but they are not a substitute for engineering on large or risky slopes.
When to hire a professional
You should strongly consider professional help if the slope is steep, the project involves a tall retaining wall, drainage is severe, or the grade change is close to the house. You may also need a pro if there are signs of soil movement, deep erosion, seepage at the base of the slope, or complicated permit requirements.
A landscape designer, grading contractor, or structural engineer can help you avoid expensive mistakes. Hiring the right expert is usually cheaper than paying twice: once to do it wrong and once to fix it.
Real-world experiences with leveling a sloping garden
Homeowners often imagine leveling a sloping garden as one dramatic weekend with a rented tiller, a wheelbarrow, and an inspirational playlist. In reality, most people who go through the process say the project teaches them three things very quickly: slopes are heavier than they look, water is smarter than it seems, and “almost level” is not actually level.
One common experience is discovering that the slope itself is not the only issue. Many people start because the yard feels awkward or hard to mow, but once they begin measuring, they realize drainage is the bigger problem. Water may be running from a neighboring lot, pouring off a downspout, or collecting at the base of the hill. That changes the project from simple grading to full landscape planning. It is a classic yard moment: you came for the grass, but you stayed for the hydrology.
Another frequent experience is underestimating how much soil moves during regrading. Even a modest terrace or lawn leveling project can require far more hauling, tamping, and rechecking than expected. Many DIY gardeners say the first day feels exciting, the second day feels educational, and the third day feels like they now personally understand the emotional life of a wheelbarrow. Still, they also say that careful layout with stakes and string saves enormous frustration. When the lines are clear, the work goes faster and the final result looks more intentional.
People who build terraces often report that the project becomes worthwhile the moment the first flat area appears. Suddenly the garden feels larger, calmer, and much more usable. A steep, messy incline turns into actual outdoor rooms: a bed for tomatoes, a strip for lavender, a place for a bench, maybe even a small patch of lawn that does not try to launch the mower downhill.
There is also a strong lesson that comes from the first heavy rain after the project is finished. Homeowners who planned drainage well usually feel triumphant watching water move exactly where it should. Homeowners who skipped that part usually stand at the window in silence, watching runoff collect in the one place they absolutely did not want it. That experience tends to convert people into lifelong believers in swales, gravel backfill, and gentle grading away from structures.
Many gardeners also find that leveling the slope changes how they use the space. A yard that was once decorative but inconvenient becomes a place for outdoor dinners, easier planting, safer paths, and less maintenance stress. The biggest reward is not just that the garden looks better. It is that the garden finally works. And when a yard works, everything from watering to weeding to weekend lounging becomes a lot more enjoyable.
Final thoughts
Learning how to level a sloping garden is really about creating control: control over water, soil, access, and how you use the space. For a small slope, that may mean simple regrading and better drainage. For a larger hill, it may mean terraces, retaining walls, and careful site planning. Either way, the best results come from measuring first, respecting drainage, using the right materials, and resisting the urge to improvise your way into a mud problem.
Done well, a sloped garden can become one of the most attractive and functional parts of your property. Done poorly, it becomes an expensive lesson in gravity. Choose wisely.


