Table of Contents >> Show >> Hide
- Why Leveling a Concrete Floor Matters
- Before You Start: Know What “Level” Really Means
- Tools and Materials You May Need
- How to Level Concrete Floors: 9 Easy Steps
- Step 1: Check the Floor and Map the Problem Areas
- Step 2: Choose the Right Leveling Approach
- Step 3: Clear the Room and Clean the Concrete Thoroughly
- Step 4: Grind Down the High Spots First
- Step 5: Repair Cracks, Holes, and Weak Areas
- Step 6: Seal Gaps, Dams, and Edges, Then Apply Primer
- Step 7: Mix the Self-Leveling Compound Correctly
- Step 8: Pour, Spread, and De-Air the Material
- Step 9: Let It Cure, Recheck Flatness, and Prep for Flooring
- Mistakes to Avoid When Leveling Concrete Floors
- When to Call a Pro
- Final Thoughts
- Real-World Experience: What Leveling a Concrete Floor Actually Feels Like
- SEO Tags
If your concrete floor looks flat until you drop a marble and it suddenly begins a solo road trip, welcome to the club. Uneven concrete floors are incredibly common in basements, laundry rooms, garages, and older homes. The good news? You usually do not need to tear out the slab or call in a dramatic construction montage. In many cases, you can level a concrete floor yourself with the right prep, the right product, and a little respect for the clockbecause self-leveling compound waits for no one.
This guide walks you through how to level concrete floors in 9 easy steps, from checking the slab and grinding high spots to pouring floor leveler and getting the surface ready for tile, vinyl, laminate, or engineered wood. Along the way, you will also learn when a floor is a smart DIY project and when it is trying to politely tell you to call a pro.
Why Leveling a Concrete Floor Matters
A concrete floor does not need to be mathematically perfect for everyday life, but it does need to be flat enough for the finish flooring you plan to install. Tile, vinyl plank, laminate, and hardwood all perform better on a flat surface. When the slab has dips, humps, or rough transitions, you may end up with cracked tile, flexing planks, hollow spots, annoying squeaks, or furniture that rocks like it is trying to start a band.
Leveling also improves safety and appearance. It helps reduce trip hazards, makes trim and cabinets fit better, and gives adhesives and underlayments a better chance to do their jobs. In short, a flat floor is one of those invisible victories that makes everything installed on top of it behave.
Before You Start: Know What “Level” Really Means
Here is the sneaky truth: most people actually need a floor that is flat, not perfectly level relative to the horizon. A basement slab can slope slightly and still work fine. The bigger problem is usually local highs and lowssmall ridges, birdbaths, patches, or cracks that ruin flooring installation.
For most interior projects, the fix involves two moves: remove the high spots and fill the low spots. That is why leveling concrete floors often means using both an angle grinder and a self-leveling underlayment. Think of it less as “pouring magic juice on the floor” and more as “helping the floor stop being weird.”
Tools and Materials You May Need
- Long level, straightedge, or laser level
- Marker or chalk
- Shop vacuum
- Degreaser or concrete cleaner
- Angle grinder with concrete grinding wheel
- Crack filler or patching compound
- Caulk or foam sill tape for edges and gaps
- Primer recommended for your floor leveler
- Self-leveling concrete or self-leveling underlayment
- Mixing bucket and heavy-duty drill with paddle mixer
- Gauge rake, smoothing trowel, or spreader
- Spiked roller and spiked shoes, if recommended
- Gloves, goggles, knee pads, and a respirator
How to Level Concrete Floors: 9 Easy Steps
Step 1: Check the Floor and Map the Problem Areas
Start with a clean visual survey. Look for cracks, crumbling spots, old adhesive, paint, stains, and obvious dips. Then place a long straightedge or level across different areas of the floor and slide it around the room. Mark low spots, high spots, and transition areas with chalk or a marker.
This step saves time and money because it tells you whether you need spot repairs, a full skim coat, or a more serious evaluation. If the slab has active structural cracks, severe heaving, major moisture issues, or dramatic settlement, stop here and bring in a professional. A self-leveling compound can improve the surface, but it cannot fix a slab that is still moving.
Step 2: Choose the Right Leveling Approach
Not every uneven floor needs the same treatment. If the problem is a single shallow dip, a patching compound may be enough. If the floor has scattered low spots and mild surface variation, a self-leveling underlayment is often the easiest solution. If the floor has pronounced high areas, you should usually grind those down before pouring any leveler.
Also pay attention to location. Interior basement and living-area floors often use cement-based self-levelers made for underlayment. Some products are for interior use only, while others can handle exterior or damp-prone environments. Always match the product to the substrate, room conditions, and finish flooring. The bag is not being bossy for fun; it is trying to save you from a very expensive redo.
Step 3: Clear the Room and Clean the Concrete Thoroughly
Remove furniture, appliances, baseboards if needed, and any floor covering that is still hanging on for emotional support. Then clean the slab like bond strength depends on itbecause it does. Sweep, vacuum, scrape off old adhesive, and remove grease, dust, flaking paint, wax, or any contaminant that could interfere with adhesion.
If you skip this step, the floor leveler may not bond correctly. That can lead to peeling, hollow sections, or loose areas later. Let the slab dry fully after cleaning, especially if you used water or a cleaner. A dusty floor plus wet primer plus hurry equals the home-improvement version of chaos.
Step 4: Grind Down the High Spots First
One of the biggest DIY mistakes is trying to bury high spots under more and more self-leveling compound. That gets expensive fast and can create unnecessary thickness. Instead, use an angle grinder with a concrete wheel to knock down ridges, humps, and raised edges. Work slowly and check progress often with your straightedge.
Wear a respirator, eye protection, and hearing protection. Grinding concrete creates a ridiculous amount of fine dust, and that dust gets everywhere. Seal nearby doorways and vents with plastic if you are working indoors. When you finish, vacuum thoroughly. Then vacuum again. Then once more for the dust that was apparently emotionally attached to the floor.
Step 5: Repair Cracks, Holes, and Weak Areas
Before pouring any leveling compound, repair non-structural cracks, holes, and spalled areas with a suitable concrete patch or crack repair product. Clean out loose debris first so the repair material has something solid to hold onto. If a crack appears active, wide, deep, or part of a bigger movement issue, do not assume a basic patch will solve it.
Just as important, do not blindly fill expansion or control joints and pretend they never existed. Movement joints need to be respected. If the slab moves there, your new surface may crack right along the same line. In other words, the floor remembers. It always remembers.
Step 6: Seal Gaps, Dams, and Edges, Then Apply Primer
Self-leveling compound flows easily, which is wonderful on the floor and terrible when it escapes into floor drains, under walls, or through gaps at the perimeter. Seal openings with caulk, foam tape, or temporary dams. Around walls and fixed objects, add edge isolation if the product calls for it.
Next comes primer. This step is non-negotiable for most products. Primer improves bond, helps control absorption, and reduces pinholes or bubbles. Use the primer recommended by the manufacturer of your leveling product, and apply it exactly as directed. Some concrete slabs need one coat; highly porous floors may need more. Let the primer dry fully, but do not let the timing window lapse if the instructions require you to pour within a certain number of hours.
Step 7: Mix the Self-Leveling Compound Correctly
Read the bag. Then read it again while making direct eye contact with your drill. Self-leveling products are sensitive to water ratios, mixing time, and temperature. Add the recommended amount of clean water to the bucket, mix with a heavy-duty drill and paddle, and keep going until the material is smooth and lump-free.
Do not add extra water because you want it to “flow better.” That may weaken the mix, affect curing, or lead to surface problems later. Also, only mix what you can place within the product’s working time. Many fast-setting compounds give you a short window, so have your tools staged and your plan ready before the powder hits the bucket.
Step 8: Pour, Spread, and De-Air the Material
Pour the mixed compound onto the primed floor, starting at the lowest section or farthest part of the room so you can work toward an exit. Spread it with a gauge rake, smoother, or trowel as needed. Even though it is called self-leveling, it still benefits from a little guidance. Think of it as self-leveling in the same way a suitcase is self-rolling once you stop dragging it through gravel.
If the product recommends a spiked roller, use one to release trapped air and help blend pours. Work quickly to maintain a wet edge and avoid cold joints between batches. For larger rooms, a helper makes a huge difference: one person mixes while the other pours and spreads. This is not a glamorous buddy activity, but it is effective.
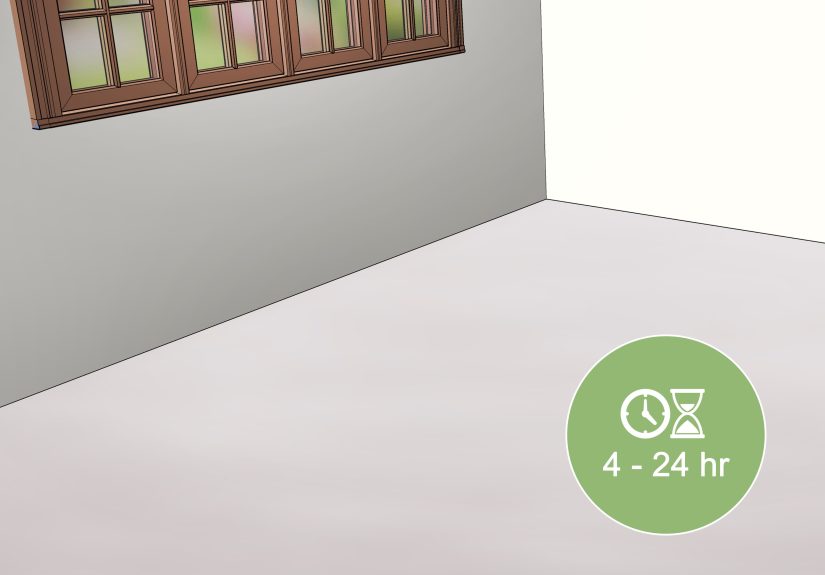
Step 9: Let It Cure, Recheck Flatness, and Prep for Flooring
Once the floor is poured, leave it alone. Resist the urge to poke it, test it, or admire it with your shoes on. Cure time varies by product, temperature, humidity, and thickness. Some compounds can be walked on in a few hours and covered the same day, while others need longer before receiving flooring adhesive or moisture-sensitive finishes.
After the recommended cure time, check the floor again with a straightedge or level. If you find tiny ridges or isolated rough spots, sand or scrape them lightly. Vacuum the floor and confirm it meets the flatness requirements for your finish flooring. A level floor is lovely. A level floor that is also clean is downright elite.
Mistakes to Avoid When Leveling Concrete Floors
- Skipping surface prep: Most failures start here, not at the pour.
- Ignoring high spots: Grinding first often saves material and improves results.
- Using the wrong primer: Primer is part of the system, not a bonus accessory.
- Adding too much water: A soupy mix can weaken the underlayment.
- Pouring over active cracks: Surface products do not solve structural movement.
- Forgetting about moisture: A damp slab can create bond and flooring problems later.
- Working too slowly: Many self-levelers set quickly, so prep everything first.
When to Call a Pro
DIY leveling is a great option for many floors, but it is not the right solution for every slab. Call a professional if you notice ongoing cracking, heaving, settlement, severe out-of-plane areas, hydrostatic moisture, or an uneven floor caused by a bigger foundation issue. The same goes for very large pours or situations where finished floor heights must align precisely across several rooms.
There is no shame in handing off a slab that looks like it has been through three renovations, two leaks, and one existential crisis. A pro can test moisture, diagnose structural issues, and recommend a long-term fix instead of a temporary cosmetic one.
Final Thoughts
Learning how to level concrete floors is one of those DIY skills that pays off far beyond the slab itself. A flat floor makes every next step easier, from installing tile and luxury vinyl plank to setting cabinets and moving furniture without that one leg doing interpretive dance. The project is not especially glamorous, but it is deeply satisfying.
The secret is simple: prep aggressively, grind where needed, repair what matters, prime correctly, mix carefully, and move quickly. Do that, and your floor has an excellent chance of going from bumpy and annoying to smooth and ready for whatever comes next.
Real-World Experience: What Leveling a Concrete Floor Actually Feels Like
The funniest thing about leveling a concrete floor is that the job sounds easy when you first say it out loud. “I’m just going to level the floor this weekend.” That sentence has the same energy as “I’ll just repaint the kitchen cabinets before lunch.” Technically possible. Spiritually optimistic.
In real life, the project usually begins with discovery. You move a shelf, lift old flooring, or run a straightedge across the slab and suddenly realize your “slight dip” is less of a dip and more of a topographical feature. There is almost always one corner that behaves like it was designed by a mischievous engineer. That is the moment the job becomes less about pouring compound and more about reading the roomspecifically, the room’s floor, which has apparently been keeping secrets.
One of the biggest surprises for first-timers is how much of the work happens before you ever mix a bag. Cleaning, scraping, vacuuming, sealing edges, checking cracks, choosing primer, staging tools, and planning your pour path can take longer than the actual application. That is not wasted time. It is the reason the pour works. People who rush prep often end up learning the same lesson twice, which is an expensive way to get an education.
Then comes the grinding. Grinding high spots feels dramatic. It is loud, dusty, and weirdly empowering, like you are arguing with the floor and finally winning. But it also teaches humility because every ridge you remove creates more dust than seems physically reasonable. You finish, vacuum, step back proudly, and then notice a fine gray film on a windowsill in a room you were not even working in. Concrete dust is a gifted traveler.
The mixing and pouring stage is the part everybody remembers because it moves fast. Once the compound is in the bucket, the clock becomes the supervisor. Suddenly you are not wandering around wondering what to do next; you are executing a mission. Pour, spread, roll, move. If you have a helper, this is where teamwork matters most. One person mixing while the other guides the pour can turn the job from chaotic to controlled in a hurry.
And then, after all the noise and dust and hurry, the room gets quiet. The floor begins to settle. The surface smooths out. You stop fussing because there is nothing left to do except let chemistry happen. That quiet moment is strangely satisfying. The slab that looked rough, patchy, and slightly offensive a few hours earlier now looks intentional.
The best part comes later, when your finish flooring goes down more easily than expected or your furniture sits flat without shims, folded cardboard, or desperate optimism. Nobody walks into the room and says, “Wow, incredible subfloor prep.” But they do notice when tile lines look straight, planks sit tight, and everything feels solid underfoot. That is the beauty of leveling concrete floors: when you do it well, the result feels invisibleand that is exactly the point.


