Table of Contents >> Show >> Hide
- Project at a Glance
- Why This DIY Light Works Indoors AND Outdoors
- Materials and Tools
- Step-by-Step: Quick DIY Jar Lantern (Indoor/Outdoor)
- Step 1: Pick your light source (the “don’t overthink it” decision)
- Step 2: Prep the jar (clean glow = better glow)
- Step 3: Add the light
- Step 4: Make it outdoor-friendly (weatherproofing that actually matters)
- Step 5: Add a handle or hanger (optional, but it screams “Pinterest win”)
- Step 6: Test it like a practical adult (even if you’re a whimsical one)
- Safety Notes for Indoor/Outdoor DIY Lighting (Read This, Future You Will Thank You)
- Design Upgrades (Same DIY, Better Results)
- Where to Use Your DIY Indoor/Outdoor Light
- Troubleshooting
- FAQ
- Real-World DIY Experiences (About )
- Conclusion
Want the cozy glow of a boutique patio… without paying boutique patio money? Same. This guide shows you how to build a quick, beginner-friendly DIY indoor/outdoor light that looks charming, works in real life, and doesn’t require an electrical engineering degree (or a dramatic montage).
The star of the show is a weather-resistant jar lantern: portable, hangable, table-friendly, and easy to customize. You’ll also get a few “choose your own adventure” upgradessolar, plug-in, brighter light output, and better weatherproofing so you can use it indoors, outdoors, or wherever your vibe needs a little sparkle.
Project at a Glance
- Project: DIY Indoor/Outdoor Jar Lantern (LED)
- Time: 20–45 minutes (plus optional drying time if you seal it)
- Cost: Budget-friendly (often under $25 per lantern, depending on the light source)
- Skill level: Beginner
- Power options: Battery, rechargeable, solar, or plug-in (low-voltage)
Why This DIY Light Works Indoors AND Outdoors
The secret is using LEDs (low heat, efficient, flexible placement) and a protected enclosure (your jar + smart sealing). LEDs are also wildly energy-efficient compared to older bulbs, which is why they’re the go-to for modern DIY lighting projects.
Indoor wins
- Soft ambient glow for bedrooms, shelves, bathrooms, and “I read one page then scroll for 45 minutes” corners.
- No hardwiring requiredportable lighting you can move as your layout (or mood) changes.
Outdoor wins
- Perfect for patios, balconies, porches, and picnic tables.
- Weather-resistance is achievable with simple materials: gaskets, sealant, and outdoor-rated components.
Important note: “Outdoor-ready” can mean different things. Some setups are great for a covered porch (damp location), while others are built to tolerate rain (wet location). We’ll build it so you can choose your level of rugged.
Materials and Tools
Core materials (the easy list)
- One jar (mason jar, wide-mouth jar, or any lidded glass jar)
- LED light source (choose one):
- Battery LED fairy lights (tiny wire string)
- Rechargeable LED puck light
- Solar mason-jar lid light (fastest “outdoor” option)
- Hanging hardware (optional): wire handle, chain, or rope
- Weatherproofing (recommended for outdoor use):
- Silicone sealant (clear)
- Rubber gasket or foam weatherstripping (for the lid)
- Heat-shrink tubing (if you’re joining wires)
- Decor (optional but fun): frosted spray, glass paint, sea glass, stones, dried flowers (keep dry!), or twine
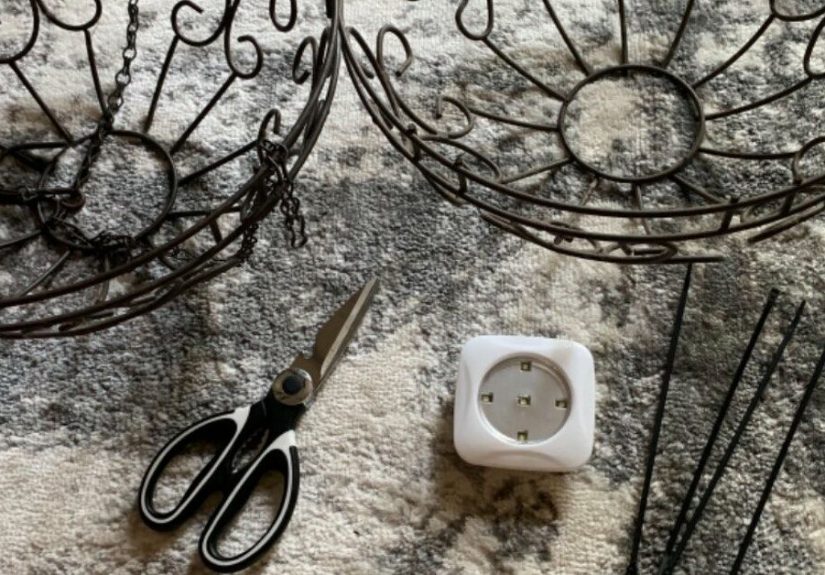
Tools
- Scissors (for trimming lights or twine)
- Small screwdriver (for battery packs)
- Drill + bit (only if you’re adding a cord pass-through or mounting hardware)
- Sandpaper or file (to smooth any drilled edges)
- Gloves + safety glasses (especially if drilling glass/metal or using sealants)
Step-by-Step: Quick DIY Jar Lantern (Indoor/Outdoor)
Step 1: Pick your light source (the “don’t overthink it” decision)
Choose based on where you’ll use it most:
- Indoors: battery fairy lights or a rechargeable puck light.
- Outdoors (easy mode): solar jar lid light (minimal wiring, fewer openings).
- Outdoors (brighter): rechargeable puck light + good sealing (or a purpose-built outdoor LED module).
If you want this to be truly quick: solar jar lid + jar + done. But if you want a warmer, “custom” glow, fairy lights are the DIY classic for a reason.
Step 2: Prep the jar (clean glow = better glow)
- Wash and dry the jar thoroughly (moisture inside = foggy sadness later).
- Remove labels and adhesive residue.
- Optional: frost the jar with a light coat of frosted glass spray for softer diffusion (let it fully dry).
Step 3: Add the light
Option A: Battery fairy lights
- Coil the lights inside the jar evenly (spread the LEDs so it doesn’t look like a glowing spaghetti ball).
- Place the battery pack:
- Indoor: tuck it under the lid inside the jar, or attach it to the outside back with removable adhesive.
- Outdoor: keep the battery pack as protected as possibleideally in a sealed compartment or under a cover.
Option B: Rechargeable puck light
- Stick the puck light under the lid (inside), or mount it to the jar’s base so it shines upward for a “lantern” look.
- Test brightness through the jarsome pucks are extremely bright. If it’s blinding, add diffusion (frosting or a thin inner liner).
Option C: Solar jar lid light
- Install the solar lid according to its instructions.
- Charge it in sunlight before judging brightness. Many solar lights need a full day to reach their best output.
Step 4: Make it outdoor-friendly (weatherproofing that actually matters)
For outdoor use, your biggest enemies are water intrusion and unprotected electrical connections. The goal is to keep moisture out and keep any wiring safe.
- Seal the lid: add a rubber gasket or foam weatherstripping where the lid meets the jar.
- Seal entry points: if you drilled a hole for wire/rope, smooth the edge and seal around it with silicone.
- Protect connections: if you joined wires, use heat-shrink tubing and keep connections inside a protected area.
- Think “covered vs. soaking”: if it will sit in open rain, use a purpose-built outdoor-rated lighting component when possible.
Step 5: Add a handle or hanger (optional, but it screams “Pinterest win”)
- Wrap sturdy wire around the jar neck to form a handle.
- Or tie rope/twine around the neck (better for decorative indoor use than constant outdoor exposure).
- For hanging outdoors, use corrosion-resistant hardware and avoid anything that will wick water into the lid.
Step 6: Test it like a practical adult (even if you’re a whimsical one)
- Turn it on and check for hot spots (uneven light). Rearrange LEDs if needed.
- Shake gentlynothing should rattle like a haunted maraca.
- Outdoor test: leave it outside for a day in a sheltered spot and check for condensation inside the jar.
Safety Notes for Indoor/Outdoor DIY Lighting (Read This, Future You Will Thank You)
Most quick DIY lanterns work best with low-voltage LED lighting. If you choose plug-in components outdoors, treat safety like the main character.
Outdoor power basics
- Use GFCI protection outdoors and around damp areas. Portable GFCIs exist if your outlet isn’t already protected.
- Use extension cords labeled for outdoor use and inspect cords for damage before use.
- Don’t use extension cords as permanent wiring and don’t run them through walls, ceilings, doors, or floors.
- Avoid overloading cords; check ratings and keep setups temporary and sensible.
Translation: if your lighting setup starts resembling a plate of spaghetti behind the grill, pause and regroup. Your yard deserves ambiance, not a surprise fire drill.
Design Upgrades (Same DIY, Better Results)
Upgrade 1: Make it brighter without making it harsh
- Use a higher-lumen LED module or brighter fairy lights.
- Add diffusion: frosted glass finish, a thin vellum liner (indoors), or a translucent insert.
- Use warm white (often around 2700K–3000K) for cozy vibes instead of “interrogation room chic.”
Upgrade 2: Add an auto-on timer (lazy in the best way)
- Many solar lids include dusk-to-dawn sensors.
- For plug-in outdoor lights, use an outdoor-rated timer (and keep it on a GFCI-protected circuit).
Upgrade 3: Make a set that looks “designed,” not “assembled at 11 p.m.”
- Build three lanterns in different heights (small/medium/large jars).
- Keep one consistent detail: matching rope, same frosted finish, or the same LED color temperature.
- Group them in odd numbers for a balanced look.
Where to Use Your DIY Indoor/Outdoor Light
Indoors
- Bathroom shelf night light (soft glow, low stress)
- Entryway console for “welcome home” warmth
- Bedroom mood lighting for winding down
Outdoors
- Patio table centerpiece (no open flame required)
- Stair and pathway accent (use multiple for real visibility)
- Balcony corners and railing posts (especially with hanging handles)
Troubleshooting
“It’s not bright enough.”
- Swap to a higher output LED light source.
- Reduce heavy tinting or overly thick diffusion.
- For solar: ensure the panel gets direct sun and the battery fully charges.
“There’s condensation inside the jar.”
- Dry everything completely and reseal the lid with a gasket.
- Avoid placing it where rapid temperature changes happen (cold night + warm humid air = fog machine).
“It shuts off randomly outdoors.”
- Check battery contacts and switch placement.
- For solar lids, make sure the sensor isn’t blocked by shade or nearby bright lights.
FAQ
Can I leave this outside in the rain?
You can build it to handle rain, but it depends on your light source and sealing. Solar jar lids are often the simplest outdoor option. If you’re using battery packs or plug-in components, treat water exposure seriously and prioritize outdoor-rated parts.
Do I need to wire anything?
Not for the quick version. Battery, rechargeable, or solar options avoid household wiring entirely. If you choose plug-in outdoor lighting, use safe outdoor practices (GFCI, outdoor-rated cords, and proper protection).
Why LED?
LEDs run cooler than older bulb styles and are highly energy-efficient, which is exactly what you want in enclosed DIY lantern projects.
Real-World DIY Experiences (About )
People underestimate how “real” lighting feels until they build their first DIY lantern and suddenly their patio looks like a small wedding venue. The most common experience DIYers share is that the first version works… but the second version is the one they brag about. Why? Because the first build teaches you the little things that photos don’t: how light bounces, what “too bright” actually looks like at night, and how quickly outdoor air can sneak moisture into anything that isn’t sealed well.
One frequent lesson: brightness is emotional. In the store, a super-bright puck light seems amazing. Outside at night, it can feel like stadium lightinggreat for finding dropped keys, not great for sipping something fizzy while pretending you’re on vacation. DIYers often end up adding frosting spray, a diffuser insert, or simply switching to warm white fairy lights. That softer glow reads “cozy” even when the actual lumen output isn’t huge.
Another big “aha” moment is weatherproofing. Many folks start with a gorgeous jar lantern, place it outside, and wake up to a steamy little terrarium effect inside the glass. Condensation doesn’t always mean it leaked like a submarineit can happen from temperature swings and humidity. The fix tends to be simple: dry everything completely, add a gasket, and seal openings thoughtfully. Some DIYers even do a quick outdoor test in a covered area before making a whole set, which is honestly the most responsible thing anyone has ever done after buying craft supplies.
If you go solar, expect the “charge anxiety” phase. A lot of beginners assume solar lights are broken because they’re dim on day one. In reality, many solar units need a proper sunny charge cycle to show their true brightness. The common experience is: day one is “cute,” day two is “okay,” and day three is “ohthere you are.” Placement matters, too. Solar panels hate shade. They also hate being blocked by decorative leaves you lovingly glued on top like a tiny lantern haircut.
The most satisfying DIY moment people describe is building a matched set. One lantern is a craft. Three lanterns is a design decision. Five lanterns is a lifestyle brand. DIYers who batch-make lanterns often standardize one detailsame jar shape, same rope, same frosting levelso everything looks intentional even if they assembled it while wearing pajama pants and a determined expression.
Finally, there’s the “practical flex” experience: using these lanterns indoors during power flickers, moving them from dinner table to bathroom night light, or turning a bland shelf into a cozy corner instantly. The portability is what wins. You didn’t just make a lightyou made a little mood tool. And that’s the kind of DIY project that keeps showing up in your home long after the glue gun cools down.
Conclusion
A quick and easy DIY indoor/outdoor light doesn’t need complicated wiring or pricey fixtures. With a jar, an LED light source, and a few smart safety and weatherproofing choices, you can build lighting that looks intentional, feels cozy, and adapts to whatever space needs a glow-up next.
Start with one lantern, test it, then make a small set. You’ll get better with every buildand your evenings (indoors or out) will look significantly more magical for a very reasonable amount of effort.


