Table of Contents >> Show >> Hide
- What You’re Making (And Why It Looks So Cool)
- Materials and Tools
- Safety First: Resin + Glass Without the Drama
- Step 1: Pick the Right Wood Slice
- Step 2: Sand and Clean Like You Mean It
- Step 3: Seal the Wood to Prevent “Outgassing” Bubbles
- Step 4: Plan Your Tree Design
- Step 5: Build a Tape Dam (So Your Resin Doesn’t Yeet Itself Off the Edge)
- Step 6: Mix Your Resin Correctly (The “Don’t Freelance Chemistry” Step)
- Step 7: Pour the Background Layer
- Step 8: Create the Tree Trunk and Branches
- Step 9: Add the “Glass” Canopy
- Step 10: Flood Coat for a Smooth, Glassy Finish
- Step 11: Cure and Unmask
- Step 12: Finishing Options (From Rustic to “Gallery Piece”)
- Troubleshooting: Fixes for Common Resin “Plot Twists”
- Creative Variations (Same Steps, Different Vibes)
- FAQ
- Real-World Maker Notes: of “Been There” Wisdom
- Conclusion
If you’ve ever looked at a plain old wood slice and thought, “You know what this needs? More sparkle and a tiny
forest vibe,” you’re in the right place. This DIY turns a humble wood round into a glossy, light-catching “glass”
tree scene using epoxy resin and crushed glass (or faux glass). It’s part rustic cabin, part fancy boutique gift
shopand 100% “wait, you made that?!”
Below you’ll get the full step-by-step: choosing the right wood slice, preventing bubbles (because nobody wants a
tree that looks like it has the measles), placing glass safely, and finishing with a clean, domed shine.
What You’re Making (And Why It Looks So Cool)
An “epoxy glass tree” is essentially a tree silhouetteusually trunk and branches in a dark resin or painttopped
with crushed glass or glass-like crystals that mimic leaves, snow, or a shimmering canopy. When you flood coat the
piece with clear epoxy, the surface becomes glossy and dimensional, like the tree is trapped in a crystal-clear
winter moment (minus the frostbite).
Materials and Tools
You can keep this beginner-friendly. The main goal is: dry wood + correct resin mix + controlled layers.
Supplies
- Wood slice/wood round (4–10 inches is great for a first try)
- 2-part epoxy resin (art/craft resin for thin coats, or tabletop resin for durability)
- Crushed glass / glass chips / faux crystals (craft-grade, sea-glass chips, or acrylic “ice”)
- Pigments: mica powder, resin dye, alcohol ink (avoid water-based paints in resin)
- Black/brown for trunk (mica + resin, or acrylic paint sealed under resin)
- Painter’s tape (for a tape “dam” around edges)
- Isopropyl alcohol (for cleanup and dust control on cured resin edges)
- Disposable mixing cups (graduated if possible)
- Stir sticks (flat edges help scrape sides and bottom)
- Nitrile gloves
- Optional: silicone caulk/hot glue (extra leak insurance), tweezers (for glass placement)
Tools
- Sandpaper (80/120/220; optional wet-sanding grits up to 2000 for polishing)
- Heat gun or small torch (for popping surface bubbles)
- Level (or a phone level app)
- Dust brush or tack cloth
- Plastic sheet/cardboard (to protect your work surface)
- Optional: rotary tool or small file (to clean cured drips)
Safety First: Resin + Glass Without the Drama
Resin crafting is fun, but it’s also chemistry class with better décor. Do these basics and you’ll avoid most issues:
- Ventilation: Work in a well-ventilated area (fresh air is your friend).
- Gloves: Wear nitrile gloves; avoid skin contact to reduce irritation or sensitization risk.
- Eye protection: Especially when handling glass chips or sanding cured resin.
- Glass handling: Use tweezers for small shards; keep pets/kids away from your sparkle zone.
- Heat tool caution: If you use a torch, keep it movingthink “quick pass,” not “crème brûlée.”
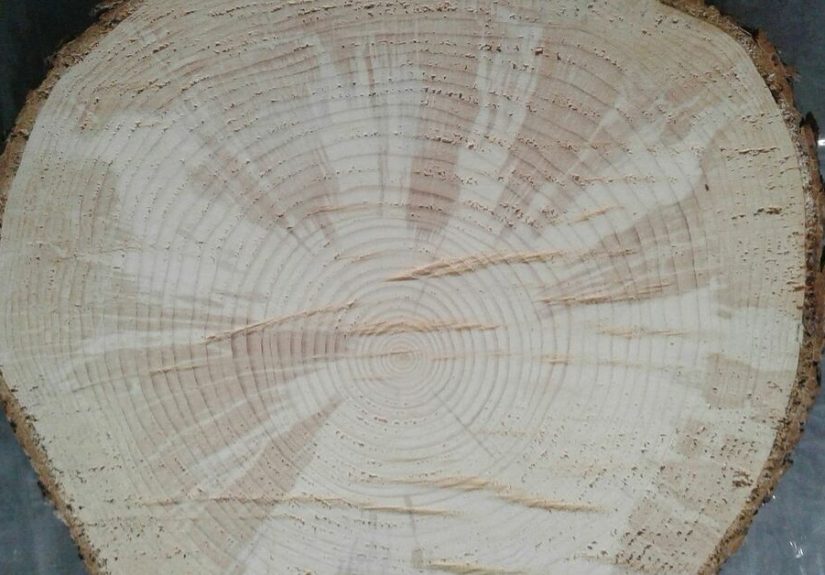
Step 1: Pick the Right Wood Slice
Your wood slice is the “canvas,” and it needs to be stable. The #1 enemy of resin on wood is hidden moisture. If
the slice is damp, you’re inviting bubbles, cloudy spots, and eventual cracking.
What to look for
- Dry wood: Store-bought craft rounds are usually dried, but still check for cool, damp feel.
- Minimal cracking: Small cracks are okay (they can look rustic), but huge splits will drink resin.
- Flat-ish surface: Slight unevenness is fine; severe cupping makes doming difficult.
Step 2: Sand and Clean Like You Mean It
Resin magnifies everything. Dust? You’ll see it. Fingerprints? Yep. Random fuzz from your sweater? Congratulations,
that’s now a permanent design element.
- Sand the top: Start around 120 grit, then 220 for a smoother finish.
- Soften sharp edges: A quick pass prevents thin resin from “pulling away” on razor edges.
- Clean thoroughly: Brush off dust and wipe with a lint-free cloth. Let it fully dry.
Step 3: Seal the Wood to Prevent “Outgassing” Bubbles
Wood is porous and full of tiny air pockets. When resin warms as it cures, that air can expand and escape into your
beautiful clear coataka bubble city. The fix is a thin seal coat.
Seal coat method (simple and effective)
- Mix a small batch of clear resin.
- Brush a thin layer over the top and edges (especially bark/live edges).
- Hit it lightly with heat to pop surface bubbles.
- Let it cure until firm (often overnight, depending on resin).
If your wood is extra porous or very “live-edge,” two thin seal coats can be even better than one.
Step 4: Plan Your Tree Design
Before you mix anything, decide what your tree will look like. This is where you get to be the art director of a
tiny woodland movie.
Easy design options
- Silhouette tree: Classic trunk + branches, glass canopy on top.
- “Tree of life” vibe: More swirling branches for a fantasy feel.
- Seasonal twist: Green canopy (spring), gold/orange (fall), icy clear/white (winter).
Lightly sketch the trunk and main branches with pencil. Keep it simpleresin is forgiving, but it also remembers
everything you do.
Step 5: Build a Tape Dam (So Your Resin Doesn’t Yeet Itself Off the Edge)
A tape “dam” helps contain the resin so you can get a thicker, glossy coat without runaway drips. It also creates a
cleaner edge.
- Flip the wood slice over and run painter’s tape around the edge so it sticks up slightly above the top surface.
- Press firmly all the way aroundseams are where leaks love to start a family.
- Set your piece on a level surface. Check from multiple angles.
Optional: Add a tiny bead of hot glue or silicone at tape seams for extra leak protection.
Step 6: Mix Your Resin Correctly (The “Don’t Freelance Chemistry” Step)
Most resin problems come from incorrect measuring or incomplete mixing. Follow the manufacturer’s ratio exactly
(by volume or weightwhichever your resin requires).
Reliable mixing routine
- Measure accurately: Use graduated cups; don’t eyeball it like you’re seasoning pasta water.
- Mix slowly: Stir steadily, scraping sides and bottom for the recommended time.
- Optional “double cup”: Pour into a second cup and mix again brieflythis helps reduce unmixed streaks.
- Let it rest: A short rest (1–2 minutes) can help bubbles rise before you pour.
Tip: Warmer room temps can lower viscosity (fewer bubbles) but also shorten working time. Aim for a comfortable
room temperature and avoid humidity swings.
Step 7: Pour the Background Layer
This first visible layer can be crystal clear or lightly tintedthink “sky behind the tree” or “frozen lake vibe.”
- Pour a thin, even layer across the surface.
- Spread gently with a stir stick to the edges (inside your tape dam).
- Pop bubbles with a quick heat pass (heat gun or torch).
When to move to the next step
For best control, wait until the resin is tacky (like the sticky side of a Post-it) so your trunk
and glass pieces don’t drift. Timing varies by resinoften a few hours.
Step 8: Create the Tree Trunk and Branches
You have two common approaches:
Option A: Resin trunk (most “3D” look)
- Mix a small batch of resin and tint it with black/brown mica powder.
- Let it thicken slightly (a few minutes) for better line control.
- Use a stir stick, craft spatula, or disposable piping bag to lay down the trunk and branches along your sketch.
Option B: Painted trunk (fast and clean)
- Paint the trunk with acrylic paint and let it fully dry.
- Seal the paint with a thin clear resin coat (so it doesn’t react or bleed).
If you want extra texture, you can sprinkle a tiny amount of fine black glitter or metallic pigment into the trunk
while it’s still wet. Subtle is the goalunless you’re intentionally making “Disco Pine.”
Step 9: Add the “Glass” Canopy
Here’s the magic. Your canopy is the crushed glass (or faux crystals) that creates a jewel-like look.
Placement tips
- Sort by size: Bigger pieces for the center, smaller pieces along edges for a softer fade.
- Use tweezers: More control, less “glass confetti explosion.”
- Follow a shape: Triangle for evergreen, round/oval for deciduous tree, or freeform for artsy vibes.
How to keep glass in place
- Brush or drizzle a thin layer of clear resin where the canopy will go.
- Place glass pieces into that resin (it acts like glue).
- Gently press pieces down so they’re partially embedded.
Optional: Add accent “sparkle bands” by mixing a small amount of resin with pearl mica or glitter and drizzling it
around the canopy edges, geode-style.
Step 10: Flood Coat for a Smooth, Glassy Finish
Once your tree elements are set enough not to shift, it’s time for the final clear coat. This locks everything in
and gives that thick, glossy “glass” look.
- Mix a fresh batch of clear resin.
- Pour slowly, letting resin flow around glass pieces and self-level.
- Use a stick to guide resin into low spots without disturbing your design.
- Pop bubbles with quick heat passes. Repeat once or twice in the first 20–30 minutes as bubbles rise.
If your glass pieces are tall, you may need two flood coats rather than one thick pour. Thick pours
can overheat (exotherm), cure too fast, or trap bubbles.
Step 11: Cure and Unmask
Cover the piece to protect it from dust (a clean plastic bin works great). Let it cure according to your resin
instructions. Many epoxies feel hard after 24 hours but reach full strength later.
- After cure, peel off the tape dam.
- Trim any drips with a craft knife or file.
- If edges are rough, sand them lightly and wipe clean.
Step 12: Finishing Options (From Rustic to “Gallery Piece”)
Keep it simple
- Add felt pads to the back for table display.
- Attach a small hanger if you want it as wall décor.
Polish to a high gloss
If you sand any cured resin (like drips), you can restore shine by wet-sanding through progressively finer grits
and then buffing with polishing compound. This is how makers get that mirror finish.
Troubleshooting: Fixes for Common Resin “Plot Twists”
Bubbles keep appearing
- Likely cause: wood outgassing or aggressive stirring.
- Fix: add/redo a seal coat; mix slower; warm resin bottles slightly before mixing (not hotjust cozy).
Sticky or soft spots
- Likely cause: wrong ratio or unmixed resin on cup sides.
- Fix: scrape off uncured resin, wipe, then recoat correctly mixed resin.
Glass pieces poke through the surface
- Likely cause: not enough flood coat coverage.
- Fix: let cure, sand sharp points carefully, then add another clear coat.
Resin leaked under the tape dam
- Likely cause: tape seam gap or weak adhesion to bark texture.
- Fix: seal seams with hot glue/silicone next time; sand edge smoother; press tape firmly.
Creative Variations (Same Steps, Different Vibes)
- Winter tree: Clear + iridescent glass, white mica “snow drift,” silver trunk highlights.
- Autumn tree: Amber/orange glass mix, copper mica, warm tinted background.
- Night sky: Deep navy resin background with micro-glitter “stars,” bright crystal canopy.
- Ocean tree: Teal background with sea-glass chips and pearly white resin accents.
- Personalized gift: Add a tiny name plate or date on the wood before the final flood coat.
FAQ
What resin is best for this project?
For a wood slice art piece, an art/craft resin or tabletop resin works well because you’re doing thin-to-medium
coats. Deep-pour resins are great for thick castings but can be overkill here unless you’re doing a very deep dome.
Can I use real broken glass?
You can, but it’s not the easiest or safest option for a beginner. Craft crushed glass, sea-glass chips, or
acrylic crystals give a similar look with fewer sharp surprises.
How do I keep the glass from sinking?
Work in stages: place glass into a tacky layer or a thin “glue” layer of resin first, then flood coat after it sets.
If you dump glass into very thin fresh resin, it can drift or sink.
Real-World Maker Notes: of “Been There” Wisdom
Let’s talk about the part nobody puts in the dreamy highlight reel: the little lessons you learn when you actually
make one of these. If you’ve never used epoxy on wood before, your first big “aha” moment will probably be how much
the wood behaves like a sponge with opinions. The slice may look dry, but if it’s been sitting in a humid garage or
near a window, it can still hold moisture deep inside. That’s why seal coats feel like “extra work” right up until
the moment you skip them and your piece starts bubbling like it’s auditioning for a soda commercial.
Another common experience: the tape dam. In theory, you wrap tape around the edge and your resin politely stays put.
In practice, resin is basically a tiny escape artist. If there’s a seam, a wrinkle, or a crumb of sawdust under the
tape, resin will find it. Many DIYers learn to do a quick “leak check” by pouring a teaspoon of mixed resin along
the inside edge first and waiting a minute. If nothing creeps under the tape, you’re good. If it does, you fix the
seam before you pour the full coatbecause cleaning cured resin drips off bark texture is not a hobby anyone chooses
twice.
You’ll also notice that “mixing thoroughly” isn’t just a suggestion. People often stir for 20 seconds, see it looks
clear, and assume it’s fine. Then 24 hours later they have soft spots that feel like gummy candy. The best habit
makers adopt is scraping the sides and bottom constantly and, when possible, doing the double-cup method. It feels
fussy, but it’s a lot less fussy than scraping off uncured resin with regret.
On the design side, glass placement is surprisingly meditativeright up until you bump the table. Many crafters use
tweezers not because they’re fancy, but because placing each chip intentionally makes the canopy look dimensional
instead of like you sprinkled glitter salt. A fun trick is to blend sizes: chunkier glass in the center creates
“body,” while fine chips around the perimeter give a soft edge that looks more natural. If you want the canopy to
glow, mixing a tiny amount of pearl mica into the clear resin around the glass can add a subtle halo effect that
looks expensive (even if your budget was “whatever was in the craft drawer”).
Finally, dust is the quiet villain of resin projects. Makers often learn to cover their piece with a clean bin and
then walk awayno “one last peek,” no ceiling fan, no rearranging a fuzzy blanket nearby. Resin stays tacky long
enough to trap floating lint like it’s collecting souvenirs. The good news: even if something goes slightly wrong,
resin art is forgiving. You can sand a cured surface and recoat. Most “mistakes” become storiesand sometimes the
piece you nearly tossed becomes the one everyone compliments the most. Go figure.
Conclusion
An epoxy glass tree on a wood slice is the perfect mashup of rustic and dazzling: natural grain underneath, glossy
resin on top, and a canopy that catches light like tiny crystals. The keys to success are simple but powerful:
start with dry wood, seal it, measure and mix your resin carefully, and build your design in controlled layers.
Do that, and you’ll end up with a piece that looks like it belongs in a boutiqueexcept you made it at your own
table, probably while wearing pajamas. (The true mark of fine art.)


