Table of Contents >> Show >> Hide
- Why Orange Place Cards Work (and Why They’re Not Just Fruit Wearing Name Tags)
- Fresh vs. Dried Citrus Slices: Choose Your Place-Card Personality
- Materials You’ll Need
- Step 1: Make Beautiful Dried Orange Slices
- Step 2: Choose a Place Card Style
- Step 3: Write Names That Look Good (Even If You’re Not a Calligrapher)
- Step 4: Assemble the Orange Place Cards
- Styling Ideas for a Festive Table
- Troubleshooting: Avoid These Common Citrus Crimes
- Food Safety Notes (Because These Are Still Real Oranges)
- Make-Ahead Timeline (So You’re Not Crafting at 1:00 a.m.)
- Budget and Sustainability Wins
- Conclusion
- Extra: Real-World Experiences and Lessons (So Your Citrus Doesn’t Spiral Into Chaos)
If your holiday table could talk, it would ask for two things: a little sparkle and a lot less stress.
Enter orange place cardstiny, cheerful name markers made with real citrus slices that look like stained glass,
smell like winter, and quietly make you look like the kind of host who definitely owns matching serving spoons (even if you don’t).
This guide walks you through making festive orange place cards with real citrus slices, from slicing and drying oranges
to assembling place cards that feel warm, elevated, and surprisingly easy. You’ll get multiple methods (oven and dehydrator),
practical styling ideas for Thanksgiving, Christmas, winter weddings, and moreplus a handful of “don’t do this unless you enjoy chaos” tips.
Why Orange Place Cards Work (and Why They’re Not Just Fruit Wearing Name Tags)
They instantly read “festive” without trying too hard
Orange is basically a shortcut to celebrationrich, warm, and naturally paired with holiday greens. On a tablescape, citrus brings color contrast
that looks intentional even if your centerpiece is… a candle you found in a drawer.
They add scent in the least obnoxious way possible
Real citrus gives off a clean, cozy aromaespecially when paired with rosemary, cinnamon, or evergreen sprigs.
It’s subtle and welcoming (unlike that one “holiday candle” that smells like a sugar cookie got into a fistfight with cologne).
They’re versatile: rustic, modern, minimalist, or fancy
Use twine for farmhouse vibes, velvet ribbon for formal dinners, vellum tags for modern weddings, or brass fasteners for a chic stationery feel.
Citrus plays well with nearly every style.
Fresh vs. Dried Citrus Slices: Choose Your Place-Card Personality
Fresh slices (same-day gatherings)
Fresh orange slices look juicy and bright, but they’re perishable. Use them if you’re assembling within a few hours of guests arriving,
and keep everything cool until it’s time to set the table.
Dried slices (make-ahead, low-stress hosting)
Dried orange slices are the MVP for holiday hosting because you can make them days (even weeks) ahead.
They’re lightweight, less messy, and hold their shape well for DIY place cards, garlands, and gift toppers.
Materials You’ll Need
Pick a simple set-up or go full “tablescape influencer.” Either works.
For the citrus slices
- Oranges (navel, Cara Cara, or blood oranges for drama)
- Sharp knife or mandoline (for even slices)
- Paper towels
- Baking sheets + parchment paper, or an oven-safe rack
- Optional: a light dusting of confectioners’ sugar or a pinch of cinnamon
For the place cards
- Cardstock, handmade paper, or pre-cut name tags
- Pen/marker (fine-tip works best), or a calligraphy pen
- Scissors or a paper trimmer
- Hole punch or needle/skewer (for threading)
- Twine, ribbon, or thin string
- Optional: vellum overlays, wax seals, brass fasteners, mini clothespins
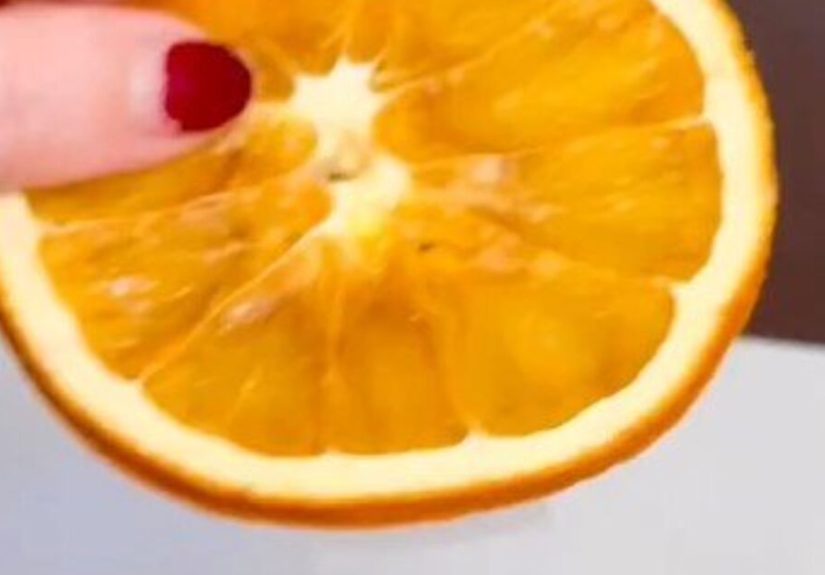
Step 1: Make Beautiful Dried Orange Slices
The goal is slices that look like amber stained glass: dry, translucent, and not browned into “campfire potato chip.”
Thickness, temperature, and patience are the whole game.
Pick the right oranges
Choose firm oranges with smooth skin. Since you’re using the whole slice, wash and scrub the peel well, then dry it.
(If your oranges are waxy, give them extra attentionyour table will thank you.)
Slice evenly
Aim for thin, consistent rounds so everything dries at the same pace. Many crafters land in the 1/8-inch to 1/4-inch range.
Thinner slices dry faster; thicker slices look more “chunky citrus charm” but take longer.
Blot like you mean it
Lay slices between paper towels and press gently. This quick step reduces drying time and helps prevent stickiness later.
Drying method A: Oven (most common, no special equipment)
- Preheat your oven lowtypically 170°F to 225°F.
- Arrange slices in a single layer on parchment or an oven-safe rack (racks encourage better airflow).
- Dry “low and slow” for 3–6 hours, depending on thickness and your oven’s personality.
- Flip slices about every hour (more often if your oven runs hot or you’re using parchment).
- Remove slices as they finish; let thicker ones continue drying.
- Cool completely on a rack before storing or crafting.
Optional “sparkle” upgrade: dust lightly with confectioners’ sugar before drying for a frosted look.
Keep it lightthis is not the moment to create a citrus crème brûlée situation.
Drying method B: Dehydrator (best for consistency)
Set a dehydrator around 135°F and dry until slices are no longer moist. Time varies widely based on thickness and fruit size,
but this method is wonderfully hands-off.
When are they actually done?
Finished slices should be dry to the touch and no longer sticky. They may be slightly pliable, but there shouldn’t be pockets of moisture.
If you’re storing them for later crafts, dryness mattersmoisture is basically an engraved invitation for mold.
Make-ahead storage tip: “Condition” your dried citrus
If you’re drying a big batch for holiday projects, consider a simple conditioning step: store slices loosely in a jar (not packed tight),
and check for moisture over the next several days. If condensation shows up, the slices need more drying time before long-term storage.
Step 2: Choose a Place Card Style
Your orange slice can hold a name in multiple ways. Pick the look that matches your eventand your available patience.
Option 1: Tag + twine (classic, rustic, fast)
Cut small tags (or use pre-made gift tags), punch a hole, and tie them onto the orange slice with twine or ribbon.
This style works beautifully for Thanksgiving place cards, Friendsgiving, and cozy winter dinners.
Option 2: Vellum name strip + fastener (modern, clean, slightly fancy)
Write or trace names on vellum strips, cut into neat rectangles, then attach to the orange slice with a brass paper fastener.
It’s polished, secure, and looks like you hired someone who owns a label maker on purpose.
Option 3: Mini tent card + citrus accent (traditional, wedding-friendly)
Fold cardstock into small “tents,” then lean a dried orange slice against each card (or attach with a dot of removable adhesive).
This is ideal for formal dinners where you want guests to easily see names from across the table.
Step 3: Write Names That Look Good (Even If You’re Not a Calligrapher)
The “print and trace” trick
If you want consistent lettering, print guest names in a light ink color and trace over them with a pen.
It’s neat, fast, and gives that “hand-lettered” vibe without requiring you to learn flourishing at midnight.
Centering without overthinking it
A simple rule: visually center the name with comfortable spacing above and belowespecially if you’re adding a ribbon bow,
a wax seal, or a tiny sprig of greenery on the card.
Pen tips for clean results
- Use a fine-tip pen for small tags (smudges love big markers).
- Test ink on your paper firstsome textured papers feather.
- Let ink dry fully before tying tags onto citrus (because fingerprints happen).
Step 4: Assemble the Orange Place Cards
Assembly method: Twine tie-on
- Poke a small hole near the rind of the dried orange slice using a needle or skewer.
- Thread twine through the slice and through the tag hole.
- Tie in a knot or bow. Trim ends.
- Optional: tuck in a rosemary sprig or dried flower before tightening the bow.
Assembly method: Brass fastener
- Pierce a small hole in the orange slice near the edge (go slowly to avoid tearing).
- Layer the name strip (vellum or cardstock) on top of the slice.
- Push the brass fastener through both and spread the prongs on the back.
- Optional: lightly antique the fastener for a vintage look.
Assembly method: Citrus + ribbon bundle
This one’s great for a “styled” look: thread ribbon through the orange slice, add a few dried florals or bunny tails,
then tie on the name tag. It reads instantly festive and photo-ready.
Styling Ideas for a Festive Table
Thanksgiving (warm and harvest-y)
- Pair oranges with linen napkins, twine, and cinnamon sticks.
- Add a small rosemary sprig to echo fall herbs.
- Use kraft tags or cream cardstock for cozy contrast.
Christmas and winter holidays (classic + evergreen)
- Combine dried oranges with pine, cedar, or eucalyptus.
- Use velvet ribbon (deep green, burgundy, or navy) for instant elegance.
- Add a tiny bell or star charm if you want extra sparkle.
Weddings and showers (fresh, modern, elevated)
- Try vellum name strips with minimalist lettering.
- Use blood oranges or Cara Cara slices for a softer blush tone.
- Pair with a wax seal if you want a stationery-forward look.
Brunch tables (bright and playful)
- Mix oranges with lemons for a sunny citrus palette.
- Use striped ribbon and simple handwritten tags.
- Scatter a few extra dried slices as light table confetti (edible-ish vibes, but decorative).
Troubleshooting: Avoid These Common Citrus Crimes
Problem: Slices turn brown
Your oven is likely too hot, or slices are too thin and drying too aggressively. Lower the temperature, use a rack,
and rotate your pans. Browning happens fastest at the edgeswatch those like a hawk with seasonal anxiety.
Problem: Slices curl like potato chips
Flip more often, and consider drying on a rack for airflow. If they curl anyway, press them gently flat while they’re still warm,
then let them finish cooling on a flat surface.
Problem: Slices feel sticky days later
They weren’t fully dried. Return them to low heat until dry to the touch. Sticky slices stored in an airtight container
are basically starting a tiny science project.
Problem: Mold (the villain of make-ahead crafts)
Mold usually means hidden moisture. Dry thoroughly, cool fully before storing, and keep slices in a cool, dark place.
If you’re making a big batch far in advance, the conditioning step helps you catch moisture before it becomes a problem.
Food Safety Notes (Because These Are Still Real Oranges)
If your dried oranges are used as decor and handled often, treat them as decorative rather than edible garnishes.
For edible use (cocktails, snacks), keep a separate batch dried on clean racks with food-safe handling, and avoid craft materials
like hot glue, floral wire, or unknown inks.
For fresh-slice place cards, assemble close to serving time and avoid placing citrus directly on hot food.
If you’re concerned about allergies or sensitivities, keep decor elements simple and clearly decorative.
Make-Ahead Timeline (So You’re Not Crafting at 1:00 a.m.)
- 1–2 weeks ahead: Dry orange slices; store once fully dry.
- 2–3 days ahead: Cut tags and prep name cards.
- Day before: Write names and do a quick assembly test run.
- Day of: Assemble, add greenery/florals, set on plates.
Budget and Sustainability Wins
Citrus place cards are affordable because the star ingredient is literally a bag of oranges. They’re also low-waste:
compost citrus after the event (if it hasn’t been glued or inked), reuse twine/ribbon, and repurpose extra dried slices
as garland, gift toppers, or simmer-pot ingredients.
Conclusion
Festive orange place cards with real citrus slices are one of those rare DIYs that look impressive but don’t demand a crafting degree.
Dry a batch of orange slices, pair them with simple tags, and you’ve instantly upgraded your table setting with color, scent, and personality.
Best of all: guests love seeing their names styled with a little edible-adjacent charmand you’ll love that the “wow” factor is mostly just oven time.
Extra: Real-World Experiences and Lessons (So Your Citrus Doesn’t Spiral Into Chaos)
Anyone who’s made DIY orange place cards more than once tends to learn the same lessonsusually after an overly optimistic first attempt.
The biggest one is that ovens have moods. The same temperature can behave differently depending on your pan, rack position, and whether your oven
runs hot. If you’ve ever checked your slices at hour two and thought, “These look perfect,” only to return at hour three and find “toasty edges,”
you’re in good company. A simple habit helps: rotate the tray every hour and treat the edges like the first to tattle on trouble.
Slice thickness is the second real-life teacher. It’s tempting to eyeball it, but uneven slices finish at different times, and that’s where the
“why are these still sticky?” mystery begins. Many hosts get into a rhythm: slice, blot, line up, then accept that some slices will come out early.
Pulling the dry ones first keeps them bright and prevents that over-baked brown ring. It also makes you feel oddly accomplishedlike you just
managed a tiny, citrus-based production line.
Then there’s the “ink meets paper” situation. On smooth cardstock, most pens behave. On textured or handmade paper, some inks feather like
they’re auditioning for a watercolor painting. People who want a clean look often test a few pen options firstor use the print-and-trace method
so the final lettering stays consistent. The best part is how quickly confidence grows: after five names, you’ll write “Christopher” without
panicking, and by the tenth card you’ll start giving yourself unearned typographic opinions.
Assembly choices also become personal. Twine is forgiving, fast, and charming. Ribbon looks luxurious but can slip if you don’t tie it snugly.
Brass fasteners are tidy and secure, but you’ll want to pierce holes gently so you don’t crack a slice. People who host larger groups tend to
prefer the method that survives handlingbecause guests pick things up, turn them around, and occasionally drop them like they’re testing
structural integrity. A well-attached name tag saves you from crawling under the table before dessert.
Another funny, consistent experience: citrus place cards become conversation starters. Guests will smell them before they fully notice them.
Someone will ask if the oranges are edible, and someone else will say, “This is so cutewhy didn’t I think of that?” (This is your cue to nod
like a calm genius.) It’s also common for guests to take them homeespecially if the tags are pretty or the orange slice is tied with ribbon.
If you secretly love that, make a few extras so you’re not left with an empty table and a lingering sense that your centerpiece was “borrowed.”
Finally, crafters often learn that less really is more. One orange slice, one clean tag, one small accent (like rosemary) is enough.
When you add too many extrasflowers, charms, thick bows, multiple stringsit can start to look like the place card is wearing a costume.
The most memorable tables are usually the ones where the citrus is the hero, the names are easy to read, and the whole setup feels effortless.
Because the true holiday flex isn’t complicated décorit’s making something beautiful that doesn’t make you tired.


