Table of Contents >> Show >> Hide
- What Stained Glass Really Is
- Copper Foil vs. Lead Came: Which Method Should Beginners Choose?
- What You Need to Get Started
- Safety First: The Part Nobody Should Skip
- Step-by-Step Guide to Making Your First Stained Glass Project
- Common Beginner Mistakes to Avoid
- Tips That Make a Huge Difference
- Frequently Asked Questions About How to Make Stained Glass
- Beginner Experiences: What Making Stained Glass Really Feels Like
- Final Thoughts
Stained glass has a strange superpower: it makes ordinary sunlight look like it got dressed up for a special occasion. One minute your window is just a window, and the next it is throwing jewel-toned confetti across the room. That magic is exactly why so many beginners fall in love with the craft. The good news is that getting started with stained glass is absolutely possible. The better news is that your first project does not need to look like it belongs in a cathedral built in 1324.
This beginner’s guide breaks down how to make stained glass in a way that feels practical, friendly, and a lot less intimidating than staring at a wall of glass sheets wondering why one of them costs more than your lunch budget for the week. You will learn the basic process, the tools beginners usually need, the difference between copper foil and lead came, common mistakes to avoid, and what real first-project experiences are usually like.
Note: This guide is safety-first and beginner-focused. For the hands-on phases that involve cutting glass, grinding edges, and soldering seams, it is smartest to learn in a beginner class, community studio, or with an experienced instructor before working on your own.
What Stained Glass Really Is
At its core, stained glass is colored or textured glass that gets cut into shapes and joined together to create a design. Some projects are simple sun catchers. Others become window panels, cabinet inserts, lampshades, ornaments, or wall art. Traditional stained glass often uses lead came, which is a channel that holds each piece of glass. Many beginners start with the copper foil method instead, because it works well for smaller projects and more detailed shapes.
If you are just getting started, think less “massive church window” and more “small geometric panel that will not emotionally destroy me by lunchtime.” A beginner-friendly first project is usually a small sun catcher with six to ten pieces, simple curves, and no razor-sharp interior corners.
Copper Foil vs. Lead Came: Which Method Should Beginners Choose?
Copper Foil
The copper foil method wraps each glass piece in adhesive copper tape so the seams can be joined together. It is especially popular for small projects, intricate shapes, and hobby work. If you have ever admired a delicate stained-glass flower, bird, or tiny mushroom that looked too fussy for chunky metal lines, copper foil was probably involved.
For beginners, copper foil is often the easier entry point because it is flexible, works well for smaller pieces, and does not require the same setup as a large lead came panel. It is also great for three-dimensional work like boxes and lampshades once you gain confidence.
Lead Came
Lead came is the more traditional method. It creates stronger, more architectural-looking lines and is often used for larger geometric panels and exterior-style windows. It has a classic look that feels crisp, structured, and timeless. It also brings additional considerations around lead hygiene, waterproofing, and assembly.
For a first stained glass project, most hobbyists do best with copper foil. You can always graduate to lead came once you have a feel for pattern making, glass choice, fit, and finishing.
What You Need to Get Started
A beginner stained glass setup does not have to be gigantic, but it does need to be thoughtful. The exact supply list varies by method, yet most beginners start with the following categories:
- Stained glass sheets in beginner-friendly colors and textures
- A simple pattern
- Glass cutter and breaking tools
- Glass grinder
- Copper foil if you are using the foil method
- Flux and soldering equipment
- Finishing materials such as patina, polish, and hanging hardware
- Safety glasses, gloves if preferred, apron, and a cleanable work surface
The smartest beginner move is not buying every shiny tool in existence. It is choosing a basic setup, learning the sequence, and making one small finished piece from start to finish. That first completed project will teach you more than a mountain of unopened supplies ever will.
Safety First: The Part Nobody Should Skip
Stained glass is beautiful, but it is not a craft for carelessness. You are working around sharp edges, fine glass dust, chemicals, hot tools, and sometimes lead-containing materials. That does not mean you should panic. It does mean you should respect the process.
Work in a well-ventilated area. Do not eat or drink at your bench. Wash your hands after handling materials, especially if your process includes lead came or traditional solder. Keep children and pets away from the workspace. Clean up carefully instead of brushing debris around like you are starring in a dramatic movie montage. The goal is simple: bring home pretty glass art, not avoidable bad habits.
If you are pregnant, working around young children, or concerned about lead exposure, talk with a qualified instructor and choose a safety plan before starting. Many beginners also prefer taking a local class first so they can learn safe habits early instead of trying to unlearn sloppy ones later.
Step-by-Step Guide to Making Your First Stained Glass Project
Step 1: Choose a Small, Simple Pattern
Your first design should be uncomplicated. Look for a project with a limited number of pieces, generous shapes, and minimal tight curves. A star, leaf, diamond sun catcher, or easy floral design works well. Tiny puzzle-piece patterns may look adorable online, but they are not ideal when you are still figuring out how all the moving parts fit together.
Good beginner patterns usually have clear, readable lines and balanced pieces. If one section looks like a glass confetti explosion, save it for later.
Step 2: Select Glass That Matches the Design
Choosing glass is where stained glass starts to feel dangerously fun. You may see transparent cathedral glass, more opaque opalescent glass, textured sheets, streaky blends, and colors that seem to glow even before sunlight hits them. For a first project, choose glass that fits the mood of your pattern and is not too visually chaotic.
Example: a simple monstera leaf might look great in a streaky green with a soft texture, while a geometric sun catcher might look cleaner in transparent amber, blue, or clear textured glass. When in doubt, fewer colors often look more polished.
Step 3: Prepare and Label the Pattern
Print or draw your pattern at full size and label every piece. Numbering pieces saves an absurd amount of confusion later. Trust this now, appreciate it later. Many beginners also keep one master copy untouched and use additional copies for cutting templates or organizing the layout.
This is also the moment to think about seam lines. The metal lines are not just structural. They are part of the design. A good pattern makes those lines feel intentional, not accidental.
Step 4: Cut the Glass Pieces
This is the stage that makes beginners feel like either artists or raccoons opening a snack wrapper. Sometimes both in the same afternoon. You place each pattern piece on the chosen glass and cut the shapes as accurately as possible. The goal is not perfection on the first try. The goal is getting pieces that are close enough to refine.
Start with smoother shapes and avoid forcing complicated cuts before you understand how your tools behave. Many beginners discover that stained glass is partly about patience and partly about accepting that one weird little shape may need a second attempt. That is normal. In fact, it is practically a rite of passage.
Step 5: Grind for a Better Fit
After cutting, the glass pieces usually need edge refinement so they fit together more cleanly. This is where beginners realize stained glass is not just about making separate pieces. It is about making those pieces cooperate. Grinding helps smooth rough edges, improve fit, and get the pattern closer to the design you planned.
A better fit makes later steps easier. Sloppy fit creates wider seams, uneven lines, and extra frustration. In stained glass, good prep is not glamorous, but it is very effective.
Step 6: Wash, Dry, and Apply Copper Foil
Once the pieces fit well, they need to be clean and dry before foiling. Copper foil wraps the edge of each glass piece and creates the metal surface that can later be joined at the seams. The foil should be centered and pressed down neatly so it lies smoothly against the glass.
This sounds easy until you are doing it on piece number seven and realize one side looks crisp while the other looks like the tape had an argument with gravity. Take your time. Neat foiling has a major effect on how clean your finished seams will look.
Step 7: Assemble and Join the Pieces
Arrange the foiled pieces on your pattern and check the fit one more time. Then the seams are joined. This is the stage most beginners should learn with live instruction, because heat, fumes, metal flow, and tool control all matter. A class or studio session helps you build correct habits from day one.
What matters most for beginners is understanding the purpose of this stage: you are not just sticking parts together. You are creating structure, visual rhythm, and strength. Slow, steady work nearly always looks better than rushing.
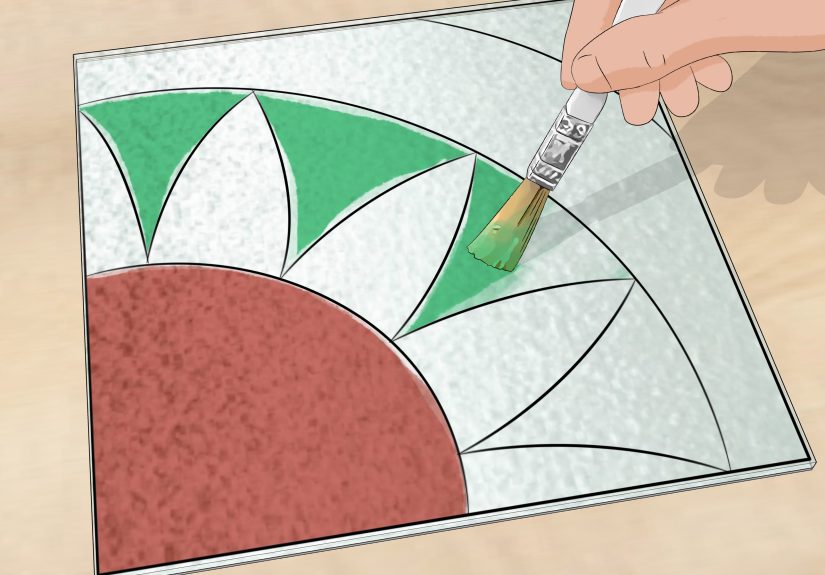
Step 8: Finish, Frame, and Hang
Once the piece is joined, it gets cleaned and finished. Some makers darken the metal lines with patina for a black or copper look. Others prefer the bright silver finish. A small piece may get hanging loops and chain. A panel may need additional border support or framing.
This is the victory lap. Clean the glass thoroughly, hold it up to the light, and enjoy the moment where your pile of separate parts finally turns into actual stained glass. It is an excellent feeling and one of the main reasons people immediately start planning project number two before project number one is even fully dry.
Common Beginner Mistakes to Avoid
- Choosing a pattern that is too complicated: Start simple and win early.
- Ignoring fit: Gaps create messier seams and weaker results.
- Skipping cleanup between stages: Dirt, residue, and rushed prep can sabotage the finish.
- Buying too much too soon: A small starter setup beats a giant pile of intimidating equipment.
- Treating safety as optional: Protective habits are part of the craft, not an extra.
- Expecting perfection on the first project: Your first piece is supposed to teach you, not audition for a museum.
Tips That Make a Huge Difference
Use a small practice project before attempting a panel meant for a real window. Choose glass colors in daylight, not under random overhead lighting that makes everything look mysteriously beige. Keep your pattern pieces organized. Take photos as you work so you can see progress and spot alignment issues. Most importantly, give yourself permission to remake a piece when needed. Skilled stained glass artists are not magically born knowing things. They just have a longer relationship with trial and error.
Frequently Asked Questions About How to Make Stained Glass
Is stained glass hard to learn?
It is learnable, but it does take patience. Beginners usually grasp the overall process fairly quickly, while precision and consistency take more time.
What is the best first stained glass project?
A small geometric sun catcher, star, heart, leaf, or simple flower is ideal. Choose something with a limited piece count and smooth shapes.
How much does it cost to get started?
The cost varies depending on whether you buy individual tools, a starter kit, or take a class. For many beginners, a class is the best first investment because it gives you access to tools, materials, and instruction without committing to a full home setup immediately.
Should I start with copper foil or lead came?
Most hobby beginners start with copper foil. Lead came is beautiful and traditional, but it usually makes more sense after you understand basic patterning, fit, and finishing.
Beginner Experiences: What Making Stained Glass Really Feels Like
The first time most people try stained glass, they expect one of two outcomes: either they will instantly reveal their hidden genius and become a luminous-glass wizard by dinner, or they will create a tragic, crooked mess and never touch the craft again. The truth is much more interesting. The first experience is usually a mix of fascination, mild confusion, tiny victories, and one oddly emotional moment when sunlight passes through your finished piece for the first time.
Beginners often say the biggest surprise is how physical the process feels. Before trying it, stained glass can seem delicate and dreamy, like a craft performed by floating artists in perfect linen aprons. In reality, there is measuring, organizing, adjusting, cleaning, and paying attention to how every piece relates to the next. It is art, yes, but it is also problem-solving. Every project asks small questions: Does this shape fit? Does this line feel balanced? Does this color need contrast? Why is this one piece acting like it pays rent and owns the studio?
Another common beginner experience is discovering how much patience matters. You cannot bully stained glass into becoming beautiful. If the fit is off, the fit is off. If a piece breaks the wrong way, you pause and try again. That can feel frustrating at first, especially if you are used to crafts with more instant gratification. But many people end up loving stained glass for exactly that reason. It slows you down in a useful way. It asks you to focus. It rewards careful attention instead of speed.
There is also a strong emotional side to the first finished piece. Even if the seams are not perfectly smooth and one side is a little more “charming” than “precise,” the result often feels special. You made something that changes with the light. Morning sun makes it one artwork, afternoon light makes it another, and cloudy days give it a softer mood entirely. That dynamic quality is part of the addiction, frankly. One project can make you start thinking about color in a completely new way.
Many beginners also talk about how satisfying it is to work with tangible materials in a very digital world. There is no app notification in stained glass. The glass does not care about your inbox. The project only responds to attention, repetition, and practice. For people who spend all day on screens, that can feel unexpectedly refreshing.
And then there is the confidence factor. Your first project might not be perfect, but it proves you can learn the language of the craft. You start recognizing glass types, understanding why some patterns are easier than others, and seeing how metal lines shape the final design. By the end of the process, you are no longer just someone who admires stained glass. You are someone who has made it. That is a different feeling entirely, and it tends to stick.
Final Thoughts
If you want to learn how to make stained glass, the best place to begin is not with a giant masterpiece. It is with a simple project, a realistic plan, and solid safety habits. Start with copper foil, choose an easy pattern, learn the basic sequence, and let your first piece teach you what your second piece needs. That is how most stained glass journeys begin: one small panel, one bright patch of sunlight, and one very satisfying realization that you are officially hooked.


