Table of Contents >> Show >> Hide
- Why Garden Plot Preparation Matters
- How to Prepare a Garden Plot: 13 Steps
- Step 1: Choose the Right Location
- Step 2: Check Drainage Before You Commit
- Step 3: Test the Soil
- Step 4: Learn Your Soil Type
- Step 5: Clear Grass, Weeds, and Debris
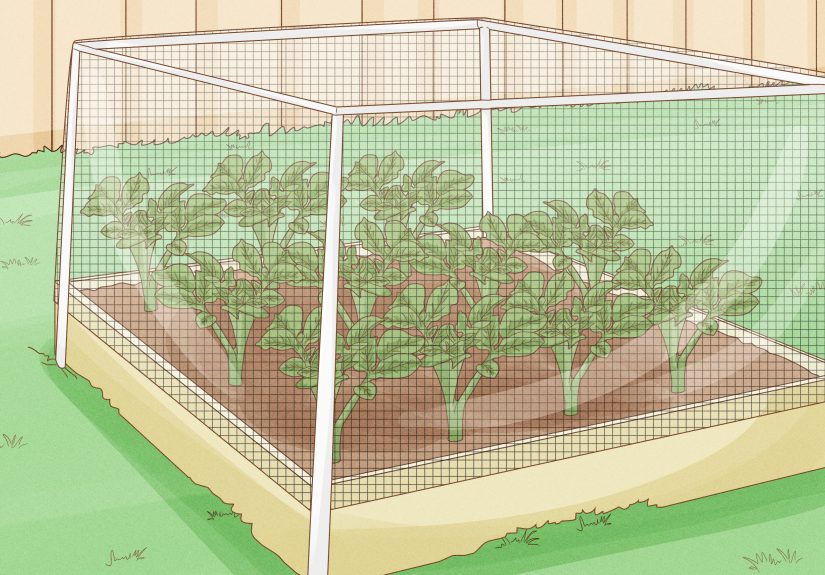
- Step 6: Mark the Shape and Size of the Plot
- Step 7: Don’t Work the Soil When It’s Too Wet
- Step 8: Loosen the Soil
- Step 9: Add Organic Matter
- Step 10: Adjust pH and Nutrients Based on the Soil Test
- Step 11: Create a Smooth, Weed-Free Seedbed
- Step 12: Plan Paths, Rows, and Plant Groupings
- Step 13: Mulch and Let the Plot Settle
- Common Mistakes to Avoid When Preparing a Garden Plot
- Extra Practical Experience: What Preparing a Garden Plot Actually Feels Like
- Final Thoughts
- SEO Tags
Starting a garden is one of those wonderfully optimistic life choices, right up there with buying matching food containers and believing you’ll fold laundry immediately. But a thriving garden doesn’t begin with seeds. It begins with the plot itself. If your soil is compacted, poorly drained, weed-packed, or nutritionally confused, your tomatoes will not bravely “figure it out.” They’ll sulk.
The good news is that preparing a garden plot is not mysterious, expensive, or reserved for people who casually use phrases like “soil tilth” at dinner. With the right prep work, you can build a healthy foundation for vegetables, herbs, flowers, or a little edible jungle. The key is to work with your site, understand your soil, and improve the bed step by step rather than attacking the yard like you’re filming a home renovation montage.
This guide walks you through 13 practical steps to prepare a garden plot, from choosing the right location to testing soil, clearing weeds, improving drainage, and setting up a bed that is easy to plant and maintain. Whether you’re starting your first backyard vegetable garden or rebooting a neglected patch of ground, these steps will save time, reduce mistakes, and give your plants a much better opening act.
Why Garden Plot Preparation Matters
Great gardens are built from the ground upliterally. A well-prepared garden plot helps roots spread easily, improves water movement, reduces weed pressure, and makes nutrients more available to plants. It also helps you avoid common beginner problems like planting in the shade, overworking wet soil, or adding random amendments because the bag looked confident.
In other words, soil preparation for a garden plot is not just busywork. It is the difference between “Look at my peppers!” and “Why is this zucchini the size of a paperclip?”
How to Prepare a Garden Plot: 13 Steps
Step 1: Choose the Right Location
Before you touch a shovel, choose your site wisely. Most vegetables need at least 6 to 8 hours of direct sunlight each day, so a plot tucked behind a fence, garage, and dramatic maple tree is probably not the one. Leafy greens can tolerate a bit less sun, but fruiting crops like tomatoes, peppers, squash, and cucumbers are sun worshippers.
Pick a spot with convenient access to water, decent air circulation, and enough room to move around comfortably. Avoid areas where tree roots compete for moisture and nutrients. If you’re deciding between “perfect view” and “easy hose access,” choose the hose. Your future self, standing in July heat with a watering can, will be grateful.
Step 2: Check Drainage Before You Commit
Plants like water, but they do not enjoy sitting in it like tiny unhappy bathers. Good drainage is essential for healthy roots. After rain, observe the area. If puddles linger for a day or two, that’s a warning sign.
You can also do a simple drainage test by digging a hole, filling it with water, and seeing how quickly it drains. If water disappears very slowly, you may need to improve the soil, build up the bed, or switch to a raised bed. Poor drainage can lead to root rot, weak growth, and the gardening equivalent of heartbreak with extra mud.
Step 3: Test the Soil
This step is wildly unglamorous and wildly important. A proper soil test tells you about pH, nutrient levels, and organic matter, which means you can amend the soil based on reality instead of vibes. Many extension services and local labs offer inexpensive testing.
If you’re growing food in an urban or older residential area, consider testing for lead as well. That is especially smart near old painted structures, busy roads, or sites with an unknown history. A soil test helps you decide whether your plot is ready to use, needs adjustment, or would be safer as a raised bed filled with clean soil.
Step 4: Learn Your Soil Type
Not all soil behaves the same way. Sandy soil drains fast but dries out quickly. Clay soil holds nutrients well but may compact and drain poorly. Loam is the dreamboat in the group because it balances drainage, moisture retention, and structure.
Knowing your soil type helps you decide how much compost to add, whether tilling is worth it, and how often you’ll need to water later. The goal isn’t to turn every yard into textbook loam overnight. The goal is to improve what you have and stop expecting heavy clay to act like a raised bed full of fluffy mix just because you asked nicely.
Step 5: Clear Grass, Weeds, and Debris
Now it’s time to clear the plot. Remove weeds, old roots, sticks, rocks, and any trash lurking in the soil. If the area is covered in lawn, you have options: cut out the sod, smother it with cardboard and compost, use a low-till approach, or cultivate the area depending on your style and timeline.
Try not to leave aggressive perennial weeds behind. Bermuda grass, bindweed, and their annoying cousins do not retire gracefully. They return like they pay rent. If you’re dealing with a particularly weedy area, smothering with cardboard and organic matter for several weeksor even a seasoncan save a lot of future frustration.
Step 6: Mark the Shape and Size of the Plot
Use stakes, string, or a hose to outline the bed before digging. This helps you think through layout, access, and scale. For in-ground beds, keep width manageable so you can reach the center without stepping on the soil. A common rule is around 3 to 4 feet wide, with paths in between.
Why does this matter? Because walking on the bed compacts the soil you just worked so hard to improve. That’s like making a smoothie and then pouring it into your laptop. Avoidable, regrettable, and not part of the plan.
Step 7: Don’t Work the Soil When It’s Too Wet
This is one of the most overlooked rules in garden bed preparation. If the soil is soggy, wait. Working wet soil smears and compacts it, especially if you have clay. A good test is to squeeze a handful. If it forms a sticky ball that won’t crumble, the soil is too wet. If it breaks apart easily, you’re in business.
Patience here pays off. Gardeners who rush this step often spend the rest of the season wondering why the soil turned into a brick factory.
Step 8: Loosen the Soil
Once conditions are right, loosen the top layer of soil with a digging fork, shovel, broadfork, hoe, or tiller. In many home gardens, you only need to work the upper several inches where most roots will grow. A light turning is often enough, especially if you are building soil over time with compost and mulch.
You do not need to pulverize the plot into dust. In fact, over-tilling can damage soil structure and bring buried weed seeds to the surface. Think “open and aerate,” not “recreate a beach.” If you’re following a low-till or no-till method, you may disturb the soil very little and rely more heavily on compost and mulch to improve it gradually.
Step 9: Add Organic Matter
If there is a universal upgrade for most garden plots, it’s organic matter. Finished compost improves structure, supports soil life, helps clay drain better, and helps sandy soil hold moisture longer. Spread a generous layer of compost over the bed and work it into the topsoil if you’re preparing a new plot, or use it as a top-dressing in more established beds.
Well-aged compost is usually a safer bet than fresh manure. If you use manure, make sure it is fully composted and appropriate for food gardens. Fresh manure can introduce pathogens, weed seeds, and too much nitrogen. Translation: your garden plot should smell earthy, not like a regrettable petting zoo decision.
Step 10: Adjust pH and Nutrients Based on the Soil Test
Most vegetables grow best in slightly acidic soil, generally around pH 6.0 to 6.8. If your test shows the pH is off, adjust it before planting. Lime can raise pH over time, while sulfur can lower it in some situations. The important part is to follow test recommendations rather than throwing amendments around like confetti.
The same goes for fertilizer. If your soil already has plenty of phosphorus or potassium, adding more may be unnecessary. A soil test helps you avoid overspending, overfertilizing, and accidentally growing enormous leaves with no fruit. Yes, your squash can become an overachiever in all the wrong ways.
Step 11: Create a Smooth, Weed-Free Seedbed
Before planting, rake the surface level and break up large clods. Remove stones, root fragments, and anything else that would interfere with seed-to-soil contact. A good seedbed is fine-textured, loose on top, and relatively even.
This step matters most if you’re direct-sowing crops like carrots, beans, beets, radishes, or lettuce. Tiny seeds do not appreciate landing in a crater between hard dirt chunks. If you’re transplanting tomatoes or peppers, the surface can be a bit rougher, but a tidy bed still makes watering, mulching, and spacing easier.
Step 12: Plan Paths, Rows, and Plant Groupings
Preparation is not just about the soilit is also about the layout. Group plants by similar water and sunlight needs. Put tall crops where they won’t shade shorter ones. Keep paths obvious and stable so you are not stomping through the bed every time you want a handful of basil.
If you’re growing vegetables, orient rows so plants get consistent sunlight when possible. Consider leaving room for supports like tomato cages, trellises, or netting. This is also a smart time to think about crop rotation. Repeating the same plant family in the same spot year after year can increase disease and pest issues.
Step 13: Mulch and Let the Plot Settle
Once the plot is prepared and plantedor even just prepared and waitingadd mulch where appropriate. Organic mulches such as straw, shredded leaves, clean grass clippings, or compost help suppress weeds, moderate soil temperature, and reduce moisture loss.
If you’ve just built a new bed, giving it a little time to settle before planting delicate seeds can help. For transplants, you can usually move ahead quickly. For direct seeding, a settled, level surface is helpful. Mulch later if needed, once seedlings are established. A bare plot may look neat for five minutes, but weeds view that as an invitation, not a warning.
Common Mistakes to Avoid When Preparing a Garden Plot
Even enthusiastic gardeners can sabotage a new bed with a few classic errors. The first is skipping the soil test and guessing. The second is planting in the wrong place because it “looked cute.” Others include tilling too deeply, adding too much compost every year, failing to remove perennial weeds, and walking on the bed after loosening it.
Another common mistake is thinking raised beds automatically solve every problem. They are useful for poor drainage, shallow soils, and contaminated sites, but they still need good soil, smart watering, and reasonable expectations. A raised bed full of bad soil is still bad soiljust more expensive and surrounded by lumber.
Extra Practical Experience: What Preparing a Garden Plot Actually Feels Like
On paper, preparing a garden plot sounds clean and methodical. In real life, it often begins with confidence, a rake, and the discovery of approximately 900 hidden rocks. The first surprise for many gardeners is how much easier the job becomes once the location is truly right. A sunny area near the house and close to a water source feels almost unfairly convenient compared with a remote patch at the back fence. When a plot is easy to reach, it gets watered, weeded, and admired more oftenand that alone improves results.
Another common experience is learning that soil has moods. A plot that looks fine after rain can still be too wet to work. Many gardeners make the mistake of digging too early in spring, only to create dense clods that harden later. Waiting a few extra days can make the difference between crumbly, workable soil and a bed that resembles broken pottery. It feels slow in the moment, but it saves effort for months.
People also tend to underestimate the power of compost. The improvement is not always dramatic on day one, but after a season or two, beds amended with compost become easier to dig, easier to plant, and more forgiving during hot weather. Clay becomes less stubborn. Sandy soil stops draining like a colander. You start noticing more worms, fewer crusty dry patches, and healthier roots when you pull spent plants at the end of the season.
Weed control is another area where experience changes behavior fast. The first time you prepare a plot without thoroughly removing perennial weeds, you learn a memorable lesson. They come back through mulch, around seedlings, and directly into your weekend plans. Gardeners who take time to smother sod, edge the plot, and keep paths defined usually have a calmer season. It is not glamorous work, but it is deeply satisfying to plant into a clean, organized bed instead of waging war with grass runners in July.
Raised beds often enter the conversation after a few hard-earned lessons too. If native soil is compacted, poorly drained, or questionable for food growing, a raised bed can feel like a cheat code. But even there, experience teaches balance. New gardeners sometimes overfill beds with pure compost or lightweight bagged mix that dries out too fast. A better experience usually comes from a balanced blend with mineral soil, organic matter, and a plan for topping up over time rather than rebuilding from scratch every season.
Perhaps the biggest lesson from preparing a garden plot is that perfection is unnecessary. A well-prepared bed is not one that looks like it was engineered by a landscape architect with a ruler obsession. It is one that drains reasonably well, has improved soil, receives enough sun, and is easy enough to maintain that you’ll keep going. The best garden plots are often the ones that get a little better every season. You notice where water pools, where shade creeps in, where tomatoes outgrow their corner, and where mulch works best. Over time, the plot becomes less of a “project” and more of a reliable growing space that fits your yard and your habits. That is the real win.
Final Thoughts
If you want a productive garden, start by preparing the plot with care. Choose a sunny site, test the soil, improve it with organic matter, avoid working it when wet, and create a bed layout that keeps roots happy and your feet out of the planting area. These simple steps build long-term soil health and make every later taskplanting, watering, mulching, and harvestingeasier.
And that is the lovely truth about gardening: a little patience at the beginning saves a lot of trouble later. Prepare the soil well, and your plants have a fighting chance to become glorious. Ignore the prep, and you may still grow somethingbut mostly character.


