Table of Contents >> Show >> Hide
- Step Zero: Figure Out Which Gorilla Glue You Spilled
- Your Basic Gorilla Glue Removal Kit
- How to Remove Wet Gorilla Glue
- How to Remove Dried Gorilla Glue from Common Surfaces
- What Not to Do
- Three Real-World Examples
- When to Stop DIY and Call for Help
- Final Thoughts
- Extra Experience and Lessons from Real Cleanup Situations
- SEO Tags
Few household mishaps inspire panic quite like spotting a shiny blob of Gorilla Glue where it absolutely does not belong. One second you are fixing a chair leg like a weekend hero, and the next you are bonding your fingers, the countertop, and possibly your dignity into one united structure. The good news: most Gorilla Glue messes can be removed. The bad news: there is no single magic trick that works on every surface.
That is the real secret professionals know. “How to remove Gorilla Glue” is not one question. It is several smaller questions: Which Gorilla product is it? Is it wet or cured? Is the surface glass, wood, plastic, fabric, painted metal, or skin? The right answer depends on all three. Use the wrong method and you can trade a glue spot for a melted finish, cloudy plastic, or one very cranky tabletop.
This guide breaks it all down in plain American English, with practical, surface-by-surface advice, safe removal methods, and a few lessons learned the hard way by DIYers everywhere. Let’s get you unstuck without turning a small accident into a full renovation episode.
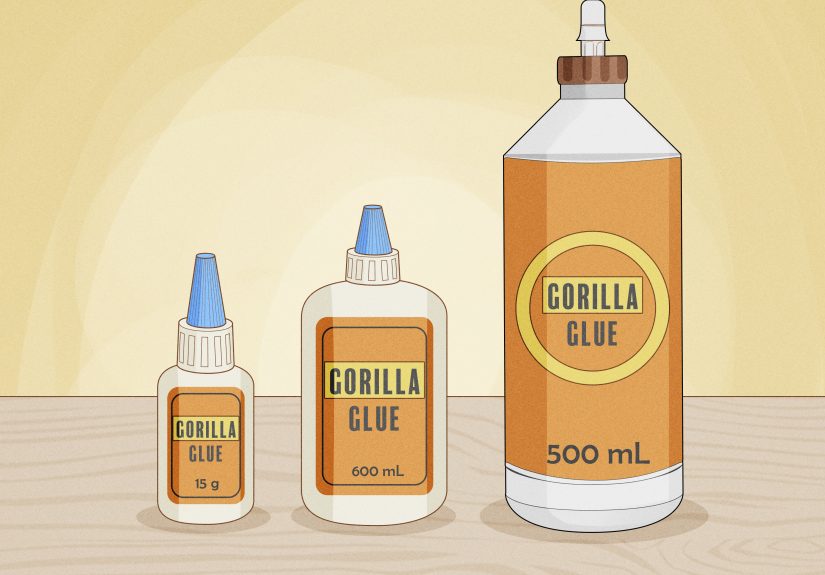
Step Zero: Figure Out Which Gorilla Glue You Spilled
Before you grab acetone like a cowboy reaching for a holster, identify the product. Gorilla makes several adhesives, and they do not all clean up the same way.
| Gorilla product type | What it acts like | Best first move | Common removal approach |
|---|---|---|---|
| Original Gorilla Glue | Polyurethane glue that expands as it cures | Blot wet squeeze-out fast | Mechanical removal once cured: scrape, sand, chisel carefully |
| Gorilla Super Glue or Super Glue Gel | Fast-bonding cyanoacrylate | Wash fresh spills quickly | Warm soapy water first, then acetone on suitable surfaces |
| Gorilla Wood Glue | PVA-style wood adhesive | Wipe wet glue with a damp cloth | Scrape and sand after it dries |
| Gorilla Clear Grip and similar flexible adhesives | Flexible contact-style adhesive | Wipe uncured glue promptly | Scrape cured residue; solvents may help before it sets |
If you still have the bottle, read the label first. That tiny step can save you a giant headache. For example, acetone often helps with Gorilla Super Glue, but Original Gorilla Glue is usually better handled by blotting while wet and scraping or sanding after it cures. In other words, the remover is not the boss here. The adhesive chemistry is.
Your Basic Gorilla Glue Removal Kit
You do not need a lab coat, just the right tools and a little patience.
- Microfiber cloths or paper towels
- Warm water and dish soap
- Plastic scraper, old gift card, or plastic putty knife
- Cotton swabs or cotton pads
- Acetone or acetone-based nail polish remover
- Isopropyl alcohol
- White vinegar
- Vegetable oil, mineral oil, or petroleum jelly
- Soft-bristle toothbrush
- Fine sandpaper
- Hair dryer set to low
- Rubber gloves and good ventilation
One more rule before you begin: always spot-test any solvent in a hidden area first. Acetone can be effective, but it can also dull finishes, discolor paint, and turn some plastics into a sad, hazy science experiment.
How to Remove Wet Gorilla Glue
Fresh glue is annoying. Cured glue is a lifestyle problem. If the spill is still wet, move quickly.
For Original Gorilla Glue
Blot, do not smear. Use a dry cloth or paper towel to lift away as much wet glue as possible. If residue remains on a project surface, follow the product directions for cleanup and use great caution with any thinner. The goal is to remove the squeeze-out before it expands and hardens.
For Gorilla Super Glue
Blot the fresh spill with a cloth lightly dampened with acetone or isopropyl alcohol, but keep the liquid controlled. You want to target the glue, not flood the entire surface. On skin, wash right away with soap and water before the bond fully sets.
For Gorilla Wood Glue
This is the nice one. Use a clean damp cloth, wipe the excess, and keep switching to a clean section of the cloth so you are lifting glue instead of spreading it around like frosting.
For Clear Grip or flexible adhesives
Wipe up uncured glue fast with a dry cloth, then follow with a compatible cleaner such as acetone, isopropyl alcohol, or a citrus-based solvent if the label allows it.
How to Remove Dried Gorilla Glue from Common Surfaces
1. Glass, Metal, Tile, and Ceramic
These hard, nonporous surfaces are usually the easiest. Start with warm soapy water if the glue is Gorilla Super Glue. If that does not loosen it, move to acetone on a cotton pad. Let it sit briefly, then work gently with a plastic scraper. On metal, white vinegar or rubbing alcohol can also help loosen residue when you want a gentler option.
If there is still a thin film left behind, use a soft toothbrush or cloth and repeat. For stubborn patches, low heat from a hair dryer can help soften adhesive residue on glass or metal before scraping. Just do not turn your kitchen into a dragon scene. Low heat is plenty.
2. Finished Wood
Wood is where people get overconfident and then very quiet. If the spill is Original Gorilla Glue or Wood Glue and it has already cured, careful scraping and light sanding usually work best. Hold the scraper low, shave the glue little by little, and stop before you gouge the finish.
If the spill is Gorilla Super Glue, acetone can sometimes help, but it may also strip stain, soften finish, or leave a dull mark. That means the hidden-spot test is not optional. Oil-based options can be gentler for some finished wood surfaces, but they can also leave residue that needs cleanup afterward. If the glue landed on heirloom furniture, slow down and consider a furniture professional before you attack Great-Grandma’s side table with chemistry.
3. Plastic and Acrylic
Plastic is the diva of glue removal. It looks sturdy, but it can react badly to aggressive solvents. Start with warm soapy water and a cloth compress to soften the glue. Then try a plastic scraper or your fingernail. If that fails, use the smallest possible amount of acetone only after testing a hidden area, because some plastics can turn cloudy or soften.
For many plastic items, patience beats power. Dab, wait, lift, repeat. This is not the moment for a metal blade, a heavy hand, or a motivational speech.
4. Painted Surfaces
Whether it is painted metal, trim, or a painted piece of furniture, use the least aggressive method first. Try warm water, then oil or rubbing alcohol, then a plastic scraper. Acetone may remove the glue, but it may also remove the paint and your will to live. If adhesive residue remains on painted metal, oil-based methods or mild alcohol-based follow-up can be safer than going full solvent immediately.
For walls and painted trim, scraping must be extremely gentle. If the bond is strong, it may be smarter to remove the blob carefully, sand the area lightly, and touch up the paint than to chase a perfect removal and end up with a bald patch on the wall.
5. Stone Countertops, Laminate, and Other Delicate Hard Surfaces
These surfaces deserve caution because sealers and finishes vary widely. Begin with warm soapy water and a plastic scraper. If you consider acetone, alcohol, or adhesive remover, test first in an inconspicuous area and check the care recommendations for the specific material. On many countertops, using too much solvent is how a glue problem becomes a finish problem.
6. Fabric, Upholstery, and Carpet
Do not rub fresh glue deeper into the fibers. Let the glue dry if needed, then gently lift the hardened material from the surface of the fabric. For sturdy, colorfast fabrics, small amounts of acetone applied with a cotton swab can help loosen remaining glue, but always test a hidden seam first. Synthetic fabrics can be especially touchy, so slow and careful is the name of the game.
On upholstery and carpet, blotting and surface lifting are safer than soaking. If the stain is large or the fabric is delicate, professional cleaning may be the better move. Some glue spots are not worth the risk of bleaching a sofa cushion into a modern art project.
7. Skin and Nails
If Gorilla Super Glue bonds your skin, do not pull it apart. Soak the area in warm soapy water and gently wiggle the bond to let the water work in. If needed, use a small amount of acetone-based nail polish remover, then wash with soap and water and apply a thick moisturizer. Oils, petroleum jelly, or mineral oil can also help loosen stuck skin more gently.
For Original Gorilla Glue on skin, the manufacturer recommends starting with a dry cloth, then gritty soap or an exfoliating wash, followed by moisturizer. In other words, do not treat every Gorilla product like super glue. Your hands will appreciate the distinction.
8. Hair
Yes, it happens. Usually during crafts, home repairs, or a bold decision made too close to the face. Start with shampoo and conditioner, then work gently with a fine-tooth comb. For stubborn Gorilla Super Glue near the ends of the hair, a carefully controlled amount of acetone may help break the bond. Avoid saturating the scalp, work slowly, and wash thoroughly afterward.
What Not to Do
- Do not pull bonded skin apart.
- Do not use metal scrapers on delicate finishes if a plastic tool will do.
- Do not soak wood or upholstered fabric unnecessarily.
- Do not use lots of acetone on plastic, painted surfaces, or specialty finishes without testing.
- Do not mix cleaning chemicals together.
- Do not assume every Gorilla Glue product removes the same way.
- Do not rush. Adhesive cleanup is more crockpot than microwave.
Three Real-World Examples
Example 1: Gorilla Super Glue on a glass tabletop
First, place a towel underneath if possible to protect surrounding surfaces. Dab the glue with acetone using a cotton pad, let it soften, then lift it with a plastic scraper. Wipe clean and wash the glass afterward.
Example 2: Original Gorilla Glue squeeze-out on a wood chair repair
If it is wet, blot it immediately. If it already cured and foamed up, shave it down carefully with a sharp scraper, then sand lightly with the grain. Refinish only if needed.
Example 3: Finger-to-finger bonding during a quick fix
Soak in warm soapy water. Gently roll and wiggle the bond. Add a little acetone only if needed for super glue, then wash and moisturize. No yanking, no heroics, no dramatic soundtrack.
When to Stop DIY and Call for Help
Some situations need more than a home remedy. Seek professional help if Gorilla Glue gets in the eyes, on the lips, deep into a wound, or covers a large area of skin with pain or burning. For valuable furniture, specialty plastics, electronics, sealed stone, or automotive finishes, conservative cleanup or a professional detailer may save money in the long run.
The smartest cleanup move is sometimes knowing when not to “just try one more thing.” That phrase has launched many a home improvement tragedy.
Final Thoughts
The best way to remove Gorilla Glue from any surface is to match the method to the glue and the material. Fresh spills are usually easier to blot away. Cured messes often require patience, softening, and gentle mechanical removal. Hard surfaces tend to tolerate more. Plastic, paint, fabric, and skin need a lighter touch.
If you remember only one thing, remember this: identify the adhesive first. Gorilla Super Glue often responds to warm soapy water and careful acetone use on appropriate surfaces. Original Gorilla Glue usually rewards mechanical removal once cured. Wood Glue likes a damp cloth while wet and a scraper when dry. That single distinction can save your surface, your repair, and your mood.
Glue is supposed to stick. That is literally its whole personality. But with the right approach, even a stubborn Gorilla Glue mess can be cleaned up without wrecking the thing you were trying to fix in the first place.
Extra Experience and Lessons from Real Cleanup Situations
In real-world cleanup jobs, the biggest mistake people make is assuming speed matters more than strategy. It usually does not. One common situation is a small drop of Gorilla Super Glue on a kitchen counter. People see it, panic, and start scrubbing with the nearest rag. That often spreads the glue into a thinner, wider patch that is harder to remove than the original drip. A better move is to stop, identify the surface, and work in a tight area with cotton swabs, a plastic scraper, and patience. It feels slower, but it usually saves the finish.
Another very common experience happens with wood repairs. Someone glues a loose chair spindle, clamps it, and then notices foamy squeeze-out from Original Gorilla Glue. At that point, there is a powerful temptation to wipe it aggressively. Unfortunately, wiping expanding glue across stained wood can make cleanup uglier. Many experienced DIYers learn that careful blotting while wet, followed by precise scraping after cure, leaves a much cleaner repair. The lesson is simple: tidy-looking glue smears are often worse than a small bead you can remove cleanly later.
Plastic surfaces teach another memorable lesson. Plenty of people go straight for acetone because it works beautifully on glass or metal. Then they discover the plastic item now has a cloudy patch that looks permanently annoyed. Storage bins, appliance trim, acrylic organizers, and protective covers are especially unforgiving. In those situations, warm soapy water, repeated compresses, and gentle lifting may feel boring, but boring is underrated when the alternative is surface damage you cannot undo.
Skin cleanup creates its own category of regret. The classic scenario is a quick household repair that turns into “why are my fingers one piece now?” People instinctively pull apart bonded skin, which is exactly what makes the experience more painful. Those who have been through it usually say the same thing afterward: warm water, patience, and moisturizer work better than panic. The more patient the process, the less irritated the skin tends to be. It is not glamorous advice, but neither is explaining to urgent care how you became attached to a coffee mug handle.
Fabric accidents are often the sneakiest because the glue can look small at first and then harden into a crusty little monument to bad luck. On clothing, the best outcomes usually come from resisting the urge to rub the wet spot. Letting the glue firm up, lifting what you can, testing a hidden area, and then working carefully from the outside inward tends to be far more effective. Upholstery is even trickier. Many people learn that a “small glue fix” on a couch can become a “why is this cushion lighter than the others?” situation if they overuse solvent.
Across all these experiences, one truth shows up again and again: the winning method is rarely the most dramatic one. It is usually the controlled one. Small amounts of solvent. Gentle pressure. Repeat applications. Careful scraping. A hidden spot test. A willingness to stop before causing bigger damage. Glue removal rewards calm, not aggression. So if you find yourself facing a Gorilla Glue mess, remember that the most effective expert tip may also be the least exciting: slow down, use the right method, and let patience do half the work.


