Table of Contents >> Show >> Hide
- Why Taping Off a Room Matters
- What You’ll Need
- How to Tape Off a Room for Painting: 15 Steps
- Step 1: Clear the Room as Much as Possible
- Step 2: Cover the Floors
- Step 3: Remove Outlet Covers, Switch Plates, and Vent Covers
- Step 4: Clean the Surfaces First
- Step 5: Repair Rough Spots and Let Them Dry
- Step 6: Choose the Right Painter’s Tape
- Step 7: Start with the Ceiling Line if Needed
- Step 8: Tape Off Baseboards and Trim
- Step 9: Do Not Stretch the Tape
- Step 10: Press the Edges Firmly
- Step 11: Overlap Corners and Problem Areas
- Step 12: Protect Fixtures, Handles, and Hardware
- Step 13: Consider a Pro-Level Edge-Sealing Trick
- Step 14: Paint Carefully Along the Tape Line
- Step 15: Remove the Tape the Right Way
- Common Mistakes to Avoid
- Should You Tape Everything or Cut In by Hand?
- Final Thoughts
- What I Learned the Hard Way About Taping Off a Room
- SEO Tags
If you have ever painted a room and ended up with one accidental brush swipe on the ceiling, two mysterious drips on the baseboard, and a personal grudge against your own trim, welcome. You are among friends. Learning how to tape off a room for painting is one of those DIY skills that sounds boring, looks easy, and absolutely separates a “pretty good” paint job from a “who did this for you?” paint job.
The good news is that taping off a room is not complicated. The bad news is that it does require patience, a little strategy, and the emotional strength to not slap tape on dusty trim and call it character. Done right, painter’s tape helps create cleaner edges, protects surfaces you do not want painted, and saves you from spending your Saturday touching up tiny mistakes with a shaky hand and a tiny brush.
This guide breaks the process into 15 clear steps so you can prep like a pro, paint with confidence, and peel that tape back with the smug satisfaction of someone who has earned crisp lines.
Why Taping Off a Room Matters
Taping off a room for painting is not just about making things look tidy. It helps protect baseboards, trim, ceilings, window casings, outlet areas, floors, and hardware from splatters and uneven edges. It is especially useful for beginners, textured walls, rooms with contrasting colors, and any project where “I’ll just freehand it” has historically ended in regret.
Good masking also helps you move faster once the paint starts rolling. When your room is properly prepped, you are not hesitating around corners or trying to paint around a doorknob like you are defusing a bomb. You can focus on the finish, not on dodging disaster.
What You’ll Need
- Painter’s tape made for your surface type
- Drop cloths or rosin paper
- Mild cleaner or damp sponge
- Microfiber cloth or tack cloth
- Putty knife or plastic taping tool
- Screwdriver for outlet and switch plates
- Plastic bags or plastic wrap for fixtures and knobs
- Step stool or ladder
- Utility knife
- Optional: clear caulk for extra-crisp lines on tricky surfaces
How to Tape Off a Room for Painting: 15 Steps
Step 1: Clear the Room as Much as Possible
Start by removing smaller furniture, wall art, curtains, and decor. Move larger furniture to the center of the room and cover it. This gives you full access to the walls and trim, and it keeps your sofa from becoming an abstract expressionist painting. The more open the room is, the easier it is to tape in straight, uninterrupted lines.
Step 2: Cover the Floors
Lay down canvas drop cloths, plastic sheeting, or rosin paper. Canvas is great because it stays put better and absorbs drips. If you are using paper or plastic, tape the edges down so they do not slide around while you work. Your goal is simple: no paint on the floor, no surprise footprints, no dramatic cleanup montage later.
Step 3: Remove Outlet Covers, Switch Plates, and Vent Covers
Take off anything easy to remove before you start taping. This includes outlet covers, light switch plates, HVAC vent covers, curtain hardware if needed, and sometimes door hardware. It is much faster to remove a plate with a screwdriver than to tape around it like you are gift-wrapping a rectangle in a panic.
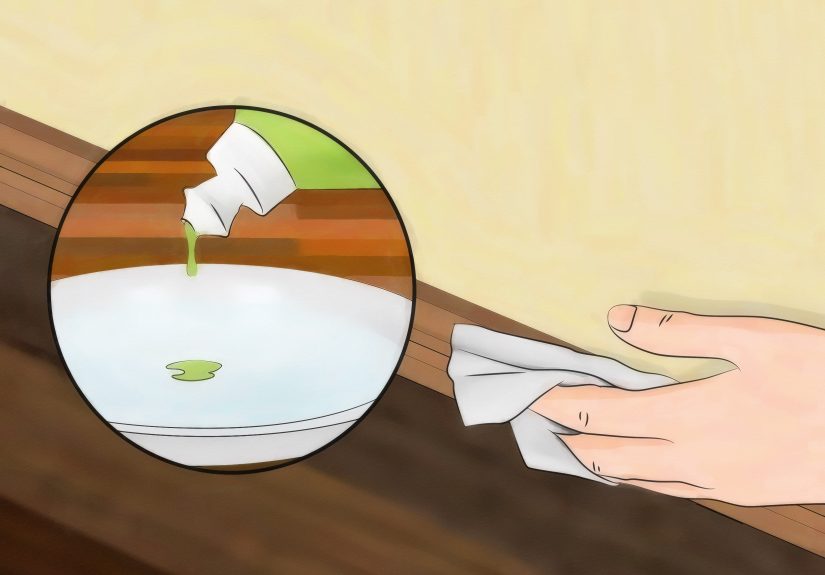
Step 4: Clean the Surfaces First
This is the step many people skip, and then they wonder why the tape peels, lifts, or lets paint seep underneath. Wipe down trim, baseboards, corners, and wall edges to remove dust, grime, cobwebs, and residue. Let everything dry completely. Painter’s tape sticks best to a clean, dry, dust-free surface. Tape and dirt are not a power couple.
Step 5: Repair Rough Spots and Let Them Dry
If you see nail holes, dents, hairline cracks, or peeling paint, patch them before you tape. Sand rough spots smooth, wipe away dust, and make sure the area is fully dry before applying tape. Taping over flaky paint is like putting a nice bandage on a bad decision. It will not hold for long.
Step 6: Choose the Right Painter’s Tape
Not all tape is created equal. Multi-surface tape works for most standard painted trim and walls. Delicate-surface or low-tack tape is better for freshly painted walls, wallpaper-adjacent areas, or surfaces that could be damaged by stronger adhesive. If you are working on textured walls or rougher surfaces, choose a tape designed for that job. Read the label. The tape roll knows things.
Step 7: Start with the Ceiling Line if Needed
If you are protecting the ceiling while painting walls, run painter’s tape carefully along the top edge where the wall meets the ceiling. Work in manageable sections instead of trying to stretch one heroic strip across the room. A straight ceiling line makes a huge visual difference, especially in rooms with bright colors or strong contrast.
Step 8: Tape Off Baseboards and Trim
Apply tape along baseboards, door casings, window trim, crown molding, and any other surface you want to protect. Start in a corner and work slowly. Longer pieces can reduce gaps, but beginners often do better with shorter sections they can control. The sweet spot is long enough to stay smooth, short enough to stay sane.
Step 9: Do Not Stretch the Tape
This is one of the biggest taping mistakes. If you pull the tape too tightly, it can lift later, curl at the edges, or break the seal you are trying to create. Lay it down gently and evenly instead. Think “place and press,” not “tug and pray.”
Step 10: Press the Edges Firmly
Once the tape is in place, run a putty knife, plastic card, or taping tool along the edge to seal it firmly. This step helps prevent paint bleed and creates sharper lines. If you notice bubbles or gaps, smooth them out now. Tiny air pockets may look harmless, but they are basically invitations for paint to sneak in and ruin your day.
Step 11: Overlap Corners and Problem Areas
At corners, seams, or awkward trim transitions, slightly overlap pieces of tape so there are no gaps. This is especially important around window stools, door trim joints, and crown molding corners. Paint loves finding the one-eighth-inch opening you did not notice. Do not give it that opportunity.
Step 12: Protect Fixtures, Handles, and Hardware
Use tape plus plastic wrap or small plastic bags for doorknobs, hinges, sconces, smoke detectors, and other fixtures that cannot be removed. For carpet near baseboards, use a putty knife to tuck a protective shield or edge under the trim. The more barriers you create now, the fewer tiny cleanup jobs you will have later.
Step 13: Consider a Pro-Level Edge-Sealing Trick
If you are working on textured walls, rough surfaces, or a super-visible color transition, you can seal the tape edge before painting. One method is applying a very thin bead of clear caulk and smoothing it with a damp rag. Another is using a specialty tape system designed to react with moisture for sharper lines. This is not always necessary, but it can be a game changer when perfection matters and your wall texture has the personality of a gravel driveway.
Step 14: Paint Carefully Along the Tape Line
Even with tape, do not overload the brush or roller right at the edge. Heavy paint can pool against the tape and create a ridge, sometimes called a paint bridge. Use controlled strokes and a moderate amount of paint. Taping is a safety net, not a license to slap on paint like you are frosting a giant cake.
Step 15: Remove the Tape the Right Way
This is where a lot of good projects go slightly sideways. Depending on the tape and paint system, removal guidance varies, so check the manufacturer’s instructions. In general, remove tape slowly, at about a 45-degree angle, and do not yank it straight out from the wall like you are starting a lawn mower. If the paint has started to bridge or the tape resists, score the edge lightly with a utility knife first. The goal is a clean reveal, not a surprise peel.
Common Mistakes to Avoid
- Taping dusty trim: The tape will not stick well, and paint may bleed underneath.
- Using the wrong tape: Strong adhesive can damage delicate surfaces; weak adhesive may fail on rough ones.
- Skipping edge pressure: If you do not press down the edges, you are basically asking for fuzzy lines.
- Stretching the tape: This can cause lifting and poor adhesion.
- Applying paint too heavily at the edge: Thick paint builds a ridge and can tear when the tape comes off.
- Waiting too long to remove tape: That is how you end up peeling off more than you intended.
Should You Tape Everything or Cut In by Hand?
Professional painters often cut in by hand for speed, but that does not mean tape is a beginner crutch. It is a smart tool. If you are painting a ceiling line, protecting trim, working with strong color contrast, or dealing with textured walls, tape can improve both your speed and your final result. You can absolutely combine methods too: tape the areas that matter most, then cut in freehand where you feel confident.
In other words, the goal is not to prove your brush bravery. The goal is a room that looks good when the lights are on.
Final Thoughts
Knowing how to tape off a room for painting is one of those humble DIY skills that pays off immediately. It makes the work neater, the room easier to manage, and the final paint job much more polished. The trick is not fancy technique. It is proper prep, the right tape, careful application, and a little patience on the removal.
So yes, taping a room takes extra time. But so does fixing a ceiling line that looks like it was painted during an earthquake. Give yourself the easier path. Prep the room, tape it right, and let the clean lines do the bragging for you.
What I Learned the Hard Way About Taping Off a Room
The first time I taped off a room for painting, I treated painter’s tape like party streamers. I moved fast, skipped the cleaning step, used random short strips, and figured the tape would somehow compensate for my overconfidence. It did not. The result was a room with one beautifully painted wall and several trim lines that looked like they had been negotiated rather than painted.
What surprised me most was how many problems had nothing to do with the paint itself. The issue was prep. I had taped over dusty baseboards, and the tape lifted in little places I never noticed. I had also pushed too much paint right up against the edge, which created a thick ridge. When I peeled the tape back, I got a mix of clean lines, ragged spots, and one area that looked like the wall had tried to molt.
After a few more projects, the process started to make sense. Clean surfaces matter more than most people think. Even a quick wipe-down changes how well the tape adheres. Pressing down the edge with a putty knife feels like a tiny step, but it makes a huge difference. So does slowing down and applying tape in controlled sections instead of trying to race your way around the room like you are on a home-improvement game show.
I also learned that tape is not magic. It helps, but it does not erase sloppy technique. If you flood the wall edge with paint, the tape cannot save you from the consequences of your own enthusiasm. A lighter hand near taped lines almost always gives a cleaner result. Less drama at the brush equals less drama at the reveal.
Another lesson: every room has one area that tests your patience. Sometimes it is the ceiling line. Sometimes it is the window trim. Sometimes it is the weird little corner behind the radiator that seems designed by someone who hated painters. Those are the places where careful taping pays off the most. When I started treating those awkward areas like the main event instead of the afterthought, my results got noticeably better.
And then there is tape removal, which deserves its own emotional support group. Pull too fast and you risk tearing the edge. Wait too long and you may peel paint. Pull at a bad angle and you can undo twenty minutes of excellent prep in about three seconds. Now I remove tape slowly, keep a utility knife nearby, and act like I am handling something fragile and slightly vindictive. That mindset has served me well.
The best part of learning this skill is that it builds confidence fast. Once you have taped off one room properly, the next one feels much easier. You start to recognize the surfaces that need extra care, the corners that need overlapping strips, and the spots where a little patience saves a lot of cleanup. Painting becomes less chaotic and more methodical. You stop hoping for clean lines and start expecting them.
So if taping off a room feels tedious, I get it. It is not the glamorous part of painting. No one posts a dramatic before-and-after photo of properly sealed tape edges. But that quiet prep work is exactly what makes the reveal satisfying. Clean lines are not luck. They are the result of doing a few simple things well, even when those things are not exciting.
And honestly, there is something deeply satisfying about peeling off tape and seeing a sharp line underneath. It is one of the rare home projects where patience gets an immediate, visible reward. That little reveal moment is worth the extra effort. It is the DIY version of a mic drop, except with less applause and more drop cloths.


