Table of Contents >> Show >> Hide
- Why Plain Table Legs Are a Secret Weapon
- What “Pottery Barn Inspired” Really Means
- Best Home Depot Legs for This Look
- Supplies You’ll Want Before the Makeover Begins
- Step-by-Step: How to Make Plain Table Legs Look High-End
- Step 1: Start with the right project, not just the right legs
- Step 2: Dry-fit everything before you finish anything
- Step 3: Sand like you mean it
- Step 4: Fix imperfections before the finish highlights them forever
- Step 5: Choose your finish path: paint, stain, or faux age
- Step 6: Protect the finish so it survives actual life
- Step 7: Attach the top the smart way
- Step 8: Add one or two details that make it look custom
- Color Ideas That Feel Expensive, Not Experimental
- Common Mistakes That Make DIY Furniture Look Cheap
- How to Style the Finished Piece
- Real-World Experience: What This Project Feels Like When You Actually Do It
There are two kinds of home projects: the ones that begin with a clear vision, and the ones that begin with you wandering into Home Depot for “just one thing” and leaving with four unfinished table legs, sandpaper, and a new personality. This project is proudly the second type.
If you’ve ever admired the warm, tailored, slightly rustic look of Pottery Barn furniture, you already know the magic formula: classic shapes, substantial proportions, soft weathered finishes, and styling that whispers, “Yes, I do own neutral linen napkins.” The good news is that you do not need a designer showroom budget to get that look. With plain wood table legs from Home Depot, a smart finish, and a few design tricks, you can create decor that feels elevated, timeless, and expensive in the best possible way.
Whether you want to build a console table, upgrade a basic bench, create a custom side table, or give a plain wood project a more high-end furniture feel, the transformation starts with the legs. They are the visual handshake of a piece. Get the profile, finish, and proportions right, and suddenly your DIY no longer looks like “weekend project.” It looks like “boutique furniture delivery,” minus the terrifying shipping fee.
Why Plain Table Legs Are a Secret Weapon
Unfinished table legs are one of the easiest ways to fake custom furniture. Home Depot carries ready-to-finish wood legs in several styles, including tapered, farmhouse, round, square, and traditional profiles. Because they come sanded and unfinished, they are basically a blank canvas with excellent posture.
That matters because the Pottery Barn-inspired look is less about copying a single product and more about creating the right overall impression. Think turned details, sturdy silhouettes, soft brown or drifted finishes, warm whites, and pieces that feel collected rather than flashy. A simple leg can become far more refined when paired with the right stain color, paint sheen, top shape, apron detail, and styling.
In other words, you are not just buying table legs. You are buying potential. Very sawdusty, very charming potential.
What “Pottery Barn Inspired” Really Means
Before you start staining anything in sight, it helps to define the look you’re chasing. Pottery Barn furniture often leans on a few repeat design cues:
1. Traditional or farmhouse silhouettes
Turned legs, chunky profiles, and classic apron lines give furniture a grounded, collected feel. Even when the overall piece is simple, the shape usually has enough detail to feel intentional.
2. Soft, layered finishes
The finish is rarely screaming. It is usually matte to satin, warm rather than orange, and designed to show some grain, texture, or patina. That is why ultra-gloss, super-red stain can derail this look faster than you can say “clearance laminate.”
3. Solid-looking construction
Even when retail furniture uses a mix of solid wood, veneer, and engineered components, the finished piece looks substantial. Your DIY should do the same. Thin tops and spindly legs will not give the same effect as a thicker top, a proper apron, or a well-scaled base.
4. Understated styling
A beautiful wood console with a lamp, a stack of books, a bowl, and one leafy branch? Very Pottery Barn energy. A neon sign, six novelty mugs, and a rubber duck collection? That is a different design journey.
Best Home Depot Legs for This Look
If you are shopping Home Depot, the safest bet is unfinished wood legs with a classic or farmhouse profile. Round tapered legs are great for lighter, more transitional pieces. Chunkier farmhouse or traditional turned legs create a more collected, heritage-style look. Square chamfered legs can work too, especially if the tabletop and finish do more of the stylistic heavy lifting.
Good uses for plain legs include:
- A narrow entry console with a stained wood top
- A sofa table behind a couch
- A bench base with upholstered or stained seat
- A side table with a thicker top and lower shelf
- A decorative riser, tray stand, or faux antique accent table
If the legs are simple, that is not a problem. In fact, plain legs are often easier to elevate because they can be shaped by the finish and the rest of the build. The trick is to make the entire piece feel cohesive.
Supplies You’ll Want Before the Makeover Begins
You do not need a professional woodshop. You do need the right materials, patience, and at least one playlist that makes sanding feel like a personality trait.
- Unfinished table legs from Home Depot
- Wood top, shelf board, or butcher block panel
- Mounting plates, apron kit, pocket-hole system, or figure-8 fasteners
- Wood filler for dents or small imperfections
- Sandpaper in 120, 180, and 220 grit
- Sanding sponge for curves and details
- Tack cloth or lint-free rag
- Primer if painting
- Wood conditioner if staining softwood like pine
- Paint or stain in a warm, furniture-friendly tone
- Protective topcoat such as polyurethane or furniture wax
- Brushes, foam applicators, or lint-free staining cloths
- Drill, screws, measuring tape, and level
Step-by-Step: How to Make Plain Table Legs Look High-End
Step 1: Start with the right project, not just the right legs
Legs matter, but the piece they support matters just as much. A Pottery Barn-inspired console usually has balanced proportions, a top with some visual weight, and enough breathing room between the legs to feel airy but not flimsy. Before you build, sketch the final piece. Decide whether you want a console, side table, bench, or decorative stand. Then match your tabletop thickness and leg height to that use.
Example: If you want a classic entry table, pair 28- to 29-inch legs with a top around 10 to 16 inches deep and 36 to 60 inches wide depending on the space. Add an apron just below the top to make the structure look more finished and substantial.
Step 2: Dry-fit everything before you finish anything
This step is not glamorous, but it will save you from the classic DIY heartbreak known as “Why is one leg looking at the ceiling?” Assemble the base first without final finishing. Check height, spacing, wobble, and how the apron or mounting hardware lines up. If you need to drill pilot holes, do it now.
Dry-fitting also helps you see whether the piece feels high-end or just highly optimistic. If the top looks too thin or the legs feel too delicate, fix the design before the stain and paint go on.
Step 3: Sand like you mean it
Even when wood legs come pre-sanded, they usually need a light refinement pass. Sand flat areas with 180 or 220 grit. For rounded or turned details, use a sanding sponge so you do not flatten the profile. Always sand with the grain when possible, and wipe away every bit of dust before the next step.
If your top is solid wood or butcher block, ease the sharp edges very slightly. That tiny softening trick makes a new board look more like finished furniture and less like a shelf that escaped from aisle 14.
Step 4: Fix imperfections before the finish highlights them forever
Small dents, cracks, or rough spots become surprisingly dramatic once stain or paint hits them. Use wood filler where needed, let it dry fully, then sand smooth. If you plan to stain the piece, choose a stainable filler. This is one of those boring steps that separates “homemade” from “custom.”
Step 5: Choose your finish path: paint, stain, or faux age
This is where the personality of the piece shows up.
Option A: Warm painted finish
For a classic Pottery Barn-inspired painted look, think creamy white, mushroom, soft greige, muted black, or warm taupe. Prime bare wood first, sand lightly after the primer dries, then apply two thin coats of paint. A matte or satin sheen usually looks more furniture-like than high gloss.
To make painted legs feel less flat, lightly distress edges by hand after the paint cures, especially around foot details and corners. Do not go full pirate treasure chest. A little wear goes a long way.
Option B: Stained wood finish
For stained legs, avoid anything too orange or too red if you want a higher-end, catalog-inspired look. Better choices include medium oak tones, walnut-inspired browns, weathered brown, driftwood, or layered custom mixes that read soft and natural. If your legs are pine or another absorbent softwood, use wood conditioner first so the stain goes on more evenly and does not turn blotchy.
Apply stain in thin, controlled coats, wipe back the excess, and always test the color on scrap wood or the underside first. Wood has opinions. It does not always care about the label on the can.
Option C: Faux weathered finish
If you love the relaxed, timeworn look, build the color in layers. Start with a base stain or paint, then dry-brush a second tone, glaze the crevices, or lightly sand through selected edges. This works especially well on turned legs because the contours catch shadow and make the finish look older and richer.
Step 6: Protect the finish so it survives actual life
Beautiful is good. Beautiful and durable is better. A console or side table needs a protective topcoat, especially if it will hold drinks, keys, lamps, or that one plant you swear you will not overwater this time.
Use a furniture-appropriate clear finish in matte, satin, or soft semi-gloss depending on your look. For stained tops, two to three coats are often worth it. Sand lightly between coats if the finish raises the grain or feels rough. For painted decorative pieces, a lighter-duty topcoat or wax may be enough, depending on how the piece will be used.
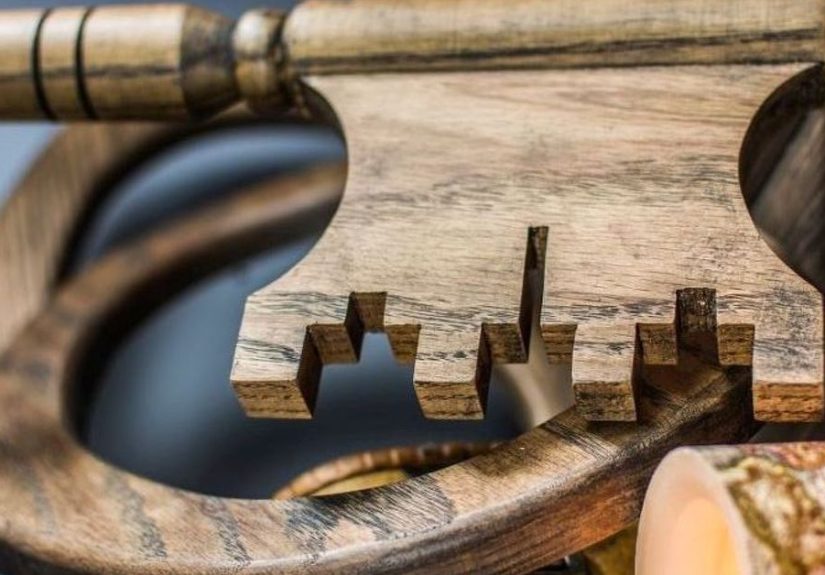
Step 7: Attach the top the smart way
Attaching a tabletop is not just a “screw it and hope” moment. Wood naturally expands and contracts with humidity, especially solid wood tops. That means the best attachment methods allow a little movement rather than locking everything down rigidly. Pocket screws in oversized holes, figure-8 fasteners, tabletop clips, or proper apron joinery can all help create a more durable piece.
If you are using legs with hanger bolts and mounting plates for a smaller piece, installation is fairly straightforward. For larger tables or consoles, adding aprons or rails between the legs makes the build look more finished and improves stability.
Step 8: Add one or two details that make it look custom
This is the secret sauce. Plain legs can look impressive when the overall piece includes a custom-feeling detail. Try one of these:
- Add a lower shelf between the legs for baskets or books
- Use a thicker top for a more expensive silhouette
- Install small levelers if the piece will sit on uneven flooring
- Use a slightly weathered finish on the top and a painted base below
- Create a soft contrast with stained legs and a painted apron
- Style with oversized decor rather than lots of tiny accessories
Color Ideas That Feel Expensive, Not Experimental
Choosing the finish color is where many good DIYs accidentally become very confusing DIYs. If you want a Pottery Barn-inspired result, stick with tones that feel lived-in, natural, and versatile.
Best paint colors
- Warm white
- Greige
- Mushroom
- Soft black
- Muted olive-gray
Best stain directions
- Light oak-inspired brown
- Medium walnut
- Weathered brown
- Drifted taupe-brown
- Layered antique pine look
Avoid glossy cherry tones, overly yellow pine stain, and gray that looks like it lost a bet. The goal is warm sophistication, not haunted beach house.
Common Mistakes That Make DIY Furniture Look Cheap
- Skipping the sample test and staining everything anyway
- Ignoring proportions between the top and the legs
- Using glossy paint when the style calls for soft sheen
- Not sanding enough between primer, paint, or topcoat
- Forgetting to wipe dust before finishing
- Using flimsy connection hardware on a larger piece
- Over-distressing the finish until it looks theatrical
- Styling the finished piece with too much clutter
How to Style the Finished Piece
Once the table or decor piece is done, do not sabotage it with random accessories. Pottery Barn-inspired styling usually works because it is edited. On a console, try a table lamp, a stack of two or three books, a ceramic bowl, and one vase with branches. On a side table, use a tray, candle, and one textured object. Leave some empty space. Empty space is not unfinished. Empty space is confidence.
You can also repeat the wood tone elsewhere in the room with frames, bowls, or baskets so the piece feels integrated rather than dropped in from another design universe.
Real-World Experience: What This Project Feels Like When You Actually Do It
The funny thing about turning plain table legs from Home Depot into Pottery Barn-inspired decor is that the transformation usually starts out looking unimpressive. You bring home four unfinished legs, and they look a little like giant breadsticks with ambition. They are pale, plain, and not particularly glamorous. At that stage, it is easy to wonder whether you have made a smart design decision or simply started a very organized pile of wood.
Then the process begins, and that is where the magic happens. The first real shift usually comes during sanding. Once you run your hand over the wood and feel the surface smooth out, the project starts to feel intentional. Curved legs especially seem to wake up after a good hand-sanding because the details become clearer. You notice the shape, the taper, the way the lower foot catches the light. Suddenly the legs look less like parts and more like furniture.
Choosing the finish is where most people experience a mix of excitement and mild panic. A stain can look completely different on pine than it does on the sample card, and paint can feel too cold or too yellow once it is actually on the wood. That is why testing is such a valuable part of the experience. Many DIYers discover that the finish they imagined at the store is not the finish that makes the piece shine at home. The best results often come from adjusting midstream, softening a color, layering a glaze, or switching from shiny to satin when the project starts drifting away from the original vision.
There is also something deeply satisfying about building a piece that looks heavier, richer, and more expensive than the sum of its parts. A basic top plus unfinished legs can feel ordinary while it is sitting on the workshop floor. But once the apron is added, the stain dries down, and the clear coat goes on, the whole thing changes. It starts to look like something you would slow down to admire in a catalog or a styled entryway photo. That moment is one of the best parts of the entire experience. It is proof that good design is often more about restraint and finish than about buying the fanciest raw materials.
Another common experience is realizing that little details matter more than expected. The project may feel 80 percent done once the legs are attached, but the final 20 percent is what creates the expensive look. The softened edges, the extra coat of topcoat, the level base, the careful styling afterward, and the decision not to overload the table with decor all add up. That final editing stage is where the piece moves from “nice DIY” to “wait, where did you get that?”
And perhaps the best part is how personal the finished project feels. Store-bought furniture can be beautiful, but a custom piece has a different kind of value. You know exactly why the stain looks warm instead of orange. You know why the table is the perfect width for your hallway. You know that one leg gave you attitude during assembly and that you won anyway. Over time, the piece becomes part decor, part memory. It holds keys, lamps, books, baskets, and all the ordinary things of daily life, but it also carries the story of having been made instead of merely purchased. That is a quiet kind of luxury, and honestly, it is very on-brand for the whole look.


