Table of Contents >> Show >> Hide
- Why Plastic Dollar Planters Are Worth Updating
- What You Need Before You Start
- Step 1: Clean the Planter Like You Mean It
- Step 2: Sand Lightly for Better Paint Grip
- Step 3: Decide on Your Finish Before You Spray Anything
- Step 4: Prime or Use Paint Made for Plastic
- Step 5: Add a Design Detail That Makes It Look Custom
- Step 6: Make Drainage Non-Negotiable
- Step 7: Use the Right Potting Mix and Planting Strategy
- Best DIY Makeover Ideas for Plastic Dollar Planters
- Mistakes to Avoid
- How to Make the Finish Last Longer
- Real-Life Experiences Updating Plastic Dollar Planters DIY
- Conclusion
There is a special kind of optimism that lives inside a plastic dollar planter. It usually startst paint choices, and a few styling tricks, you can turn budget bins into planters that look surprisingly polished.
This project is perfect for people who want a high-impact update without the high-drama price tag. You do not need a workshop, a design degree, or a mysterious social media talent for making everything look expensive. You just need a plan. In this guide, we will walk through how to refresh plastic dollar planters, what mistakes to avoid, how to make them last longer outdoors, and how to style them so nobody suspects they once lived near the discount party supplies.
Why Plastic Dollar Planters Are Worth Updating
Plastic planters from dollar stores and discount retailers have a lot going for them. They are lightweight, easy to move, inexpensive, and available in shapes that range from “basic nursery pot” to “someone in product development was feeling adventurous.” They are especially handy for porches, balconies, apartment patios, and seasonal decorating because you can swap them around without needing a back brace.
The main downside is appearance. Many low-cost plastic planters come in flat black, thin brown, or random shades that feel less “curated garden oasis” and more “temporary storage for a plant that has seen things.” But their affordability is exactly what makes them such a fun DIY project. You can experiment with color, texture, faux finishes, and plant combinations without feeling like you are risking a designer heirloom.
Updating these planters is also practical. A makeover can help old containers match your home’s style, create a more unified porch or patio, and give tired plastic pots another season or two of life. That is budget-friendly, space-smart, and just self-righteous enough to feel satisfying.
What You Need Before You Start
Basic supplies
- Plastic dollar planters
- Mild soap and water
- Clean cloth or sponge
- Fine-grit sandpaper or sanding sponge
- Painter’s tape
- Drop cloth, cardboard, or old newspaper
- Plastic-friendly spray paint or primer plus spray paint
- Optional outdoor sealer or clear topcoat
- Drill for drainage holes if needed
- Potting mix and plants
If your planter does not have drainage holes, do not skip fixing that. Plants like pretty containers, but they do not enjoy sitting in swamp soup. If you love the look of a pot with no drainage, use it as a decorative outer container and place a nursery pot inside. That gives you the style without creating a root-rot spa.
Step 1: Clean the Planter Like You Mean It
The first rule of a good planter makeover is deeply unglamorous: clean the thing. Dust, dirt, leftover stickers, oils from handling, and old soil can interfere with paint adhesion. Wash the planter thoroughly with soap and water, then let it dry completely. Not “mostly dry.” Not “spiritually dry.” Completely dry.
If the planter has spent time outdoors, inspect it for chalky fading, cracks, or brittle spots. A little wear is fine. If it crumbles when squeezed or has serious splits, let it retire with dignity. DIY can do many things, but resurrection should stay in the fantasy aisle.
Step 2: Sand Lightly for Better Paint Grip
Plastic is smooth, which is lovely for manufacturing and slightly annoying for painting. A light sanding helps rough up the surface so the primer or paint has something to hold onto. You are not trying to carve a sculpture. Just scuff the exterior gently with fine-grit sandpaper or a sanding sponge.
Focus on the outside and the upper rim where paint will be most visible. Wipe away dust after sanding. This small step makes a big difference, especially on glossy plastic planters that otherwise behave like paint repellents.
Step 3: Decide on Your Finish Before You Spray Anything
This is the moment to choose your style direction. Before opening a can of paint like an excited raccoon, figure out the look you want. Some easy ideas include:
- Modern matte: black, white, sage, charcoal, or sand
- Faux stone: textured spray in granite, slate, or sandstone tones
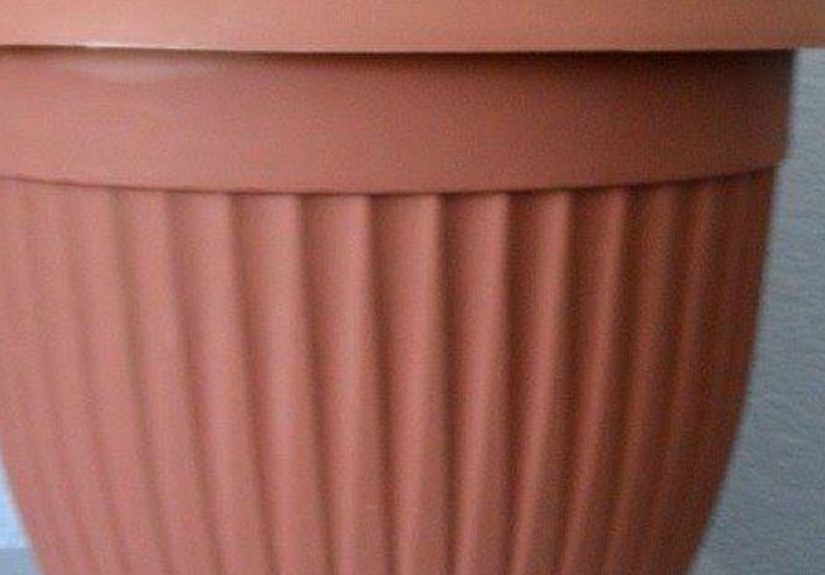
- Terracotta look: warm clay shades for a more classic garden feel
- Color-blocked pots: two-tone designs using painter’s tape
- Brushed metallic accents: subtle gold or bronze on the rim only
- Cottage garden charm: soft blue, creamy white, dusty green, or faded coral
If your home exterior already has strong colors, match the planters to that palette. If your house is neutral, the planters can either blend in or become the stars of the show. There is no wrong choice here, unless the choice is seven unrelated neon colors and one accidental camouflage pot. That is less “designer garden” and more “yard sale during a windstorm.”
Step 4: Prime or Use Paint Made for Plastic
This is where durability lives or dies. Standard craft paint alone often looks nice for a minute and then starts peeling like it got bored. For the best result, use spray paint formulated for plastic or use a plastic-compatible primer followed by your color coat.
Work outdoors or in a very well-ventilated area. Put the planter on cardboard or a drop cloth. Shake the can well, hold it the recommended distance from the surface, and apply light coats rather than one heavy blast. Heavy spraying creates drips, puddles, and the unmistakable vibe of a project gone rogue.
Let each coat dry according to the can instructions. Usually, patience wins. A rushed second coat can smear, wrinkle, or turn your smooth finish into a strange peel-texture that nobody asked for.
Best practice for a smooth finish
- Spray in thin, even passes
- Rotate the planter instead of leaning awkwardly over it
- Coat the rim and top edge carefully
- Avoid painting the inside too deeply if the pot will be filled with soil
- Allow full cure time before planting or moving outdoors
Step 5: Add a Design Detail That Makes It Look Custom
If you stop at a solid color, your planter will already look better. But a little extra detail can make it look surprisingly upscale. Try one of these easy upgrades:
Color blocking
Use painter’s tape to mask off the lower third, middle stripe, or rim. Paint one section a contrasting color. This is an easy way to get a modern designer look with almost no extra effort.
Faux concrete or stone
Textured spray paint or layered neutral tones can create a weathered stone effect. It is great for making small plastic planters feel heavier and more architectural. Your porch gets instant “expensive garden center” energy without the expensive garden center invoice.
Rope, wood, or cane accents
For decorative use, you can wrap the outside with jute rope, faux wood slats, or cane webbing. Just keep these embellishments away from areas that stay damp, and use them more for covered porches or indoor planters.
Stenciling
Simple botanical motifs, stripes, or tiny repeating patterns can add personality. Keep the stencil crisp and restrained. One elegant pattern says chic. Eight competing patterns say your planter had too much coffee.
Step 6: Make Drainage Non-Negotiable
A beautiful planter that traps water is still a problem. If your plastic dollar planter does not have adequate holes, drill them before adding soil. Two to four drainage holes often work well for small to medium pots, depending on size. If the planter is decorative and you do not want to alter it, use it as a cachepot with a slightly smaller nursery pot tucked inside.
Avoid stuffing the bottom with random rocks in hopes of “creating drainage.” That old tip sounds handy, but it often causes more trouble than magic. The better move is to keep holes open, use potting mix made for containers, and keep the plant type matched to the container size and sun exposure.
Step 7: Use the Right Potting Mix and Planting Strategy
Once your planter is refreshed, do not sabotage the glow-up with heavy garden soil scooped from the yard. Container plants do best in potting mix, which is lighter and better at balancing moisture and airflow. Garden soil compacts too easily in pots and can make roots miserable.
For a visually pleasing arrangement, think in layers. One of the easiest design formulas is:
- Thriller: a taller focal plant
- Filler: mounding plants that add fullness
- Spiller: trailing plants that soften the edge
For example, a refreshed black planter might hold a spiky grass or upright dracaena in the center, petunias or coleus around it, and sweet potato vine or ivy trailing over the side. A soft clay-colored pot might look great with herbs, lavender, calibrachoa, or compact marigolds. Match the plants to the amount of sun your space gets, because no paint job can emotionally support a shade plant roasting in full afternoon sun.
Best DIY Makeover Ideas for Plastic Dollar Planters
1. The faux high-end stone planter
Start with a black or gray base coat, then add a textured stone finish. Pair with boxwood, ornamental grass, or white flowers for a clean, upscale look.
2. The warm terracotta impersonator
Use clay-toned spray paint to mimic classic terracotta. This works beautifully for herb gardens, Mediterranean-style plantings, and cottage porches.
3. The modern porch collection
Paint several mismatched dollar planters in the same matte neutral color. Suddenly the assortment looks intentional instead of accidental.
4. The cheerful seasonal switch-up
Use one paint color family for spring and summer, then replant the same refreshed containers for fall with ornamental kale, pansies, ivy, or compact mums. One inexpensive pot can pull multiple style shifts throughout the year.
5. The indoor-outdoor cachepot trick
Paint the outside, leave the inside simple, and place a nursery pot inside. This is perfect for anyone who wants style with easy plant swaps and less mess.
Mistakes to Avoid
- Skipping the cleaning step
- Painting glossy plastic without light sanding or the right paint
- Using thick coats that drip
- Forgetting drainage holes
- Using heavy garden soil instead of potting mix
- Choosing plants with different watering or light needs in one pot
- Putting a newly painted pot outside before it fully cures
The biggest mistake is treating the planter makeover as separate from the gardening part. The prettiest container still needs to function. A successful DIY update looks good and supports healthy plants. Beauty and practicality can coexist. It is a rare miracle, like a junk drawer that closes properly.
How to Make the Finish Last Longer
If your refreshed plastic planters are headed outdoors, give them the best shot at longevity. Place them where they will not sit in standing water. Lift them slightly off solid surfaces if needed. Avoid dragging them across rough concrete. Refresh scratches quickly before they spread into peeling.
In extreme climates, store empty planters in a garage, shed, or covered area during the off-season. Even durable plastic benefits from a break. Sun, heat, rain, and freeze-thaw cycles can wear down both the container and the finish over time.
If you used a clear topcoat suited for outdoor use, that can help preserve color and reduce wear. Just make sure the finish is compatible with your paint. Nothing ruins a triumphant DIY moment faster than a topcoat that reacts badly and turns your planter into modern art against your will.
Real-Life Experiences Updating Plastic Dollar Planters DIY
The first time I updated a pile of plastic dollar planters, I was wildly overconfident. I had six bargain pots, one can of spray paint, and the kind of energy that usually appears right before someone says, “This will only take twenty minutes.” It did not take twenty minutes. It took an afternoon, a second can of paint, and one very humbling lesson about trying to spray too close to the surface. Still, once the planters dried, I understood the appeal immediately. They looked coordinated. They looked intentional. Most importantly, they no longer looked like they had been rescued from the back corner of a garage after a dramatic thunderstorm.
What surprised me most was how much the makeover changed the whole space. A front step that once looked random suddenly felt styled. Three mismatched plastic pots painted in a soft matte charcoal instantly looked like a set. I added basil and parsley to one, white petunias to another, and a spiller vine to the third, and the whole entry felt cleaner and more expensive. Not actually expensive, of course. More like “I have excellent taste and know how to wait for sales.”
Another time, I used warm clay-colored paint on a few plain plastic pots that originally had the personality of an office stapler. After planting rosemary, thyme, and oregano, they looked so convincing that a neighbor asked where I bought the “nice terracotta set.” I did not lie, but I did pause dramatically before answering because the moment deserved respect.
I have also learned that these projects are wonderfully forgiving. One pot got a scratch? Touch it up. One color choice looked weird in daylight? Repaint it. One stencil attempt came out looking like a haunted fern? Sand lightly and try again. Cheap plastic planters are ideal for experimenting because the stakes are low. They invite creativity without making you nervous. That alone makes them more fun than many pricier decor projects.
The most useful experience, though, came from the failures. I once skipped drainage holes because the planter looked so cute and I did not want to “ruin” it. The plant did not appreciate my aesthetic priorities. After one heavy rain, the pot became a small botanical swimming pool. Lesson learned. Now I either drill holes or use an inner nursery pot, and life is better for everyone involved, especially the roots.
Over time, I have come to love these planter makeovers because they combine three satisfying things: thrift, creativity, and visible results. You start with something ordinary, spend a little time improving it, and end up with decor that genuinely changes the mood of your space. That is a good DIY formula. It is practical enough to justify, fun enough to repeat, and affordable enough that you can do several at once without hearing your wallet file a formal complaint.
If you have a stack of plastic dollar planters sitting around, do not underestimate them. Underneath the bland finish and suspicious original color is real potential. With a little cleaning, thoughtful paint, proper drainage, and a plant combination that suits the space, those cheap containers can become some of the hardest-working style pieces on your porch, patio, balcony, or kitchen windowsill. In the world of home and garden DIY, that is a pretty respectable glow-up.
Conclusion
Updating plastic dollar planters is one of the easiest budget-friendly DIY projects for making a home feel more polished. The secret is not complicated: prep the plastic properly, use the right paint, protect drainage, and style the finished pot with purpose. Whether you want modern neutrals, faux terracotta charm, or a porch full of coordinated containers, these humble planters can absolutely rise to the occasion. Cheap does not have to look cheap, and your plants do not care where the pot came from as long as their roots are happy. That is the kind of practical elegance we can all get behind.


