Table of Contents >> Show >> Hide
- Why Cute Brush Holders Are More Than Just Desk Candy
- Design Rules I Learned the Hard Way
- Materials That Make Great Brush Holders
- My Build Process (Copy the Vibe, Avoid the Chaos)
- Gallery: I Make Cute Brush Holders (37 Pics)
- Brush Care Tips That Make Your Holders Work Better
- FAQ: Quick Answers Before You Hot-Glue Something to Your Soul
- Extra : My Brush-Holder Life Lessons (a.k.a. How I Became This Person)
- Conclusion: Cute, Functional, and Actually Sustainable
If you’ve ever fished a paintbrush out of a cup and discovered it now has the personality of a frayed broom, welcome.
If you’ve ever watched your makeup brushes breed across your vanity like rabbits with a skincare addiction, also welcome.
I started making cute brush holders for a practical reason (protect the bristles), then kept going for an even more practical reason:
tiny, ridiculous objects bring me joy… and apparently my brushes have unionized for better working conditions.
This post is a deep dive into what actually makes a brush holder work (not just look adorable), plus a gallery of 37 playful designs you can copy,
remix, or pretend you “totally thought of first.” Whether you need a paint brush holder for your studio, a makeup brush organizer for your bathroom,
or a travel-friendly DIY brush holder, you’ll find ideas that are cute, stable, and easy to live with.
Why Cute Brush Holders Are More Than Just Desk Candy
A brush holder is basically a tiny piece of furniture for your tools. Done right, it saves time, protects your investment, and keeps your space calmer.
Done wrong, it becomes a bristle-flattening chaos cup that collects dust, pigment, and regret.
- Brush shape stays crisp: No more “why is my liner brush now a fan brush?” moments.
- Cleaner workspace: A dedicated home for brushes cuts down on rolling, falling, and accidental paint tattoos on your elbow.
- Better hygiene (especially for makeup): Good airflow and easy cleaning help you avoid storing damp tools in a bacteria spa.
- Faster setup: When tools are visible and sorted, you start creating soonerand procrastinate less creatively.
Design Rules I Learned the Hard Way
1) Let Brushes Breathe
Whether it’s acrylic paint or foundation, brushes need airflow. A holder that traps moisture can make natural bristles sad and synthetic bristles… funky.
Favor open tops, vent holes, and layouts that don’t cram brush heads together like they’re sharing a studio apartment.
2) Respect the Ferrule
The ferrule (that metal part connecting bristles to handle) is where brushes go to die if water or cleaner keeps sneaking in.
After washing, it’s best to dry brushes flat (or with bristles slightly over an edge) so moisture doesn’t migrate into the ferrule.
Once fully dry, storing upright is fine for most daily use setups.
3) Stability Beats Aesthetics (By a Nose)
A gorgeous brush holder that tips over is not “whimsical.” It’s “gravity’s slapstick routine.”
Wide bases, grippy feet, and a little weight (or a non-slip pad) keep things upright when you inevitably bump the table like a startled cartoon character.
4) Cleanability Is Non-Negotiable
If the holder can’t be wiped clean, it will eventually wear a crusty little “patina” that no one asked for.
Smooth sealed surfaces, removable inserts, and simple shapes win in the long run.
5) Size for Reality, Not Fantasy
Your “small collection” will grow. Brushes multiply when exposed to art stores. Plan spacing for today’s set plus a few future arrivals.
For drilled holes, a mix of sizes (roughly in the 7–12 mm range) covers most handles comfortably without wedging.
Materials That Make Great Brush Holders
The best material depends on your vibe (cute), your tools (paint vs. makeup), and your tolerance for mess (honesty matters).
Here are my go-to options:
Polymer Clay
Durable, detail-friendly, and perfect for tiny animals holding tiny brushes like they have little jobs. Great for sculpted holders and brush rests.
Bonus: you can sand and buff it smooth. If you paint on top, test your sealant so it doesn’t stay tacky.
Air-Dry Clay
Easy and accessible, especially for quick sculpted stands. Seal it well if it’ll live near sinks or get splashed.
It’s fantastic for handmade texture, but it needs protection if you want it to survive daily life.
Wood (Drilled Blocks, Layered Birch, Scrap Builds)
Wood is classic, stable, and endlessly customizable. A drilled hardwood block is the “quiet luxury” of brush storage:
it doesn’t scream for attention, but it never lets you down.
Resin
Resin can look like candy, glass, ocean waves, or forbidden snack gummies. It’s wipeable and strong when cured properly.
Add weight and felt feet, and you’ve got a pro-level vanity piece.
Upcycled Containers
Jars, mugs, tins, and cleaned candle vessels are budget-friendly and charming. Add filler (pebbles, beads, marbles) for stability and spacing.
Just make sure it’s easy to rinse out when it inevitably gets dusty.
Wall Systems (Pegboard + Hooks)
If you want brushes visible and off your surface, pegboard is a power move. Hooks, bins, and small shelves let you build a “brush station”
that scales with your collection.
My Build Process (Copy the Vibe, Avoid the Chaos)
- Measure your brushes: thickest handle, longest brush, and how many you actually use weekly.
- Pick a storage style: cup, stand with holes, angled rack, wall-mounted, or travel roll.
- Prototype fast: cardboard mockups for size; a scrap wood test block for hole spacing; a clay test coin for finish.
- Design for airflow: leave headroom; avoid tight clusters; add vents or open sides where possible.
- Add stability: widen the base, add weight, or use adhesive feet.
- Seal smart: choose finishes that wipe clean; test sealants on small samples before committing.
- Stress-test: load it with your heaviest brushes, nudge it lightly, and see if it survives real life.
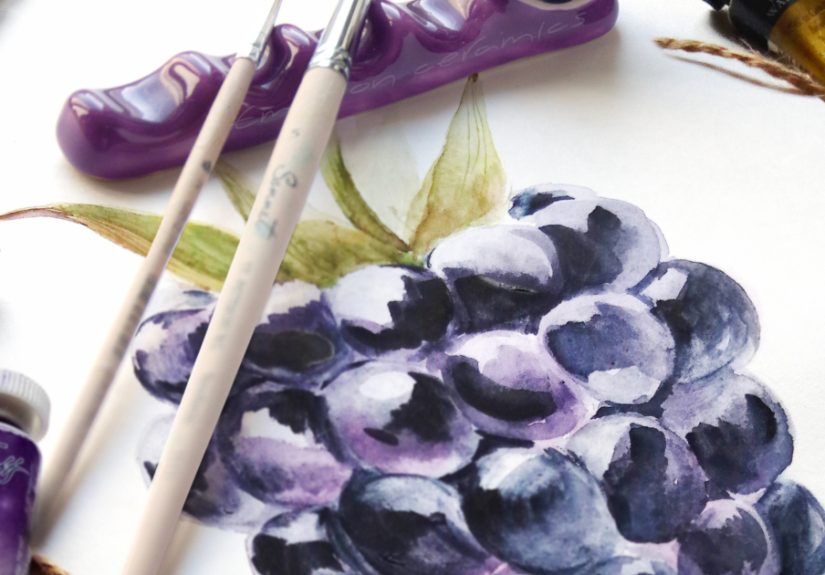
Gallery: I Make Cute Brush Holders (37 Pics)
Below are 37 ideas with image placeholders. Swap in your own photos, or use the captions as a design menu.
(If you build Pic #12, please name it something dramatic like “HexaTower of Productivity.”)


Brush Care Tips That Make Your Holders Work Better
For Makeup Brushes
- Clean regularly: especially face brushes that touch liquids/creams. A gentle cleanser and lukewarm water go a long way.
- Dry flat: reshape the bristles and let them dry with airflow (avoid trapping moisture in a cup right away).
- Store with space: crowding brush heads can warp them and makes everything harder to keep clean.
For Paint Brushes
- Clean after sessions: acrylic dries fast; oil needs proper cleaning steps; watercolor still benefits from a rinse and reshape.
- Don’t park wet brushes bristles-down in a cup: it bends tips and can ruin the shape.
- Protect from dust: if your studio gets dusty, consider a brush roll or a covered holder for your softest brushes.
Dust, Air, and “The Bathroom Factor”
If your brush holder lives in a bathroom, aim for wipeable surfaces and good ventilation. Humidity is not your brushes’ best friend.
A closed container can protect from dust, but don’t seal damp brushes inside itlet them dry fully first.
FAQ: Quick Answers Before You Hot-Glue Something to Your Soul
How many brushes should a holder fit?
For daily use, aim for your core set (often 8–20) plus a little extra. For big collections, consider two holders:
one “daily driver” and one “everyone else, behave.”
Are drilled-hole brush stands better than cups?
Drilled holes keep brushes separated and upright, which is great once they’re dry. Cups are flexible and fast, but can crowd brush heads.
If you use a cup, add filler or an insert so brush heads don’t mash together like they’re in a subway at rush hour.
Do I need to seal polymer clay brush holders?
Not always. Polymer clay itself is durable, but paint, mica powders, and surface treatments may need protection.
If you do seal, test firstsome finishes can stay tacky depending on products and cure conditions.
What’s the easiest beginner-friendly brush holder?
Upcycled candle jar + pebbles or beads. You’ll finish in under 10 minutes and feel like a productivity wizard.
Extra : My Brush-Holder Life Lessons (a.k.a. How I Became This Person)
I didn’t set out to become “the brush holder person.” It happened the way most hobbies happen: one tiny inconvenience, followed by an irrational amount of enthusiasm.
My original problem was simplemy brushes were always either (1) missing, (2) damp, or (3) doing that thing where the bristles splay out like a stressed-out palm tree.
I tried the classic cup-on-the-desk method, which works great if you enjoy surprise avalanches every time you reach for one brush and accidentally pull three.
So I made a small stand. Just a basic little clay slab with holes. It looked… fine. Functional. Mildly boring. And then I did the most dangerous thing:
I thought, “What if it was cuter?” That’s how you end up sculpting a tiny frog in a bathrobe whose sole purpose is to hold your eyeliner brush like it’s a royal scepter.
My friends didn’t help. They saw one holder and immediately requested custom versions like I was running a luxury furniture studio, not a kitchen-table craft situation
with questionable glitter containment protocols.
Over time, I learned that “cute” and “useful” need to be best friends, not polite acquaintances. A sculpted character is adorable, yes, but if it’s top-heavy, it’s a disaster.
A glossy resin holder is gorgeous, yes, but if it slides on the counter like it’s trying to escape, you’ll spend your mornings chasing it with a mascara wand.
The sweet spot is when the design makes you smile and silently fixes a problem: separated slots so brush heads don’t get crushed, enough airflow so things dry properly,
and a base heavy enough to survive the chaos of real hands in a real morning.
My biggest surprise was how much a holder changes your routine. When brushes have assigned “parking spaces,” you stop losing time.
You stop tossing tools into drawers where they collect dust. You stop treating your brushes like disposable items and start treating them like equipment.
And yes, it’s silly that a tiny otter holding a cup can make me more consistent about cleaning and putting things away. But honestly?
If a small clay animal can trick my brain into being organized, I’m not going to argue with science.
These days, I keep a rotation: one open holder for daily brushes, one covered option for softer brushes that hate dust,
and a travel roll that prevents the dreaded “everything got bent in my bag” tragedy. And every so often,
I still make something purely for the bitlike a “DO NOT DRINK” brush mugbecause creativity should be useful, but it should also be fun.


