Table of Contents >> Show >> Hide
- Why Simple DIY Deck Railings Work So Well
- Start With Safety, Code, and Common Sense
- Best Material Options for Simple Easy Custom DIY Deck Railings
- Easy Custom Deck Railing Ideas That Actually Look Good
- How to Plan a DIY Deck Railing Without Losing Your Mind
- Simple Installation Strategy for DIY Homeowners
- Common DIY Deck Railing Mistakes to Avoid
- What Makes a Deck Railing Feel Custom
- Conclusion
- Real-World Experiences With Simple Easy Custom DIY Deck Railings
Note: Always check your local building department before building or replacing deck railings. Local code, permit rules, and inspection requirements can vary by city, county, and state.
If your deck currently has the personality of a plain slice of toast, the railing is your chance to add some butter, jam, and maybe a little architectural swagger. The good news is that simple easy custom DIY deck railings do not have to be complicated, wildly expensive, or designed by someone wearing black turtlenecks and saying the word “minimalism” with deep emotion.
A smart deck railing can make your outdoor space look finished, feel safer, and work better for real life. It can frame a view, create privacy, define stairs, support lighting, and make an older deck feel brand-new without rebuilding the whole structure. Better yet, a custom railing does not always mean fancy fabrication. In many cases, it simply means choosing a clean design, the right materials, and a layout that fits your house instead of looking like it came straight from Aisle 12 with zero personality.
This guide walks through practical ideas, design choices, common mistakes, and real-world lessons so you can build a deck railing that is simple to install, easy to live with, and custom enough to make the neighbors suspicious that you suddenly became handy over the weekend.
Why Simple DIY Deck Railings Work So Well
There is a reason simple railing designs continue to win. They are easier to measure, easier to build, easier to repair, and usually easier to keep code-friendly. Clean lines also age well. A basic wood frame with evenly spaced balusters or metal infill still looks sharp years later, while overcomplicated railings can date a deck faster than a sponge-painted kitchen from the 1990s.
Simple designs also leave room for customization where it counts. You can play with post caps, rail color, baluster style, drink rails, lighting, or privacy panels without turning the project into a full-time emotional event. In other words, keep the bones simple and let the details do the flirting.
Start With Safety, Code, and Common Sense
Know when a railing is required
In many places, a guard is required when the deck walking surface is more than 30 inches above grade. Stairs usually bring their own rules, and many jurisdictions require a graspable handrail when you have four or more risers. That means your deck might not need a guard, but your stairs still may. The safest move is to verify requirements before you buy materials, not after you have already cut everything and developed a strong emotional bond with the wrong posts.
Get the height and spacing right
A common residential standard is a minimum 36-inch guard height, while stair handrails are often in the 34- to 38-inch range. Openings between balusters or cables are commonly kept under 4 inches. These measurements are not random; they are about reducing fall risk and preventing unsafe gaps. Even a beautiful railing becomes a problem if the spacing looks like it was measured with a sandwich instead of a tape measure.
Strong connections matter more than looks
This is where many DIY projects either become legends or cautionary tales. The railing posts and their connections to the deck framing are critical. A stylish top rail means very little if the post wobbles when someone leans on it. Use code-compliant hardware, structural fasteners rated for the job, and connectors suitable for outdoor exposure. If you are replacing only the railing on an older deck, inspect the framing before assuming it is ready for its glow-up.
Best Material Options for Simple Easy Custom DIY Deck Railings
Pressure-treated wood
Wood is still the classic DIY choice because it is affordable, easy to cut, and friendly to custom designs. You can stain it, paint it, cap it, trim it, and generally treat it like the Swiss Army knife of deck railing materials. The tradeoff is maintenance. Wood can splinter, twist, fade, and demand periodic sealing or painting like a diva asking for one more backstage adjustment.
Cedar or redwood
If you want a warmer, more natural look, cedar or redwood can be excellent choices. They tend to look more refined than standard treated lumber and often work beautifully in simple slat or square-baluster designs. They usually cost more, but many homeowners like the finished look enough to justify it.
Composite railing
Composite railing is a strong pick for homeowners who want lower maintenance and a clean, finished appearance. It often comes in kits, which can simplify installation and help keep spacing consistent. Composite tends to cost more upfront, but it saves time on future sanding, staining, and repainting. Translation: fewer Saturdays spent arguing with peeling finish.
Aluminum or steel
Metal railing systems are sleek, durable, and especially appealing if you want a modern style. Aluminum is lightweight, strong, and typically low maintenance. Steel can feel extra sturdy and gives a sharper architectural look. If you live in a wet or coastal climate, corrosion resistance and the right hardware become especially important.
Cable railing
Cable railing works best when you want an open view and a more modern look. It is popular for elevated decks facing a yard, lake, or mountain view. It can look fantastic, but it is not always the cheapest or simplest option once hardware, post reinforcement, and tensioning are factored in. Beautiful? Yes. Effortless? Not always.
Easy Custom Deck Railing Ideas That Actually Look Good
1. Wood posts with black metal balusters
This might be the sweet spot for many DIY homeowners. You get the warmth and affordability of wood with the crisp visual lines of metal. It works on farmhouse, traditional, transitional, and even modern homes. Paint the posts and rails white for a classic contrast, or stain the wood medium brown for a richer look.
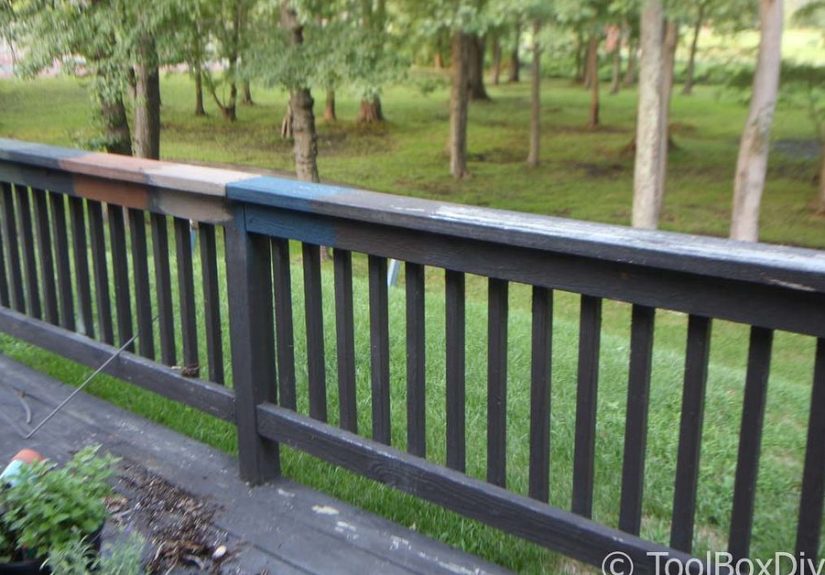
2. All-wood square railing with wider cap rail
A classic wood railing becomes more custom when you add a wider top cap. That top cap can act like a mini shelf for drinks, planters, or the iced tea you forgot outside for two hours. It is easy to build and gives a simple deck a more intentional design.
3. Composite kit with a drink rail
If you want the easiest path to a clean finished look, a composite kit with a drink rail is a practical win. The system helps reduce layout guesswork, and the top rail adds both style and function. It is especially useful on entertainment decks where people always need somewhere to set a plate, a drink, or their phone while pretending they are not checking it.
4. Mixed-material railing with privacy section
Not every part of a deck needs the same level of openness. One side may face the backyard view, while another stares directly into a neighbor’s kitchen window. A smart custom approach is to use open railing on the view side and a slatted privacy panel where you need screening. This keeps the project simple while solving a real problem.
5. Simple railing plus lighting
Sometimes the “custom” part is not in the railing shape at all. Add post-cap lights, low-profile rail lights, or step lights and the whole deck feels more polished. Lighting also improves nighttime safety, which is a lot more exciting than stepping onto a dark stair and discovering gravity still works.
How to Plan a DIY Deck Railing Without Losing Your Mind
Measure everything twice
Measure deck sections, stair runs, post locations, and finished rail heights before ordering materials. Draw a quick sketch with dimensions. You do not need fancy software. A notepad, a pencil, and a willingness to stop “eyeballing it” can save money and preserve family harmony.
Match the railing to the house
Look at your home’s trim, windows, exterior color, and architectural style. If your house is traditional, an ultra-industrial cable system may feel out of place. If your home is modern, chunky turned balusters may look like they wandered in from another address. The best custom deck railing usually feels like it belongs to the house, not like it won a raffle to be there.
Choose your maintenance level honestly
Do not pick a high-maintenance railing if you already know you hate upkeep. Be honest with yourself. If staining wood every few years sounds relaxing, great. If that sounds like punishment, composite or aluminum may be a better long-term fit.
Price the whole system, not just the rails
Posts, brackets, connectors, fasteners, post caps, lighting, sleeves, trim, and finish products all affect the final budget. Many homeowners compare only the visible rail price and then get surprised when the “affordable” option starts collecting add-ons like a shopping cart with commitment issues.
Simple Installation Strategy for DIY Homeowners
Step 1: Check the framing
Before installing anything new, inspect the deck frame, rim area, stair framing, and old post locations. Repair rot, loose connections, or weak attachment points first. A fresh railing over weak framing is like putting nice shoes on a folding chair.
Step 2: Set or reinforce the posts
Posts should be plumb, well-fastened, and properly supported. This is the structural heart of the system. Use the correct structural screws, bolts, blocking, or hardware approved for deck guard applications. Follow manufacturer instructions closely, especially with metal connectors.
Step 3: Build or install rail sections carefully
If you are building wood sections, pre-measure and dry-fit them before fastening permanently. Keep spacing consistent. If you are using a kit, follow the sequence precisely. Many systems are easiest when assembled in a specific order, and improvising halfway through can lead to very creative language.
Step 4: Finish the details
Add caps, trim, lighting, drink rails, or privacy panels last. Sand sharp edges, seal exposed end grain, and use exterior-rated products throughout. Small finishing steps often make the difference between “decent DIY” and “wait, you built that?”
Common DIY Deck Railing Mistakes to Avoid
- Using decorative fasteners where structural hardware is required
- Installing posts that look fine but feel loose under pressure
- Ignoring local code for stair handrails and opening limits
- Choosing horizontal elements without checking climbability concerns or local interpretation
- Mixing metals and fasteners without thinking about corrosion
- Forgetting drainage, exposed end grain, and long-term weathering
- Overbuilding the design and underplanning the install
What Makes a Deck Railing Feel Custom
A custom deck railing is not always about complicated craftsmanship. More often, it is about thoughtful choices. A wider cap rail. Black balusters with warm cedar posts. A privacy panel only where needed. Matching the railing color to the window trim. Built-in lighting on the stair side. A simple cocktail rail that makes the deck better for daily life.
That is the magic of a good custom DIY deck railing. It does not scream for attention. It quietly makes the whole deck feel finished, functional, and personal.
Conclusion
Simple easy custom DIY deck railings are one of the best ways to upgrade an outdoor space without rebuilding the entire deck. Start with safety, code awareness, and strong post connections. Then choose a style that fits your home, your budget, and your tolerance for maintenance. Whether you go with painted wood, composite panels, black metal balusters, or a view-friendly cable setup, the smartest railing is the one that looks good, feels solid, and makes everyday deck life better.
If you keep the structure smart and the design simple, your railing can do a lot of heavy lifting. It can improve curb appeal, define the space, boost safety, and make the deck feel custom without becoming a complicated mess. That is a pretty strong return for a project that, with the right planning, can be both practical and surprisingly satisfying.
Real-World Experiences With Simple Easy Custom DIY Deck Railings
One of the most common experiences homeowners report with deck railings is that they start the project thinking it will be mostly decorative, then quickly realize the railing changes how the entire deck feels. A deck that once seemed wide open and unfinished suddenly feels more like an outdoor room. Even a basic square railing can make the space feel intentional, safer, and far more comfortable for kids, pets, and guests who do not enjoy accidental edge-related drama.
Another common lesson is that the “simple” part of the project is usually the design, not the planning. Homeowners often find the best results come from choosing a straightforward railing style and spending extra time on layout. When post spacing is balanced, rail heights are consistent, and the stair section visually matches the main deck, the finished project looks more expensive than it really is. On the other hand, when one bay is oddly short, another is too wide, and the stair rail appears to have entered from another timeline, even good materials can look awkward.
People who choose wood often love how customizable it feels. They can stain it to match a pergola, paint it to coordinate with trim, or add details like planters and wider cap rails. But they also tend to learn quickly that outdoor wood wants attention. Sun, rain, and seasonal movement do not care that the railing looked perfect on installation day. A few years later, some boards may twist, finish may fade, and that once-proud railing may start hinting that it would really like a maintenance budget.
Homeowners who switch to composite or aluminum often talk about relief more than romance. The appeal is not just style. It is freedom from constant upkeep. Many say the biggest joy comes a year or two later, when the railing still looks neat with little more than cleaning. That is when the higher upfront cost starts to make emotional sense. Fewer repairs. Fewer repaint weekends. Fewer moments spent glaring at peeling paint while holding a scraper and questioning every life decision.
Stair railings tend to be where the biggest learning experiences happen. Many DIYers discover that stairs are less forgiving than flat deck sections. Angles, cuts, graspable handrails, and post stability all become more important. It is very common for people to breeze through straight deck rail panels and then spend twice as long adjusting the stair section. The lesson is simple: plan stairs first, not last.
Another frequent experience is realizing that small upgrades matter more than expected. A drink rail becomes everyone’s favorite feature during cookouts. Low-voltage or solar lights make evening use safer and more inviting. A privacy panel on just one side can completely change how comfortable the deck feels. These details are often inexpensive compared with the full project, yet they deliver some of the strongest day-to-day value.
In the end, the most successful DIY deck railing projects usually share the same pattern. The homeowner keeps the design clean, respects structure and code, chooses materials that fit real life, and adds just enough personality to make the deck feel finished. That is the sweet spot: a railing that looks custom, works hard, and does not become a maintenance villain by next spring.


