Table of Contents >> Show >> Hide
- Before You Start: Do These 6 Things First
- Way #1: Loosen It with Penetrating Oil + Controlled Torque
- Way #2: Use Heat (or Temperature Change) to Break the Rust Bond
- Way #3: Extract It (Screw Extractor, Drill, or Last-Resort Removal)
- How to Choose the Right Method Fast
- What to Do After Removal (So You Don’t Fight the Same Screw Again)
- Final Thoughts
- Real-World DIY Experiences with Rusted Screws (Extended Notes)
A rusted screw is basically a tiny metal troll. It looks harmless, then suddenly you’re sweating in the garage, questioning your life choices, and holding a screwdriver like it personally betrayed you.
The good news: most rusted screws can be removed without destroying the surrounding material. The better news: you usually do not need a machine shop, a wizard, or a dramatic speech. You need the right method, in the right order. This guide breaks down three proven ways to remove rusted screwsstarting with the least aggressive option and moving up only when needed.
This article is written in a practical, real-world style for DIYers, homeowners, and anyone who has ever muttered “why won’t you move?” at a screw. It also blends common best practices from major U.S. home improvement retailers, tool brands, DIY publishers, and safety guidance into one readable playbook.
Before You Start: Do These 6 Things First
Before jumping into the three methods, set yourself up for success. Rusted screw removal is often less about brute force and more about preparation and control.
1) Use the correct driver bit
A loose-fitting Phillips, Torx, flathead, or hex bit will strip the head faster than you can say “I’ll just try one more time.” Match the bit size precisely and make sure it seats fully in the screw head.
2) Clean the screw head and surrounding area
Brush off loose rust, dirt, paint, and debris. A small wire brush works well. Cleaning improves bit contact and helps penetrating oil reach the threads instead of just sitting on top like a decorative puddle.
3) Add downward pressure
One of the biggest mistakes is trying to turn before seating the bit firmly. Push down hard while turning slowly. This helps the bit stay engaged and reduces cam-out (that annoying skip that chews up the screw head).
4) Protect yourself
Wear safety glasses and gloves, especially if you’re drilling, striking with a hammer, or using heat. Rust flakes and metal chips are tiny, fast, and rude.
5) Know what the screw is going into
A rusted screw in a steel hinge behaves differently from one in outdoor wood trim, an aluminum fixture, or a plastic housing. Your method should match the material around the screwnot just the screw itself.
6) Use an escalation mindset
Start gentle. If it doesn’t move, escalate. Going full demolition on attempt #1 is how a five-minute fix becomes a weekend project.
Way #1: Loosen It with Penetrating Oil + Controlled Torque
This is the best first move for most rusted screws. Penetrating oil helps seep into tight spaces, break down corrosion, and lubricate the threads so the screw can turn more easily.
What You’ll Need
- Penetrating oil (not just general lubricant)
- Wire brush
- Correct screwdriver or bit
- Manual screwdriver, drill/driver, or impact driver (used carefully)
- Rubber band (optional traction trick for a partially damaged head)
Step-by-Step
- Clean loose rust first. Use a wire brush to remove surface rust and debris around the screw head.
- Apply penetrating oil. Spray or drip it around the screw head and where the threads enter the material (if accessible).
- Wait. Let the product work. Sometimes a few minutes is enough; for stubborn corrosion, longer dwell time helps.
- Tap lightly. A few gentle taps on the screw head or surrounding metal can help the penetrant travel deeper.
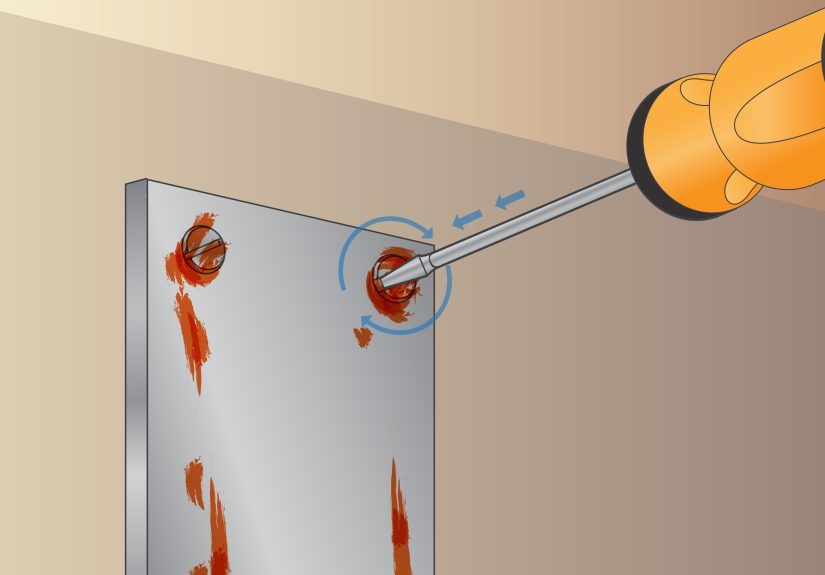
- Try removal with firm downward pressure. Turn slowly counterclockwise. Avoid sudden, jerky force at first.
- Rock the screw if needed. Try a tiny tightening motion first, then loosen. That small back-and-forth movement can break the rust bond.
Pro Tips That Actually Help
If the screw head is starting to strip, stop and improve traction before trying again. A rubber band placed between the bit and screw head can help in some cases. If part of the screw shank is exposed, locking pliers can give you a better grip than a screwdriver.
If you’re using a drill/driver, go slow and controlled. Speed is great for coffee grinders, not for rusted screws. Too much speed increases heat, reduces feel, and raises the chance of stripping the head.
When This Method Works Best
- Outdoor hardware with moderate rust
- Hinges, brackets, and metal fixtures
- Screws that still have a usable head
- Situations where you want to preserve the surrounding material
Common Mistakes to Avoid
- Using the wrong bit size “because it’s close enough”
- Forcing the screw immediately without giving penetrant time to work
- Using too much drill speed and stripping the head
- Assuming every spray can is a penetrating oil (some are mainly lubricants or water displacers)
Way #2: Use Heat (or Temperature Change) to Break the Rust Bond
If penetrating oil and careful torque fail, temperature can help. Rust can lock threads together tightly, and controlled heat can expand metal and weaken that bond. In some cases, a heat-and-cool cycle works even better than heat alone.
This method is effective, but it also has the biggest “please pay attention” energy. Use it only when the surrounding material and setting make it safe.
When to Use Heat
- The screw is in metal (hinges, frames, brackets, machinery parts)
- Penetrating oil alone didn’t work
- The screw head is still intact enough to turn
- There are no nearby flammables, finishes, wiring, or sensitive plastics in the heat path
Tools You Can Use
- Heat gun (safer for many DIY situations)
- Soldering iron (great for smaller screws and tighter control)
- Propane torch (higher risk; use only when appropriate and experienced)
How to Do It Safely and Effectively
- Remove or shield nearby combustible materials. This includes rags, solvents, aerosol cans, and dust buildup.
- Do not heat immediately after spraying penetrant. Follow the product label and allow vapors to dissipate fully.
- Apply heat to the surrounding metal first. The goal is to expand the material around the screw and disturb the corrosion bond.
- Use short heating intervals. Gradual heat is better than blasting the area and damaging paint, finishes, or parts.
- Try removal while warm. Seat the bit fully, apply strong downward pressure, and turn slowly.
- Repeat if needed. A couple of heat-and-attempt cycles often works better than one dramatic try.
What About Cooling Methods?
Some products and techniques use rapid cooling (or heat followed by cooling) to create thermal shock that helps break corrosion. That can work, especially on stubborn metal fasteners. For most home users, though, controlled heat plus patience is the simpler and safer first temperature-based method.
Big Warning for Electronics, Plastic, and Painted Surfaces
If the screw is in a plastic housing, appliance trim, electronics casing, or a painted decorative surface, heat can cause more damage than the rust. In those cases, skip to the extraction method and use precision instead of temperature.
Way #3: Extract It (Screw Extractor, Drill, or Last-Resort Removal)
This is the “okay, now we’re doing surgery” method. If the screw is badly rusted, the head is stripped, or the screw simply refuses to move, extraction is usually the most reliable solution.
The key here is precision. Go slow, stay centered, and resist the urge to rush. A rushed extractor job can break the extractor or damage the surrounding material, which is the DIY version of stepping on a rake.
Best Cases for Extraction
- The screw head is stripped or rounded
- The screw won’t move even after penetrant and heat
- You can replace the screw afterward (recommended)
- You have room to use a drill straight-on
What You’ll Need
- Center punch and hammer
- Drill and appropriately sized bits
- Screw extractor set (spiral or double-ended type)
- Cutting oil (especially when drilling into metal)
- Safety glasses
- Locking pliers (optional)
Step-by-Step Extraction Method
- Mark the center. Use a center punch to make a small indentation in the middle of the screw head. This helps prevent the bit from wandering.
- Drill a pilot hole. Start with a small bit and drill slowly, keeping the drill straight. Low speed is your friend here.
- Increase size if needed. Follow your extractor kit instructions for the recommended pilot hole size.
- Insert the extractor. Gently seat it in the hole (some types are tapped in lightly).
- Turn counterclockwise slowly. The extractor should bite and begin backing the screw out.
- Stop if it feels unstable. If the extractor starts slipping, reassess. Forcing it can break the extractor, which is much harder to drill out.
Alternative Extraction Tricks (Sometimes Faster)
- Pliers: If the screw head or shank protrudes, locking pliers may remove it without drilling.
- Cut a new slot: For larger screws, you can cut a flathead slot with a rotary tool and then use a flat screwdriver.
- Reverse drilling: In some cases, drilling in reverse with the right bit can catch and spin the screw out.
Last Resort: Drill the Head Off
If the screw is completely wrecked and nothing works, drilling the head off is often the cleanest way to separate the part being held. Once the top piece is removed, you may be able to grab the remaining screw shank with pliers and back it out. This is a legitimate method, not a failure. It just means the screw chose violence first.
Important Precision Notes
- Keep the drill aligned with the screw axis
- Use sharp bits, especially on hardened or corroded screws
- Use cutting oil when drilling metal to reduce heat and improve control
- Match extractor size to screw size exactly
- Replace the old screw after removaldon’t reuse compromised fasteners
How to Choose the Right Method Fast
If the screw head is intact and accessible
Start with Way #1 (penetrating oil + controlled torque). Add a rubber band or try a better-fitting bit if traction is poor.
If the screw is heavily rusted in metal and still won’t move
Move to Way #2 (heat/temperature change), but only if the area is safe for heat and free of flammables.
If the head is stripped, rounded, or damaged
Go to Way #3 (extraction). It’s usually faster than pretending the screw is going to cooperate.
What to Do After Removal (So You Don’t Fight the Same Screw Again)
- Clean the threads or hole of rust and debris
- Replace with a new screw of the correct material and size
- Consider stainless or coated fasteners for outdoor use
- Use anti-seize or a suitable thread treatment when appropriate (especially in corrosive environments)
- Avoid overtightening, which can damage the head and complicate future removal
Final Thoughts
Removing rusted screws is less about strength and more about sequencing: loosen, heat, extract. Start with the least aggressive method, protect the surrounding material, and escalate only when needed. In many cases, patience and the right bit will solve the problem. In tougher cases, a screw extractor and a steady hand will do the job.
And if you end up drilling out the screw after trying everything else? Congratulationsyou didn’t fail. You completed the full boss battle.
Real-World DIY Experiences with Rusted Screws (Extended Notes)
One of the most common situations where rusted screws show up is outdoor hardware: gate hinges, patio furniture, mailbox brackets, and exterior light fixtures. In those jobs, the screw usually looks “not that bad” until you try to turn it. A typical DIY experience goes like this: the first attempt feels tight, the second attempt slips, and by the third attempt you realize you’re one bad twist away from stripping the head completely. The lesson most people learn (often the hard way) is that the first minute matters most. Taking time to brush the rust off, apply penetrant, and wait can save twenty minutes of extraction work later.
Another frequent scenario is bathroom or kitchen hardware, especially screws exposed to moisture and cleaning chemicals. These screws may not look dramatically rusted, but corrosion can still lock the threads in place. A lot of people instinctively reach for a power drill because it feels faster. In practice, a manual screwdriver with strong downward pressure often works better at the start because it gives more feedback. You can feel whether the screw is beginning to move, whether the bit is slipping, or whether the head is deforming. That “feel” is hard to get from a fast-spinning drill.
In garage and workshop repairs, the most successful experiences usually come from an escalation approach. For example, a DIYer working on an old steel bracket might start with penetrant and a hand tool, then move to a heat gun, and only then use an extractor. This progression protects the part and minimizes damage. People who jump straight to drilling often end up with an off-center hole, a damaged surrounding surface, or a broken extractor. The irony is that the slow-looking method is often the fastest method overall.
There’s also a very real difference between rusted screws in wood and rusted screws in metal. In wood, the screw may be stuck because of rust plus swelling, finish buildup, or paint. In metal, you’re usually fighting corrosion at the threads. That difference changes what works. Heat can be great on metal brackets, but risky near finished wood or plastic trim. On the other hand, cutting a new slot and using a flathead driver can be a smart move for larger screws in wood applications when the head is damaged.
A practical takeaway from many real-world repairs is this: once a rusted screw comes out, replace it with a better fastener. Outdoor projects especially benefit from stainless steel, coated screws, or corrosion-resistant hardware matched to the environment. DIYers who skip this step often see the same problem return a year later. The repair itself may be successful, but the long-term win comes from preventing a repeat battle.
Finally, one of the most underrated “experience-based” tips is emotional, not technical: stop when the screw starts getting worse. If the head is deforming, if the bit keeps skipping, or if you feel yourself adding more force just because you’re annoyed, pause and switch methods. Rusted screw removal is one of those jobs where stubbornness helps only if it’s directed at the processnot at one failing technique. The screw may be stubborn, but your strategy should be smarter.


