Table of Contents >> Show >> Hide
- Before You Block Anything: 5 Quick Reality Checks
- 1) The Quick Board-Up (Plywood Panel)
- 2) The Removable Insulated Door Plug (Reversible + Energy-Smart)
- 3) Frame It In (Stud Wall + Insulation + Sheathing)
- 4) Masonry Infill (Brick or Concrete Block)
- 5) Convert the Doorway Into a Fixed Window (Light Without the Exit)
- How to Choose the Best Method (Without Overthinking It for Three Weeks)
- Common Mistakes That Turn “Easy” Into “Why Is This My Life Now?”
- of Real-World “Been There” Experiences (So You Don’t Have To)
- Conclusion
Every house has that door. The one nobody uses. The one that leaks air like it’s paid by the draft.
The one that used to lead somewhere useful… and now opens into a muddy side yard, a future deck project,
or a mysterious “we’ll deal with it later” zone.
If you want to block up an external doorwaywhether for security, energy savings, a remodel, or because you’re
turning the old back entrance into a pantry wallthere are several solid options. Some are temporary (fast, cheap,
reversible). Others are permanent (looks like the door never existed). The trick is matching the method to your goal:
security, weatherproofing, appearance, and code compliance.
Before You Block Anything: 5 Quick Reality Checks
1) Make sure you’re not blocking required egress
If this door is part of a required exit route (especially in rentals, finished basements, or home businesses),
sealing it off could create a safety issue and a code issue. When in doubt, treat doors like emergency lanes:
you don’t want to “temporarily” park a wall where an escape route is supposed to be.
2) Check permits and HOA rules
Many jurisdictions require permits for exterior envelope changes (closing openings, changing siding, masonry infill,
converting doors to windows). If you’re doing a permanent change, a quick call to your local building department can
save you from expensive “undo it” moments later.
3) Assume water will try to get in (because it will)
The threshold and lower corners of door openings are famous for hidden water damage. If you’re closing the opening,
plan for proper weather-resistive layers (wrap, flashing, and a water-managed exterior surface), not just “cover it and pray.”
4) Decide: temporary vs. permanent
- Temporary: great for renovations, vacant properties, storm prep, or “we might want the door back.”
- Permanent: best for energy performance, resale polish, and long-term durability.
5) Confirm what kind of wall you’re dealing with
Exterior walls are often load-bearing. That doesn’t mean you can’t close a door openingbut it does mean you should
respect the structure: headers, studs, and proper fastening matter. If you see sagging, cracked drywall near the opening,
or a questionable header, bring in a pro.
1) The Quick Board-Up (Plywood Panel)
If your goal is “block the opening today,” this is the fastest path. A plywood board-up is common for storm prep,
securing vacant homes, or buying time while you plan a permanent fix. Done right, it’s sturdy and surprisingly effective.
Best for
- Immediate security
- Short-term weather protection
- Renovation periods and vacant properties
How it works (high-level)
- Measure the door opening (and decide whether you’re mounting inside the jamb or overlapping the trim).
- Cut exterior-grade plywood thick enough to resist flexing.
- Reinforce the panel with framing lumber (so it doesn’t bow like a cheap trampoline).
- Fasten it securely into framingnot just into flimsy trim.
- Seal edges if you need weather protection (paint/sealant helps a lot).
Pros
- Fast and inexpensive
- Works even if you’re not ready to mess with siding
- Strong security upgrade when installed properly
Cons
- Not “pretty” (unless your aesthetic is “post-apocalyptic chic”)
- Not a long-term moisture-managed wall solution
- Can trap moisture if sealed incorrectly without a proper wall assembly
Pro tip: If you need this to last more than a short season, treat it like an exterior surface:
seal the plywood, keep water from sitting at the bottom edge, and check it after heavy rain.
2) The Removable Insulated Door Plug (Reversible + Energy-Smart)
Want to keep the door physically in place (or keep the opening intact), but stop drafts and lock down the space?
A removable insulated “door plug” is a clever middle-ground. Think of it like a winter coat for a doorwayminus the sleeves.
Best for
- Rarely used doors you might want later
- Seasonal air leakage problems
- Rentals or situations where you can’t permanently alter the exterior
How it works (high-level)
- Create a rigid panel sized to fit snugly inside the door jamb.
- Use insulation (rigid foam board is common) sandwiched between sturdy layers (like plywood).
- Add weatherstripping around edges to reduce air leaks.
- Secure it so it won’t shift, but can still be removed later.
Pros
- Reversible
- Improves comfort and can reduce heating/cooling loss
- Can be made neat-looking from the inside (paint it to match your walls)
Cons
- Doesn’t “erase” the doorway visually from outside
- Still relies on the existing door area being reasonably dry and sound
- You’ll want to watch condensation in humid climates
Reality check: Fiberglass insulation is great for warmth, but it’s not an air seal by itself.
If your plug is insulated but leaky around the edges, air will still sneak in like it owns the place.
3) Frame It In (Stud Wall + Insulation + Sheathing)
This is the classic “make it a wall” solutionand when it’s done correctly, it looks like the doorway never existed.
You remove the door and jamb, frame the opening with studs, insulate, then rebuild the exterior layers (sheathing, wrap,
siding) and interior finish (drywall). It’s approachable for confident DIYers and a very normal project for contractors.
Best for
- Permanent closure with good insulation and durability
- Turning a door area into closet space, pantry walls, built-ins, or extra room layout
- Resale-friendly “clean” results (when the exterior is matched well)
What “done right” includes
- Solid framing: studs aligned and anchored to the existing framing
- Insulation: to match the rest of the wall cavity
- Air sealing: caulk/foam where appropriate so you don’t create a draft factory
- Exterior weather layers: sheathing + housewrap/WRB + proper flashing transitions
- Exterior finish: siding or masonry tie-in that sheds water
- Interior finish: drywall, tape, mud, sand, prime, paint (the “why is drywall so humbling?” phase)
Pros
- Energy-efficient and durable when properly sealed
- Most “invisible” final look
- Works with many siding types (vinyl, fiber cement, wood, etc.)
Cons
- Exterior siding matching can be tricky (especially with older paint or discontinued materials)
- More steps than a board-up
- May require permits and inspections
Specific example: If you’re turning a back door into a pantry wall,
framing the opening lets you run continuous shelving, add a tall cabinet, and eliminate a chronic draft zone.
The finished pantry feels intentionallike the door never existedrather than “we put a wardrobe in front of it and hoped for the best.”
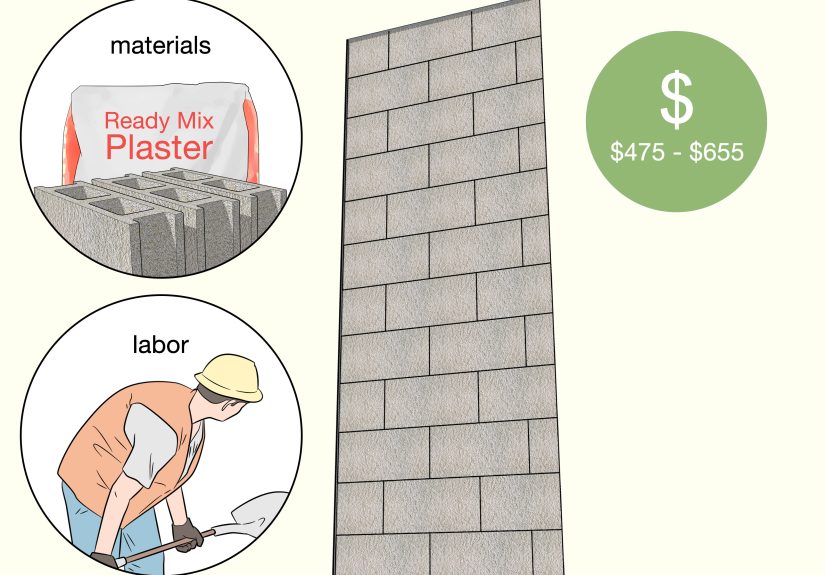
4) Masonry Infill (Brick or Concrete Block)
If the exterior is brick, block, or stoneor if the doorway is in a foundation wallmasonry infill can be a strong, long-lasting solution.
This method is especially common for basement doors, old cellar entrances, and utility doorways you no longer need.
Best for
- Brick or masonry exteriors
- Basements and lower-level openings
- High durability and security
What matters most: moisture management
Masonry walls often rely on proper flashing and drainage details to handle water that gets behind exterior layers.
If your home has masonry veneer, details like flashing and weep holes may be part of keeping the wall dry over time.
When you change an opening, you don’t want to accidentally create a water trap behind the new infill.
Pros
- Very durable and secure
- Can blend nicely with existing masonry when matched well
- Great for lower-level openings exposed to splash-back and soil moisture
Cons
- More specialized skills and tools
- Matching brick color and mortar can be an art (and artists charge accordingly)
- Incorrect drainage details can lead to moisture problems
Specific example: Closing an old basement walkout door can free up interior wall space for storage while
reducing cold air infiltration. Masonry infill can also deter pests that treat door thresholds like a VIP entrance.
5) Convert the Doorway Into a Fixed Window (Light Without the Exit)
If you’re blocking a door because you don’t need the exitbut you do want natural lightconsider converting the opening into a fixed window.
This is a practical “best of both worlds” option: the doorway becomes part of the wall system again, but you don’t lose daylight.
Best for
- Kitchens, dining areas, and living rooms where light matters
- Doors that open to awkward or unsafe exterior conditions
- Modernizing curb appeal
Options
- Fixed picture window: clean look, great light, fewer moving parts
- Glass block: privacy + light (common in bathrooms and basements)
- Transom + solid wall below: a nice compromise if you want a smaller glass area
Pros
- Adds light and can boost the feel of the room
- Often looks intentional and “designed”
- Still improves security vs. a door
Cons
- Usually not the cheapest option
- Requires proper flashing and exterior trim/siding work
- May still require permits and inspections
Specific example: A side door off the dining room that no one uses can become a large fixed window
that brightens the entire space, while the interior wall area can be redesigned for a buffet cabinet or banquette seating.
How to Choose the Best Method (Without Overthinking It for Three Weeks)
- If you need security fast: go with a plywood board-up (Method #1).
- If you want reversible + comfort: use an insulated door plug (Method #2).
- If you want it gone for good: frame it in and rebuild the wall (Method #3).
- If it’s a masonry exterior or basement opening: consider masonry infill (Method #4).
- If you’d miss the daylight: convert it to a fixed window (Method #5).
Common Mistakes That Turn “Easy” Into “Why Is This My Life Now?”
Skipping air sealing
Insulation slows heat transfer, but air leaks are like leaving a window cracked all season. Seal gaps at framing edges,
transitions, and around any patch panels.
Forgetting the exterior weather layers
A permanent closure needs a continuous water-resistive barrier and proper transitions so water sheds outward.
It’s not just “cover the hole”it’s “restore the wall system.”
Creating a moisture sandwich
Layering materials that trap moisture (especially in humid climates) can invite mold and rot. If you’re unsure about
vapor control and drying potential, this is a great moment to consult a building pro.
Mismatching siding without a plan
The exterior patch is often the hardest part to make invisible. If you can’t get a perfect match, consider design-based
solutions: a vertical “feature” panel, matching trim bands, or a planned exterior accent that looks intentional.
Blocking a door that should stay usable
If the door is part of a safe exit route or needed access, don’t sacrifice function for aesthetics.
A fixed window conversion or an upgraded, well-sealed exterior door might be the smarter upgrade.
of Real-World “Been There” Experiences (So You Don’t Have To)
The first time I saw someone “block up” an exterior doorway, it was a masterclass in confidence and chaos. The plan was simple:
“We never use this door. Let’s close it and make a wall.” The reality was… a little more like a home-improvement sitcom.
Experience #1: The Draft That Wouldn’t Die. The homeowner framed the opening, insulated it, drywall finished it beautifully,
and stood back like a proud artist unveiling a masterpiece. Then winter arrived and the patch area still felt colder than the rest of the room.
The culprit wasn’t the insulationit was tiny air leaks at the edges where the new framing met the old. The fix was small (air sealing),
but the lesson was big: insulation is a sweater; air sealing is the zipper. Without the zipper, you’re still chilly.
Experience #2: The Mystery Moisture Stain. Another project looked perfect inside… until a faint stain appeared near the baseboard
after heavy rain. The old threshold area had been a water-prone spot for years, and when the door was removed, the team didn’t fully rebuild the
exterior water-management layers the way the rest of the wall worked. Translation: water found the weak point, because water always does.
That job ended with some exterior siding removal and a redo of the weather-resistive barrier transition. Not fun, but very educational.
Experience #3: The “Matching Siding Is a Myth” Moment. People think the hard part is framing. Often it’s not.
The hard part is making the outside look like it was always that wayespecially if the siding is old, sun-faded, or discontinued.
One homeowner couldn’t match the siding at all and was ready to accept a patch that screamed “I used to be a door!” Instead,
they leaned into design: a planned vertical accent panel with trim borders. Suddenly it didn’t look like a patchit looked like intention.
The house went from “oops” to “oh, nice!”
Experience #4: The Permit Surprise. A different homeowner did everything right physically, then tried to sell the house.
The inspector flagged the exterior alteration as unpermitted work. It didn’t mean the wall was unsafe, but it did mean paperwork and negotiation.
The takeaway: if you’re doing a permanent exterior envelope change, check permit requirements early. It’s boring, yesbut boring beats expensive.
And finally, experience #5: The Emotional Attachment Door. Sometimes the best answer isn’t “remove it forever.”
One family blocked a door during a remodel, then realized it was their easiest path to the backyard grill, the garden, and the dog’s favorite route.
They ended up reopening it later, but this time they upgraded the door and weatherproofed it properly. The door didn’t need to disappear;
it needed to stop acting like a wind tunnel. Moral: before you erase a door, imagine how you actually live in the spaceon busy weekdays, in rain,
carrying groceries, with pets, with kids, with that one friend who always uses the “wrong” entrance.
Conclusion
Blocking up an external doorway can be quick and temporary, or permanent and seamlessit all depends on your goals.
If you need speed and security, a well-built board-up works. If you want comfort without commitment, an insulated door plug can tame drafts.
For a long-term upgrade, framing in the opening and restoring the exterior wall layers is the most “invisible” solution.
Masonry infill shines on brick or basement openings, and converting the doorway to a fixed window keeps the light while removing the exit.
Whatever you choose, remember the “big three”: don’t block required egress, manage water, and
seal air leaks. Do that, and your old doorway won’t haunt you with drafts, stains, or regrets.


