Table of Contents >> Show >> Hide
- The 3-Step System (Works for Any Garlic, Any Recipe)
- Which Peeling Method Should You Use? Match It to the Recipe
- Why These Tricks Work (Tiny Science, Big Payoff)
- Common Garlic-Peeling Problems (and Quick Fixes)
- Specific Examples: How Peeled Garlic Shows Up in Favorite Recipes
- Batch Prep: Peel Once, Cook All Week
- Extra : Real-World “Garlic Peeling Experiences” You’ll Recognize
- Conclusion
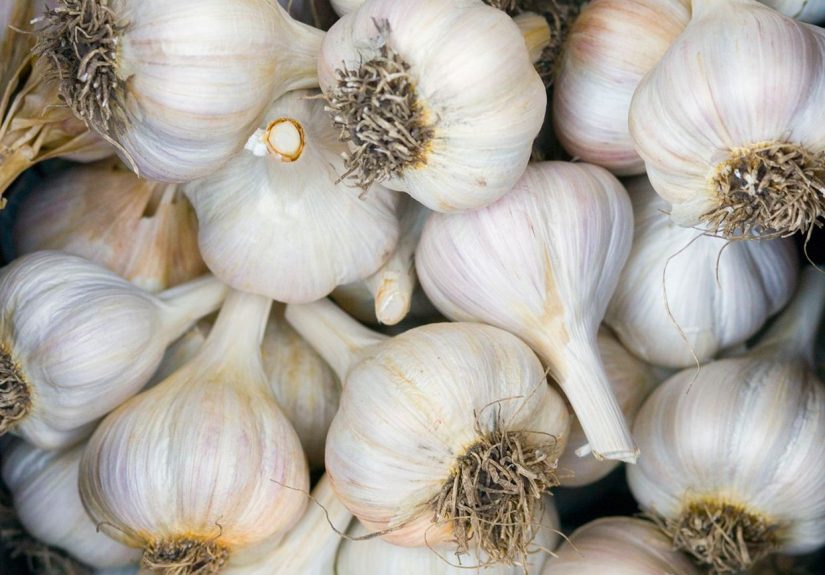
Garlic is the tiny ingredient with main-character energy. It makes pasta sauce taste like a hug, turns roast chicken into a
headline, and can rescue a bland stir-fry faster than you can say “Where’s the soy sauce?”
The only downside: peeling those papery little jackets can feel like trying to unwrap a stubborn candy… with slightly sticky fingers.
The good news is you don’t need fancy gadgets, a gym membership, or wizard training. You just need a simple 3-step systemand a couple
of optional “speed-run” tricks for when your recipe demands a whole garlic party.
The 3-Step System (Works for Any Garlic, Any Recipe)
Step 1: Break the head into cloves (set yourself up for success)
First, separate the cloves. This sounds obvious, but doing it the right way saves time and keeps cloves from flying across the kitchen
like tiny, fragrant hockey pucks.
- Loosen the outer papery skin around the garlic head (just the loose layers, not each clove).
- Press and roll the garlic head on the cutting board with your palm to separate cloves.
- Pull off only what you need and keep the rest of the head intactwhole bulbs stay fresher longer than loose cloves.
Kitchen reality check: Super-fresh garlic usually peels easier. Older garlic can be clingier, because the papery skins dry out
and stick tighter. That’s not a failureit’s just garlic being garlic.
Step 2: Loosen the skin (pick one of these fast “unlock” methods)
Garlic skin is easiest to remove after you loosen it. Think of it like opening a jar: you don’t wrestle the lid off with your fingertips;
you break the seal first. Same idea here.
Option A (Best for 1–6 cloves): The Knife Smash
This is the classic, most reliable methodfast, tool-minimal, and it doubles as the first step of mincing.
- Place a clove on a cutting board.
- Lay the flat side of a chef’s knife over it (sharp edge facing away from your hand).
- Press firmly with your palm until the clove cracks slightly.
Once the clove is lightly crushed, the peel usually slips off in one or two moves. If you smash too hard, you’ll end up with garlic paste
(which is not a tragedyjust a different vibe).
Option B (Best for a whole head or more): The Jar (or Two Bowls) Shake
If you’re peeling lots of clovesmeal prep, big batch marinara, holiday cookingshaking is a legit shortcut. You’re using friction to knock skins loose.
- Jar method: Put separated cloves in a lidded jar or container. Seal and shake vigorously.
- Two-bowl method: Place cloves in a large metal bowl, cover with another bowl, and shake like you’re auditioning for a percussion band.
Then open up, pick out peeled cloves, and toss skins. Expect that some cloves may need a quick touch-up peel, especially smaller ones.
Pro tip: This method is loud. If anyone in your house is napping, they will not be after the “garlic maraca solo.”
Option C (Best when skins are stubborn): Quick Heat (Microwave or Hot Water)
Heat creates steam and loosens the papery layersespecially helpful for older garlic or when you’re peeling a lot.
- Microwave method: Warm cloves briefly, then cool for a moment and peel. The skins often release more easily.
- Hot-water soak: Cover separated cloves with very hot water for about a minute, then drain and peel.
Safety note: Don’t overheat garlic. You’re loosening skins, not starting a garlic sauna. Also, let it cool briefly so you’re not handling hot cloves.
Option D (Best for gadget lovers): Silicone Garlic Peeler Tube
This is the small, inexpensive tool that looks like it belongs in a pencil case. You put a clove inside and roll it back and forth; the skin
comes off while the clove stays mostly intact. It’s especially nice if you hate the “garlic hand perfume” effect.
Step 3: Peel, trim, and prep (so your garlic behaves in the pan)
Once the skin is loose, the rest is quick:
- Peel off the papery skin with your fingers.
- Trim the root end (the tough, dry “butt” end). A small slice helps if any skin is still clinging.
- Check the center sprout (the green germ) if your garlic is older. Some cooks remove it to reduce bitterness.
Now your garlic is ready for whatever your recipe wants: sliced, minced, smashed, grated, or left whole for slow-cooking.
Which Peeling Method Should You Use? Match It to the Recipe
If you need garlic minced (most weeknight recipes)
Go with the knife smash. It’s fast and sets you up for chopping. After smashing, slice, then rock your knife through the garlic
until it’s as fine as you want.
Great for: pasta sauces, tacos, soups, scrambled eggs, stir-fries.
If you need garlic sliced (for quick sautéing)
Use a gentle smashjust enough to loosen the peel without mangling the clove. Then slice into thin coins or slivers.
Great for: aglio e olio, sautéed greens, garlic chips for topping ramen or salads.
If you need garlic whole (for mellow flavor)
Try the silicone tube or hot-water soak so cloves stay intact. Whole cloves turn sweet and mild when simmered or roasted.
Great for: roast chicken, braises, beans, slow-cooked soups.
If you need a lot of garlic (meal prep, batch cooking, holidays)
Use the jar/two-bowl shake first, then finish stragglers with a quick knife press. This hybrid approach is usually the fastest overall.
Great for: big batches of hummus, marinades, garlic confit, freezer prep.
Why These Tricks Work (Tiny Science, Big Payoff)
Garlic skin clings because it’s dry, papery, and wrapped around a clove with natural texture. The tricks above work by changing the “grip”:
- Smashing cracks the clove and breaks the skin’s seal.
- Shaking uses friction and impact to separate skins from cloves.
- Heat creates steam that loosens the papery layer (especially helpful with older garlic).
- Silicone rolling increases friction on the skin without crushing the clove.
Translation: you’re not peeling harderyou’re peeling smarter. (Garlic respects strategy.)
Common Garlic-Peeling Problems (and Quick Fixes)
“The peel won’t come offwhat am I doing wrong?”
Probably nothing. Try a slightly firmer smash, trim the root end, or switch to a quick heat method. Older garlic can be more stubborn.
“My garlic got crushed and sticky.”
That happens if you press too hard. If your recipe can handle garlic paste (most sauces can), go with it. Otherwise, switch to a silicone peeler or
a gentler tap.
“My hands smell like garlic forever.”
Wash with soap, then rub your fingers on stainless steel under running water (like a spoon or faucet) to help neutralize odor.
Or wear thin kitchen gloves if you’re peeling a mountain of cloves.
“The garlic tastes too sharp.”
Cut size matters. Finely minced or grated garlic is more intense than sliced or whole garlic. If you want mellow flavor, use whole cloves or bigger pieces
and cook them longer.
Specific Examples: How Peeled Garlic Shows Up in Favorite Recipes
1) Weeknight Pasta Sauce
Peel 3–5 cloves using the knife smash. Mince, then sauté gently in olive oil until fragrant (not browned). Add tomatoes and simmer.
The garlic becomes the cozy base note that makes the sauce taste like it’s been simmering since noon.
2) Stir-Fry or Fried Rice
Peel 2–3 cloves, slice thin, and add near the start so it perfumes the oil. Keep heat controlledthin slices can brown fast.
If you want a softer flavor, smash cloves instead and remove them later.
3) Roasted Garlic for Spreads
For roasted garlic, you can peel cloves or roast a whole head. Either way, once roasted, the cloves turn buttery and sweet.
Mash into softened butter, stir into mashed potatoes, or spread on bread and pretend you’re in a bistro.
4) Homemade Vinaigrette or Aioli
For raw applications, use peeled garlic that’s finely minced or grated for smooth texture. Start with a small amountraw garlic has enthusiasm.
Let it sit in the acid (like lemon juice or vinegar) for a few minutes to soften the bite.
Batch Prep: Peel Once, Cook All Week
If you cook often, peeling garlic in bulk can save serious time. Here’s a practical approach:
- Separate a few heads into cloves.
- Use the jar/bowl shake to peel most of them fast.
- Finish any stubborn cloves with a quick knife press.
- Store peeled cloves in an airtight container in the fridge and use within several days for best flavor.
Want to go full meal-prep mode? Mince a bunch and freeze it in small portions so you can toss garlic straight into a hot pan.
You’ll feel like your past self left you a delicious gift.
Extra : Real-World “Garlic Peeling Experiences” You’ll Recognize
The first time you try the knife smash method, it feels almost too simplelike you’ve been overpaying for a problem with your time. You set the clove down,
place the flat of the knife over it, press, and suddenly the peel loosens like it got bored and decided to leave. The experience is oddly satisfying,
especially if you’ve ever tried to peel garlic by picking at a tiny corner of skin for 45 seconds while your pasta water boils over.
Then comes the “pressure calibration” phase. You learn that garlic has a sweet spot: too gentle and the skin laughs at you; too aggressive and you’ve made garlic
paste on the cutting board. The good news is that even when you overshoot, most recipes don’t mind. Sauce? Great. Soup? Perfect. Stir-fry? Also fine, as long as
you don’t burn it. You start to realize garlic is forgivingyour technique doesn’t have to be flawless for the food to be fantastic.
If you try the jar shake method, your experience depends heavily on quantity. With just two sad cloves, you’ll shake the jar and nothing will happen, and you’ll
stare into the container like it betrayed you personally. Add a whole head’s worth of cloves, though, and suddenly the friction party begins. After a vigorous shake,
you open the lid and see peels separating like they’re trying to escape a crowded elevator. It feels like a magic trickone that is loud enough to alert your entire
household that “something garlicky is happening.”
The two-bowl method has its own personality. It works best when you commit. Half-hearted shaking leads to half-peeled cloves and a mild sense of disappointment.
But when you go for it, the experience is basically kitchen percussion: shake, rattle, clangthen open to find a pile of cloves with skins mostly loosened.
There’s always a few holdouts (garlic is allowed to have opinions), but you’ve still saved a bunch of time.
Heat methods are the “problem-solver” experience. When garlic is older or stubborn, a quick warm-up makes it suddenly cooperative. The moment you peel after a brief
microwave warm or hot-water soak, you can feel how the skin releases more easily. The trade-off is an extra stepwaiting for cloves to coolso the experience feels
less like a speed hack and more like a calm, controlled kitchen maneuver. This is the method you use when you’re done negotiating with clingy peels.
Over time, you build a personal garlic workflow. You might smash cloves for quick dinners, shake a jar for Sunday meal prep, and keep a silicone peeler around for
intact cloves when you want pretty slices. The best part is that peeling garlic stops feeling like a chore and starts feeling like the first step toward something
delicious. And once you’re comfortable, you’ll notice a funny side effect: you start adding “one extra clove” to everythingbecause now you can. Garlic confidence
is real, and it tastes amazing.


