Table of Contents >> Show >> Hide
- What Blood Glucose Monitoring Actually Measures
- Two Main Ways to Monitor: Fingerstick (SMBG) vs. CGM
- How to Prepare for Blood Glucose Monitoring
- How Fingerstick Blood Glucose Meters Work
- Step-by-Step: How to Check Your Blood Sugar with a Meter
- How CGMs Work (And Why They Sometimes “Disagree” with Fingersticks)
- What Can Throw Off Your Readings
- How to Use Your Numbers Without Spiraling
- Safety and Hygiene (Especially in Shared Settings)
- Choosing the Right Monitoring Method
- Conclusion
- Real-World Experiences: What Blood Glucose Monitoring Feels Like Day to Day (Extra )
Blood glucose monitoring is one of those tiny daily habits that can feel oddly powerful: a 5-second number that helps you steer your day
instead of letting your day steer you. Whether you’re living with diabetes, managing prediabetes, adjusting medications, or simply trying to
understand how your body responds to food, stress, and sleep, checking blood sugar turns “I feel weird” into “Here’s what’s going on.”
And yessometimes it also turns “I did everything right” into “Why is my body auditioning for chaos?” (We’ll talk about that too.)
In this guide, you’ll learn how to prepare for blood glucose monitoring, how the two main methods work (fingerstick meters and continuous glucose monitors),
what can throw results off, and how to use your numbers without letting them boss you around.
What Blood Glucose Monitoring Actually Measures
“Blood glucose” (often called “blood sugar”) is the amount of glucose circulating in your bloodstream. Glucose is your body’s main fuel source.
Your level changes constantlyafter meals, during exercise, when you’re sick, when you’re stressed, and sometimes just because your hormones
decided to host a surprise party.
Monitoring gives you data points (or a full data stream) that can help you and your clinician adjust food choices, physical activity, medication timing,
insulin doses (if used), and strategies for preventing highs and lows.
Two Main Ways to Monitor: Fingerstick (SMBG) vs. CGM
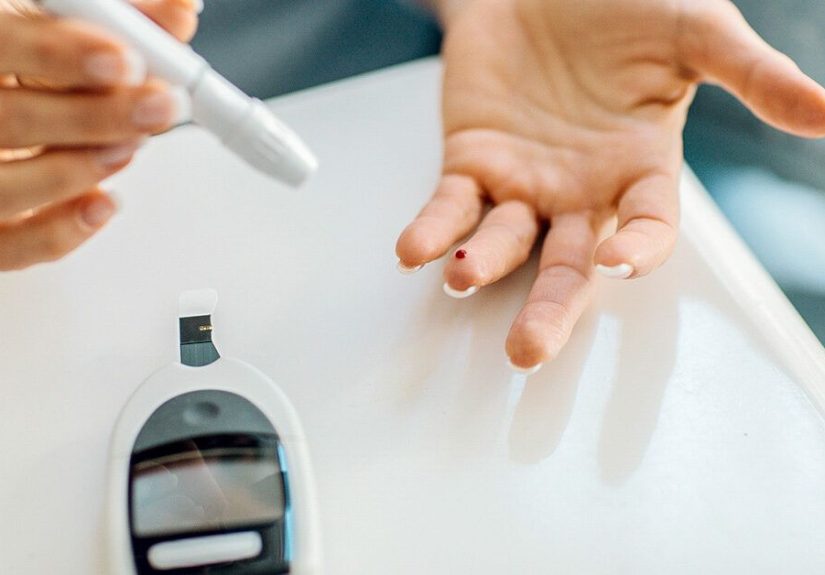
1) Fingerstick monitoring (SMBG)
Self-monitoring of blood glucose (SMBG) uses a handheld meter and disposable test strips. You prick your fingertip, place a small drop of blood
on a strip, and the meter displays a number. It’s fast, relatively inexpensive, and still the “backup plan” even for many people who use CGMs.
2) Continuous glucose monitoring (CGM)
Continuous glucose monitoring uses a small sensor inserted just under the skin that estimates glucose levels frequently throughout the day and night.
It shows trends, patterns, and direction arrowsuseful for seeing what’s happening between fingersticks, and for catching lows earlier with alerts.
Important nuance: CGMs typically measure glucose in interstitial fluid (the fluid between your cells), not directly in a blood drop. That difference
explains why CGM readings can lag behind fingerstick readings when glucose is changing quickly (like after exercise or a big meal).
How to Prepare for Blood Glucose Monitoring
Preparation is less about “getting ready for a test” and more about making your results trustworthy. Accuracy is a chain: hands, strips, meter,
technique, and context. Weakest link wins.
Gather your supplies
- Glucose meter
- Test strips compatible with your meter
- Lancing device and sterile lancets
- Alcohol swabs (optional, depending on your situation)
- Cotton ball or tissue
- Sharps container (or an approved puncture-resistant container)
- Logbook or app (optional but very helpful)
Check the “unsexy” stuff that affects accuracy
- Expiration dates: expired strips can give unreliable results.
- Storage: keep strips in their original container and close it tightly; store the meter and strips as the manufacturer instructs.
- Meter readiness: ensure the meter is charged (or has a good battery) and clean.
- Quality control: consider using control solution when recommended, especially with a new vial of strips or if results seem off.
Wash and dry your hands (seriously)
Washing with soap and warm waterand drying thoroughlyhelps prevent food residue or lotions from skewing your reading.
Warm water also helps blood flow, which makes it easier to get a good drop without excessive squeezing.
Pick the right site
Fingertips are the standard because they tend to reflect changes in blood glucose quickly.
Some meters allow alternate-site testing (like palm or forearm), but those sites can be less accurate when glucose is rising or falling fast.
If you feel symptoms that don’t match your number, a fingertip check is usually the “gold standard reality check.”
How Fingerstick Blood Glucose Meters Work
Here’s the “tiny lab” happening inside your strip:
-
Blood meets chemistry: the test strip contains enzymes (often glucose oxidase or glucose dehydrogenase).
When your blood enters the strip, glucose reacts with these enzymes. - Electrical signal is created: the reaction generates an electrical current (electrochemical strips) or a measurable color change (older systems).
- The meter calculates your result: the meter measures the signal and converts it into a glucose value, typically displayed in mg/dL in the U.S.
Think of the strip as a “glucose translator.” Your blood provides the message; the strip turns it into a signal; the meter turns the signal into a number.
Clean hands and properly stored strips are what keep the translation honest.
Step-by-Step: How to Check Your Blood Sugar with a Meter
The exact steps vary slightly by brand, but this routine matches what major health organizations recommend:
1) Get the meter ready
- Insert a test strip (if your meter uses that workflow).
- Confirm the meter powers on and is ready for a sample.
2) Prep your finger
- Wash hands with soap and warm water; dry well.
- Warm your hands if they’re cold (rub them together or run warm water).
- If you use alcohol swabs, let the site fully dry (wet alcohol can sting and may dilute the sample).
3) Use the lancing device
- Load a new lancet (single-use is the safest and most consistent).
- Adjust depth if your device allows itstart shallow and increase only if needed.
- Prick the side of the fingertip rather than the center (often less painful).
4) Apply blood to the strip
- Gently bring up a drop. If needed, massage from the base of the finger toward the tip.
- Avoid “milking” aggressivelytoo much squeezing can mix tissue fluid with blood and affect results.
- Touch the strip to the drop as directed (don’t smear unless your instructions say to).
5) Read, record, respond
- Wait for the meter to display the value.
- Log it (time, before/after meal, exercise, stress, medication changes).
- Use your plan: if your number is outside your target range, follow your clinician’s instructions for correction, food, or safety steps.
How CGMs Work (And Why They Sometimes “Disagree” with Fingersticks)
A CGM system typically has three parts: a sensor, a transmitter (or integrated transmitter), and a receiver (often your phone).
The sensor sits under your skin and measures glucose in interstitial fluid at frequent intervals. The system then displays:
- Current glucose estimate
- Trend arrows (rising, falling, steady)
- Graphs (hours to days of data)
- Alerts for highs and lows (depending on model and settings)
Lag time: not a bug, a biology feature
Because CGMs measure interstitial fluid glucose, there can be a lag behind blood glucoseespecially during rapid changes.
That’s why you might see a CGM reading that looks “late to the party” after a workout or right after a meal.
When a fingerstick is still helpful
- If you have symptoms of low or high glucose but the CGM number doesn’t match how you feel
- When glucose is changing quickly (rapid up/down arrows)
- If your device prompts you to confirm with a meter
- When troubleshooting suspected sensor issues
What Can Throw Off Your Readings
If your results feel inconsistent, it’s often not “you failed.” It’s usually one of these fixable factors:
Technique problems
- Hands not washed (food residue = surprise glucose boost)
- Not enough blood on the strip
- Excessive squeezing
- Reusing lancets (duller lancets can cause more pain and poor sampling)
Supply issues
- Expired strips or strips exposed to heat/humidity
- Test strip container left open
- Meter battery low or meter dirty
- Needing a control solution check (especially with a new strip vial)
Body and environment factors
- Dehydration or poor circulation (harder sampling; sometimes less reliable readings)
- Illness, infection, pain, or stress hormones raising glucose
- Recent intense exercise (can raise or lower glucose depending on intensity, timing, and insulin/food)
- CGM lag during rapid changes
How to Use Your Numbers Without Spiraling
Glucose monitoring is meant to be informative, not judgmental. A high number is not a moral failing.
It’s a data point that helps you problem-solve.
Look for patterns, not perfection
- Fasting trends: morning numbers can reflect overnight hormones, late meals, or medication timing.
- Meal response: comparing before-meal and 1–2 hours after the first bite can reveal which meals spike you.
- Activity effects: tracking before and after a walk can show how movement helps you.
Know the context of “targets”
Target ranges are individualized. Many guidelines provide common goals for many (but not all) nonpregnant adultsoften including
pre-meal and post-meal targetsyet your clinician may set different numbers based on age, pregnancy, hypoglycemia risk,
comorbidities, medications, and personal priorities.
Safety and Hygiene (Especially in Shared Settings)
If monitoring happens in a clinic, facility, or any setting where equipment might be shared, infection-control rules matter.
Blood glucose monitoring involves blood exposure; proper hand hygiene and glove practices are essential for healthcare workers,
and devices should not be shared unless they’re specifically designed and disinfected per policy.
At home, keep it simple: don’t share lancets, don’t share lancing devices, and dispose of sharps safely.
Your future self (and your trash collector) will thank you.
Choosing the Right Monitoring Method
A meter can be a great choice if you need occasional checks, want a lower-cost option, or prefer simple tools.
A CGM can be a strong fit if you benefit from trend data, alerts for lows/highs, or you’re adjusting insulin and want more frequent feedback.
Some people use both: CGM for trends and fingersticks for confirmation.
Conclusion
Blood glucose monitoring works best when you treat it like a helpful dashboard, not a report card.
Prepare your supplies, wash and dry hands, use good technique, and store strips properly.
Understand what your device measures (blood vs. interstitial fluid), and use your results to spot patternsespecially around meals, activity, stress, and sleep.
Over time, those patterns become practical decisions: what breakfast keeps you steady, what walk timing helps most, when you’re more likely to go low,
and what questions to bring to your next appointment.
If you want one simple takeaway: don’t chase a “perfect number.” Chase better information, better patterns, and safer days.
Real-World Experiences: What Blood Glucose Monitoring Feels Like Day to Day (Extra )
Here’s the part nobody puts on the box: blood glucose monitoring is as much about emotions and routines as it is about physiology.
The first week often feels like learning a new instrumentawkward finger positioning, fumbling with strips, and that tiny panic when the meter says,
“Error.” (Meters can be dramatic. You’re fine.)
Many people start out convinced they must be “doing it wrong” because numbers bounce. Then they learn the plot twist:
glucose is supposed to change. The goal is to understand why it changes in your body. One person might discover that their “healthy”
granola-and-juice breakfast sends their glucose sky-high, while another finds the same meal barely nudges them. Someone else notices that
a stressful meeting raises glucose more than dessert. The body is a complicated little science fair project.
A common experience with fingersticks is the “I don’t have enough blood” problem. People then squeeze harder, which can make the sample messy or inconsistent.
The game-changer is usually warmth and patience: washing hands with warm water, letting the arm hang down for a few seconds, massaging gently from the base
of the finger, and using the side of the fingertip. With practice, most people develop a personal “favorite finger” rotation and a lancing depth
that feels more like a tap than a jab. (Also: new lancets hurt less. Reusing them is like reusing a teabagpossible, but disappointing.)
CGM users often describe a different learning curve: not pain, but interpretation. The first time you see a trend arrow, it can feel like a weather report:
“Glucose is rising with a chance of snacks.” The graph helps connect cause and effectespecially around exercise and mealsbut it can also tempt people
to over-correct. A small rise after eating doesn’t always need a big response. Sometimes the best move is to wait, hydrate, and take a short walk,
then see if the line settles.
Another very real experience is dealing with “numbers that don’t match reality.” A person might feel shaky and sweaty, glance at the CGM,
and see a normal readingonly to confirm with a fingerstick that they’re actually low. That’s when you learn about lag time and rapid changes.
It can be frustrating, but it’s not the device “lying.” It’s measuring a different fluid compartment, and biology doesn’t always sync perfectly
with our need for instant certainty.
Over time, many people find that logging notes is more valuable than logging every single number. Writing “late dinner,” “poor sleep,” “walked 20 minutes,”
or “new medication” helps turn random readings into patterns. The goal becomes less “What is my glucose right now?” and more “What makes my glucose steadier?”
That shifttoward curiosity instead of judgmentis when monitoring stops feeling like homework and starts feeling like a tool you control.


