Table of Contents >> Show >> Hide
- What Makes This Version Special
- Main Keywords and Helpful LSI Keywords
- Ingredients
- Equipment
- Step-by-Step Recipe
- Optional Upgrade: Homemade Custard Version
- How to Serve It
- Flavor Variations (Pick Your Personality)
- Common Mistakes (and How to Avoid Them)
- Make-Ahead and Storage
- Nutrition Notes
- FAQ
- of Real-World “Kitchen Experience” with This Recipe
- Conclusion
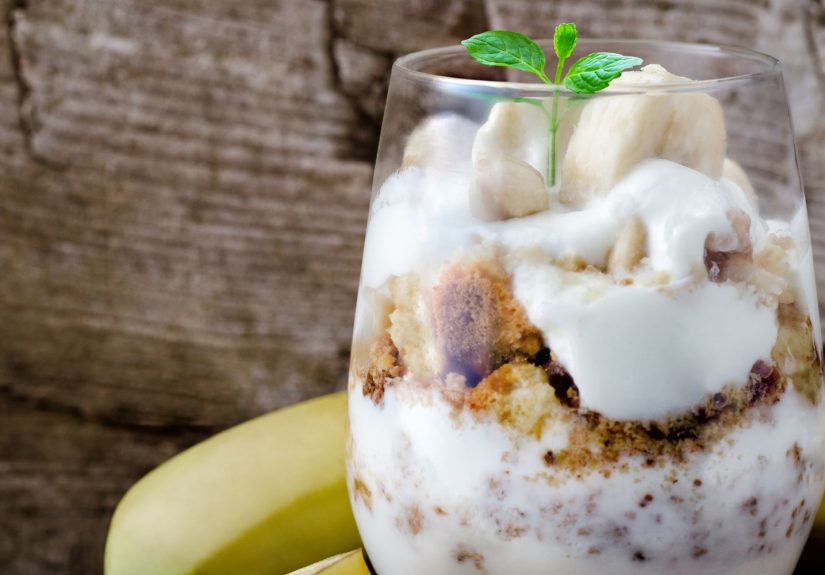
Banana pudding is the dessert equivalent of a group hug: creamy, sweet, nostalgic, and mysteriously able to disappear
before you’ve even found a clean spoon. Traditionally, it’s layered with vanilla wafersbut today we’re going rogue in
the most delicious, pantry-friendly way: graham cracker crumbs.
Why graham crackers? They soften faster, taste like honeyed toast, and bring a gentle cinnamon-brown-sugar vibe even
when they’re “plain.” Plus, turning them into crumbs gives you control over texture: some sandy crumble, some chunky
bits, all of it delightful. This recipe delivers a classic banana pudding feelcreamy pudding, ripe bananas, fluffy
toppingwhile the graham crumbs add a buttery, crunchy-to-cakey transition that makes each bite interesting (and
slightly dangerous to your self-control).
What Makes This Version Special
- Graham cracker crumb layers instead of wafers: faster softening, cozy flavor, and clean slices.
- Two texture zones: a tender “cake-like” crumb layer inside and a crisp buttery crumble on top.
- Simple method: choose either a no-cook pudding base or a from-scratch custard option.
- Banana-browning strategy: layer bananas where they’re protected, not exposed to air.
Main Keywords and Helpful LSI Keywords
You’ll naturally see these concepts throughout the recipe: banana pudding with graham cracker crumbs,
homemade banana pudding, no-bake banana dessert, vanilla pudding layers,
banana pudding trifle, graham cracker crumble topping, and make-ahead pudding.
Ingredients
This recipe is written for a standard 9×13-inch dish (about 12 servings). You can halve it for an 8×8.
For the Graham Cracker Crumbs (Layer + Topping)
- 3 cups graham cracker crumbs (about 18–20 full sheets, depending on brand)
- 6 tablespoons unsalted butter, melted
- 1/4 cup light brown sugar (or white sugar)
- 1/2 teaspoon ground cinnamon (optional, but highly encouraged)
- Pinch of salt
- 1 teaspoon vanilla extract (optional, for “bakery energy”)
For the Creamy Pudding Base (No-Cook Option)
- 2 (3.4 oz) boxes instant vanilla pudding mix
- 3 cups cold milk (whole milk gives the best body)
- 1 (14 oz) can sweetened condensed milk
- 1 tablespoon vanilla extract
For the Fluffy Topping
- 2 cups cold heavy cream
- 2–3 tablespoons powdered sugar (to taste)
- Pinch of salt
For Layering
- 5–6 ripe bananas (yellow with speckles is ideal)
- Optional: 1–2 teaspoons lemon juice (only if you’re okay with a faint tang)
Equipment
- 9×13-inch baking dish (or trifle bowl)
- Mixing bowls
- Whisk
- Electric mixer (hand or stand) for whipped cream
- Plastic wrap
Step-by-Step Recipe
Step 1: Make the Graham Cracker Crumb Mixture
-
In a bowl, combine 3 cups graham cracker crumbs, 1/4 cup brown sugar,
pinch of salt, and cinnamon (if using). -
Pour in melted butter and vanilla. Toss with a fork until the crumbs look like
damp sand with some clumps. - Set aside about 3/4 cup of this mixture for the top crumble. The rest will be used in layers.
Texture tip: If you want extra crunch on top, keep a handful of crumbs a bit chunkier instead of pulverized.
The contrast is chef’s-kiss.
Step 2: Make the No-Cook Pudding Base
- In a large bowl, whisk the instant pudding mix with cold milk for about 2 minutes.
- Whisk in the sweetened condensed milk and vanilla.
- Let it sit for 5 minutes to thicken slightly.
Step 3: Whip the Cream
- In a cold bowl, beat heavy cream with powdered sugar and a pinch of salt.
- Whip to medium-stiff peaks: fluffy, holds shape, but still looks creamynot like butter-in-training.
Step 4: Combine for a Lighter Filling
- Fold about one-third of the whipped cream into the pudding to loosen it.
- Fold in the remaining whipped cream gently until no streaks remain.
This “pudding-meets-mousse” texture is what makes people ask, “Did you buy this from a bakery?” and what makes you
respond, “Oh, you know… I dabble.”
Step 5: Slice Bananas (At the Right Time)
Slice bananas right before assembling. If you slice them too early, they’ll start browning and
looking like they’ve seen things. If you want a little insurance, toss slices lightly with a tiny splash of lemon
juicebut know it can add a subtle tang. The better trick is to bury the bananas between pudding layers
so air can’t get to them.
Step 6: Assemble the Layers
Goal: Keep bananas protected, crumbs evenly distributed, and your future self grateful.
- Sprinkle a thin layer of graham crumb mixture across the bottom of the dish (about 1 cup).
- Add a layer of bananas (about 1/3 of your slices).
- Spread 1/3 of the pudding mixture over the bananas, sealing them in.
- Repeat: crumbs, bananas, puddinguntil you have 3 layers of bananas and pudding.
- Finish with a thick cloud of remaining whipped topping (or reserve a little whipped cream for a final decorative layer).
- Sprinkle the reserved 3/4 cup crumb mixture over the top.
Step 7: Chill (This Is Not Optional)
Cover and refrigerate for at least 4 hours, ideally 6–12 hours. This rest time is where
the magic happens: crumbs soften into cake-like layers, flavors mingle, and the dessert becomes sliceable instead of
“pudding soup with ambition.”
Optional Upgrade: Homemade Custard Version
If you want a more old-school, from-scratch feel, swap the no-cook pudding with homemade vanilla custard (thickened with
egg yolks and cornstarch/flour). It’s richer, deeper, and tastes like someone’s grandmother just winked at you from the
recipe box.
Quick guidance: Warm milk/cream, temper egg yolks with sugar and starch, cook until thick and gently bubbling,
then remove from heat and add vanilla and butter. Cool slightly before layering so you don’t “cook” the bananas into brown
mush. Chill thoroughly before folding in whipped cream if you want that mousse-like finish.
How to Serve It
- For neat squares: Serve from a 9×13 dish after a long chill.
- For drama: Layer it in a trifle bowl so everyone can admire the stripes.
- For parties: Spoon into cups or mason jarsportable, cute, and harder to accidentally double-dip.
Flavor Variations (Pick Your Personality)
1) Peanut Butter Banana Pudding
Whisk 1/2 cup creamy peanut butter into the pudding base. Add a few chopped peanuts on top. This turns your
dessert into a peanut butter sandwich wearing a tuxedo.
2) Chocolate-Graham Twist
Use chocolate graham crackers or mix 2 tablespoons cocoa powder into the crumb mixture.
Bonus: chocolate crumbs hide any banana browning like a tasteful camouflage.
3) Cinnamon Toast Comfort
Add extra cinnamon and a whisper of nutmeg. Top with a pinch of flaky salt. It tastes like breakfast, but legally dessert.
4) “Magnolia-Inspired” Creamy Style
Keep condensed milk in the mix and fold the pudding into whipped cream for that ultra-light, bakery-style fluff. It’s
famous for a reason: the texture is basically edible pillows.
Common Mistakes (and How to Avoid Them)
Bananas Turn Brown Too Fast
Most browning happens when banana slices sit exposed to air. The fix: layer bananas between pudding so they’re
sealed. Also, don’t pour piping-hot custard directly onto bananaswarm is fine, volcanic is not.
Runny Pudding
Use cold milk for instant pudding and whisk long enough to activate thickening. If your kitchen is warm,
chill the mixture briefly before folding in whipped cream.
Soggy Top
If you want a crisp top crumble, add the final crumb sprinkle right before serving. For the classic soft
banana pudding experience, add it during assembly and let it mellow in the fridge.
Make-Ahead and Storage
- Best make-ahead window: 6–12 hours before serving for peak texture.
- Storage: Cover tightly and refrigerate up to 2 days.
- Freezing: Not recommendedbananas get watery, cream can weep, and crumbs lose their charm.
Nutrition Notes
Banana pudding is a treat, not a tax form. Expect a dessert that’s rich in dairy and sweetness. If you want a lighter
version, you can use reduced-fat milk and a lighter whipped topping, but the texture will be less lush. A good compromise
is simply smaller servingsbecause this dessert tastes best when you still want “just one more bite.”
FAQ
Can I use graham cracker squares instead of crumbs?
Absolutely. You’ll get more distinct layers and less “crumb cake” texture. If using squares, crumble a handful for the top
garnish.
What bananas are best?
Choose bananas that are ripe and fragrant, ideally with speckles. Under-ripe bananas taste starchy; over-ripe
bananas can turn too soft and watery when chilled.
How do I keep it from tasting too sweet?
Use a pinch of salt in both the crumbs and the whipped cream, and don’t overdo the sugar in the topping. Salt doesn’t make
it saltyit makes it taste like it has better manners.
of Real-World “Kitchen Experience” with This Recipe
If you’ve ever brought banana pudding to a gathering, you already know it has a social life of its own. It gets talked
about, hovered over, and “accidentally” sampled before dinner. With the graham cracker crumb version, the experience is
even more entertaining because people expect vanilla wafersand then they take a bite and pause like their brain is
recalculating the joy-to-effort ratio.
The first thing you’ll notice when you make this is how much control you gain with crumbs. Wafers are wonderfully classic,
but they can slide around while you’re layering, and they sometimes soften unevenly. Crumbs behave. They settle into an
even blanket that feels forgiving, especially if you’re assembling in a hurry. And if you’re making individual cups, the
crumbs pack neatly so each spoonful has the same cozy crunch-to-cream balance.
You’ll also learn quickly that timing matters most with the bananas. Slice them too early and they start browning before
the pudding even hits the fridge. Slice them too thick and your layers feel bulky; too thin and they vanish into the
custard. A medium sliceabout the thickness of two stacked quartersis the sweet spot: sturdy enough to be “banana,” but
still tender after chilling. And the best trick isn’t fancy fruit spray or complicated hacksit’s simply burying the
bananas between pudding layers so air can’t reach them. That one habit alone keeps your dessert looking fresher longer.
Another real-life discovery: chilling isn’t just for food safety; it’s for texture diplomacy. In the first hour, the
pudding tastes good but feels separatecrumbs are still crumbly, bananas still firm, and the layers haven’t agreed to be a
team yet. After four hours, the crumbs soften into something like tender cake, and the whole dish slices cleanly. Overnight,
it becomes that “classic banana pudding” texture people dream about, where the dessert is creamy but not loose, and every
bite tastes blended rather than layered.
Finally, the topping teaches you a lesson about crowds: if you want applause, hold back a little crumble. Add most of it
during assembly so it can mellow into the pudding, then sprinkle a final handful right before serving for crunch and
contrast. That last-minute topping looks intentional, tastes brighter, and convinces everyone you definitely planned this
(even if you were just trying to use up graham crackers from a box that’s been in your pantry since “s’mores season”).
Conclusion
Banana pudding with graham cracker crumbs is a simple twist that keeps everything people love about the classiccreamy
vanilla pudding, sweet bananas, fluffy toppingwhile adding a cozy, buttery crumb texture that feels both nostalgic and
refreshingly new. Make it ahead, chill it properly, and layer those bananas like you’re protecting a secret. The result is
a dessert that tastes like comfort food with a little extra swagger.


