Table of Contents >> Show >> Hide
- Why Make Your Own Furniture Polish?
- How Olive Oil & Vinegar Actually Work
- What This DIY Polish Is (and Isn’t)
- Ingredients & Tools
- The Best DIY Recipe (Plus Two Useful Variations)
- Step-by-Step: How to Use It (Without Making Everything Greasy)
- Where This DIY Polish Works Best (and Where to Avoid It)
- Troubleshooting: Fix the Most Common DIY Polish Problems
- Specific Examples: When Olive Oil & Vinegar Shine (Pun Intended)
- Storage, Shelf Life, and Safety
- FAQ
- Conclusion: A Simple DIY Polish That Works When You Keep It Simple
- Real-World Experiences and Lessons Learned (What People Usually Notice)
If your wooden table is looking a little tiredlike it just pulled an all-nighter binge-watching
reality TVgood news: you don’t need a cabinet full of mystery sprays to bring it back to life.
A simple DIY homemade furniture polish made with olive oil and vinegar can clean up light grime,
boost shine, and make wood look “well cared for” again… without the chemical cologne.
But let’s be clear: this isn’t magic fairy dust in a spray bottle. It’s a practical, old-school
combo that works best when you use it the right way (and don’t try to baptize your dining table
in salad dressing). In this guide, you’ll learn exactly how olive oil and vinegar work on wood,
the best ratios to mix, how to apply it without leaving a greasy film, what surfaces to avoid,
and how to troubleshoot the most common DIY-polish mishaps.
Why Make Your Own Furniture Polish?
Homemade furniture polish is popular for three simple reasons: it’s inexpensive, easy, and you
control what’s inside. Many store-bought polishes rely on added fragrance, solvents, or silicone
ingredients that can leave buildup over time. A DIY blend is straightforward: oil for luster,
vinegar for mild cleaning, and (optionally) a little scent if you want your living room to smell
less like “old bookshelf” and more like “freshly cleaned adult.”
It’s also customizable. Want a lighter, quick-buff finish? Use less oil. Want a richer glow for
dry-looking wood? Increase the oil portion. The key is understanding what you’re trying to
accomplish: quick shine, gentle cleaning, or a little of both.
How Olive Oil & Vinegar Actually Work
Olive oil: shine, slip, and a “refreshed” look
Olive oil is a fat, so it naturally adds sheen and helps a cloth glide over a surface. On sealed,
finished wood, that can make the grain look deeper and the surface look more even. It can also
visually soften tiny surface scratches by filling micro-lines (not repairing them, but making
them less obviouslike a flattering filter for your end table).
Vinegar: cuts light film and fingerprints
White distilled vinegar is mildly acidic, which helps loosen light grime, haze, or sticky residue
that can build up from handling, cooking vapors, or everyday life. Used sparingly, it can help
remove dulling film so the wood’s finish looks clearer.
The important caveat: vinegar is acidic
Because vinegar is acidic, using it too often or too strong can gradually dull some finished wood
surfaces. That doesn’t mean “never,” it means “don’t overdo it.” Think of vinegar like exfoliating
skincare: helpful sometimes, not a great idea as your entire personality.
What This DIY Polish Is (and Isn’t)
This olive oil and vinegar blend is best as a light-duty polish/cleaner for finished
wood furniturepieces sealed with a protective topcoat (like polyurethane, lacquer, varnish, or
similar finishes). It is not the best choice for:
- Unfinished or raw wood (it can absorb unevenly and stain/blotch).
- Antiques with wax or delicate finishes (test carefully or choose a wax-based method).
- Wood floors (slip hazard + wrong products can damage floor finishes).
- Deep restoration (water damage, peeling finish, or structural issues need different solutions).
Ingredients & Tools
You can keep this simple or slightly “fancy.” Either way, the goal is a small batch you’ll actually
usebecause oils can go off over time.
Ingredients
- Olive oil (regular/refined is fine; extra-virgin works but has stronger scent and color)
- White distilled vinegar (clear, consistent, and widely used for cleaning)
- Optional: a few drops of lemon essential oil (or a tiny amount of lemon juice for scent)
- Optional: a few drops of mild dish soap (helps emulsify so oil and vinegar mix more evenly)
- Optional: a little water (for a lighter “dust-and-buff” spray)
Tools
- Microfiber cloths (at least two: one for applying, one for buffing dry)
- Small bowl or jar (or a glass spray bottle)
- Funnel (if using a bottle)
- Label + marker (so nobody accidentally marinates dinner in your “table polish”)
The Best DIY Recipe (Plus Two Useful Variations)
Different sources and cleaning pros recommend slightly different ratios depending on whether you
want more cleaning power (more vinegar) or more shine/conditioning (more oil). Below are three
practical mixes you can choose from.
Recipe A: Balanced Everyday Polish (good starting point)
- 1/4 cup olive oil
- 1/4 cup white distilled vinegar
- Optional: 5–10 drops lemon essential oil
This is the classic “equal parts” approacheasy to remember and easy to tweak. It’s a solid choice
for finished furniture that looks dull from everyday handling.
Recipe B: More Conditioning, Less Acid (best for dry-looking wood)
- 3/4 cup olive oil
- 1/4 cup white distilled vinegar
- Optional: 3–5 drops essential oil
This version leans heavier on oil, which can look great on wood that appears dry or slightly faded.
It also reduces how much vinegar touches the finish.
Recipe C: “HGTV-Style” Rich Polish (bigger batch for multiple pieces)
- 1 cup olive oil
- 1/4 cup white distilled vinegar
This is a richer mix meant for wiping and buffingespecially helpful if you’re doing several pieces
in one session.
Step-by-Step: How to Use It (Without Making Everything Greasy)
1) Dust first (seriously)
If you polish over dust, you’re basically turning dust into gritty paste. Dry-dust with a microfiber
cloth first, or lightly dampen a cloth with water and wipe, then dry.
2) Test in a hidden spot
Choose an inconspicuous area (inside a leg, under an edge). Apply a tiny amount, wait a few minutes,
then buff dry. Look for cloudiness, discoloration, or stickiness.
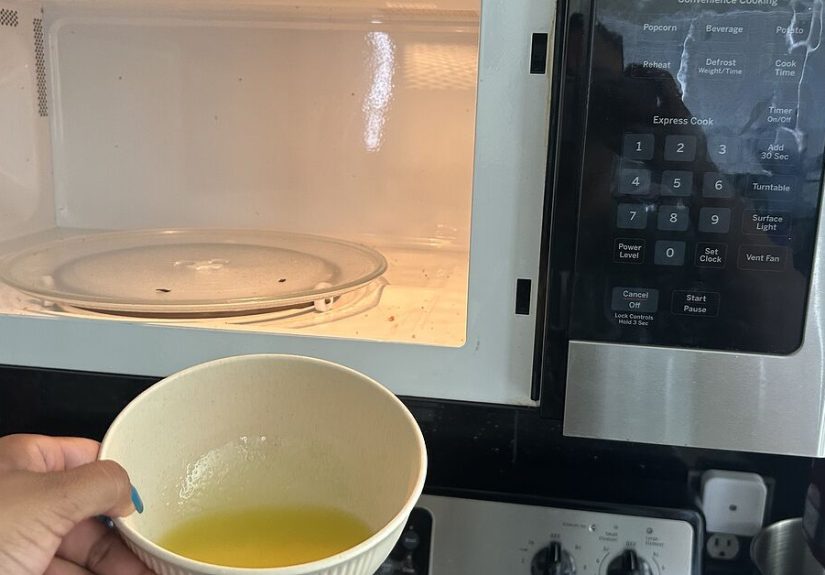
3) Mix and shake (oil and vinegar don’t naturally “stay together”)
Combine the ingredients in a jar or spray bottle and shake well. Shake again before each use.
If you add 2–3 drops of mild dish soap, it helps the mixture emulsify slightly so you get a more
even application.
4) Apply to the cloth, not directly to the furniture
For most pieces, it’s better to dampen a cloth with the mixture rather than spraying the surface.
This prevents overspray on walls, fabric, or hardware and avoids soaking seams and joints.
5) Wipe with the grain
Work in small sections. Wipe in the direction of the wood grain using gentle pressure. Your goal
is a thin, even coatthink “light moisturizer,” not “deep-fried buffet.”
6) Buff completely dry with a clean cloth
This step is where the shine happens. Use a second dry microfiber cloth and buff until the surface
feels dry to the touch. If it feels oily, keep buffing or you used too much.
7) Let it settle
Give the piece 15–30 minutes before placing objects back on it. If you used a heavier oil ratio,
consider waiting longer. This helps reduce fingerprints and prevents that “why is my mug sliding?”
moment.
Where This DIY Polish Works Best (and Where to Avoid It)
Works well on:
- Finished dining tables and coffee tables
- Finished dressers, nightstands, and bookshelves
- Finished wood cabinets (light useavoid soaking around handles)
- Wood trim or sealed banisters (again: light application)
Be cautious or skip on:
- Unfinished wood: can absorb unevenly and darken spots.
- Wax-finished antiques: vinegar can interfere with wax layers; consider wax-only care.
- Veneer edges and seams: too much liquid can seep in and cause lifting.
- Wood floors: not recommendedslip risk and finish sensitivity.
- Anything near porous stone: vinegar can etch surfaces like marble if dripped.
Troubleshooting: Fix the Most Common DIY Polish Problems
Problem: “It looks streaky.”
Usually this happens when the mixture wasn’t shaken enough, or the cloth is overloaded. Fix it by
buffing with a clean dry microfiber cloth. Next time: shake more, use less product.
Problem: “Now it feels sticky.”
Sticky usually means too much oil or not enough buffing. Try wiping the surface with a cloth lightly
dampened with warm water (or a tiny bit of mild soapy water), then dry and buff. Next time: reduce
oil, apply thinner, buff longer.
Problem: “The finish looks cloudy.”
Cloudiness can happen if too much vinegar or moisture sits on the finish, or if the finish is sensitive.
Stop using the mixture on that piece. Wipe with a damp cloth (water only), dry thoroughly, and test a
gentler ratio later (more oil, less vinegar) or switch to a commercial product designed for that finish.
Problem: “It helped… but the table still looks rough.”
DIY polish improves appearance, but it won’t repair worn finish, deep scratches, peeling varnish, or
water damage that penetrated the coating. Those issues may require finish repair, refinishing, or
specialized restoration methods.
Specific Examples: When Olive Oil & Vinegar Shine (Pun Intended)
Example 1: Fingerprints and dull haze on a coffee table
For a sealed coffee table that looks cloudy from constant touching, Recipe A (equal parts) is a great
start. Dust first, apply a small amount to a cloth, wipe with the grain, then buff dry. The vinegar helps
cut the “handprint film,” and the oil gives the finish a warmer glow.
Example 2: Slightly dry-looking wood on a bookshelf or dresser
If the wood looks a little faded (especially on darker stains), Recipe B (3:1 oil to vinegar) can give a
richer look with less acidity. Keep it light and buff thoroughly so it doesn’t attract dust.
Example 3: Mild water rings on finished wood
For light water rings (especially white, newer-looking marks), many DIY guides recommend the vinegar-and-oil
combo as a gentle approach. Use a tiny amount, rub with the grain, and buff dry. If the mark doesn’t improve
after a couple of tries, stopmore rubbing won’t always help, and you don’t want to wear down the finish.
Storage, Shelf Life, and Safety
Because olive oil is food-based, it can oxidize and eventually smell “off,” especially if stored warm or
for long periods. For best results:
- Make small batches you’ll use within a few weeks.
- Store in a cool, dark place and keep the container sealed.
- Label the bottle clearly (and keep it out of reach of kids and pets).
- Discard if it smells rancid or looks unusual.
Also: keep the mixture off fabric and rugs, and avoid using it right before a big party unless you want
your guests doing accidental “ice skating” near the sideboard.
FAQ
Can I use apple cider vinegar instead of white vinegar?
You can, but white distilled vinegar is clear and more predictable. Apple cider vinegar has color and a
stronger scent, and it could potentially tint very light finishes if overused. If you try it, test first.
Will this attract dust?
Any oily residue can attract dust if you leave too much behind. The solution is simple: apply a thin coat
and buff completely dry. If it feels slick, it’s not done.
Should I use extra-virgin olive oil?
Extra-virgin works, but it’s more aromatic and can have a deeper color. Many people prefer regular/refined
olive oil for polishing because it’s lighter in scent and appearance. Either way, small batches are best.
How often should I use this polish?
For most homes, occasional use is plentythink monthly or seasonally, not daily. Frequent polishing can
create buildup (oil) or dullness (acid). Regular dusting with a microfiber cloth goes a long way.
Conclusion: A Simple DIY Polish That Works When You Keep It Simple
DIY homemade furniture polish with olive oil and vinegar is a classic, low-cost way to refresh finished
wood furniture. The vinegar helps break up light grime and haze, while the olive oil boosts shine and
smooths the look of the surface. The trick is using a gentle ratio, applying a thin coat, and buffing
thoroughly so you get the glow without the greasy aftermath.
Treat it like a maintenance tool, not a miracle cure. Used occasionally and thoughtfully, it can keep
your favorite pieces looking clean, warm, and well-lovedwithout turning your dining table into a
slippery salad bar.
Real-World Experiences and Lessons Learned (What People Usually Notice)
In real homes, the first “wow” moment with olive oil and vinegar polish usually happens on pieces that are
clean but dull. Think of a coffee table that’s been wiped with plain water for months, or a dresser
that’s dusted regularly but still looks a bit flat under bright daylight. When a thin coat of oil hits a
sealed finish and gets buffed properly, the wood grain often looks deeper and the surface looks more
evenalmost like you turned up the contrast just a notch.
The second common experience is realizing how much application method matters. People who
love this DIY polish typically apply it to a cloth first and work in small sections. People who hate it
usually did one of three things: (1) sprayed the surface like they were putting out a fire, (2) forgot to
shake the bottle, or (3) skipped the buffing step because “it looked fine.” Then, a few hours later, the
piece feels sticky or shows fingerprints like it’s collecting evidence.
Another pattern: this mix is often used as a “rescue move” for furniture that looks slightly dried out,
especially on medium-to-dark stains. Many DIYers report that a richer oil ratio (like 3 parts oil to 1 part
vinegar) makes older pieces look less ashy and more hydratedagain, not because the wood is literally
drinking the oil (a sealed finish is a barrier), but because the surface looks smoother and reflects light
more evenly after buffing.
Kitchens bring their own reality check. On wood cabinets near a stove, there’s often a thin greasy film
that plain water won’t touch. Here, vinegar’s “cutting” effect can be noticeablebut it’s also where
restraint matters most. People who use a heavy vinegar mix too often sometimes notice finishes looking
slightly dull over time. The more sustainable approach is to clean grease with a mild soap-and-water wipe,
dry thoroughly, and use the oil/vinegar polish only occasionally as a finishing step.
There’s also the “surprise downside” experience: oil can oxidize. If someone makes a huge batch and stores
it in a warm spot, eventually it may smell off. That’s why small batches tend to win in real life. A
half-cup batch used within a few weeks is more practical than a gallon jug that sits for months like a
science experiment with ambitions.
Finally, there’s the most valuable lesson people learn: this is a maintenance polish, not a
restoration project. It can improve the look of minor surface issueslight haze, fingerprints,
subtle dryness, tiny scuffsbut it won’t fix peeling varnish, deep scratches through the finish, or water
damage that has penetrated the coating. When expectations match reality, this DIY method feels like a
satisfying, easy win. When expectations are “make this thrift-store table look brand new,” it can feel
disappointing. Used for what it’s good at, it’s one of those simple household tricks that earns a permanent
place in the cleaning rotation.


