Table of Contents >> Show >> Hide
- Fresh vs. Canned Pumpkin: What Actually Changes?
- Ingredients You’ll Need
- Step 1: Make Fresh Pumpkin Purée (Thick, Smooth, Pie-Ready)
- Step 2: Build a Crisp, Flaky Crust
- Step 3: Mix a Smooth, Balanced Filling
- Step 4: Bake Like a Pro (No Cracked Desert Surface)
- Step 5: Cool Without Cracks
- Serving Ideas
- Make-Ahead, Storage, and Food Safety
- Troubleshooting (Because Pie Has Opinions)
- Fun Variations (Choose Your Pumpkin Personality)
- FAQ: Quick Answers for Busy Bakers
- Kitchen Notes: Real-Life Experiences with Fresh Pumpkin Pie ()
- Conclusion
If pumpkin pie is the official dessert of “cozy season,” then making it with fresh pumpkin purée
is basically giving your pie a fancy sweater and a warm hug. This recipe walks you through everything:
picking the right pumpkin, turning it into silky purée (without ending up with pumpkin soup), building a crisp crust,
and baking a custardy filling that slices cleanly and tastes like fall showed up on time.
This is a homemade fresh pumpkin pie recipe designed for real kitchens: practical steps,
flexible options (homemade crust or store-bought), and troubleshooting so you don’t have to whisper threats at your oven.
Fresh vs. Canned Pumpkin: What Actually Changes?
Fresh pumpkin pie can taste a little brighter and more “squash-forward” than canned. The big catch?
Fresh purée can be more watery, which can make the filling less creamy and the crust soggier. The fix is simple:
roast (don’t boil) the pumpkin, then blend and strain until thick.
Think “Greek yogurt,” not “orange smoothie.”
If you want the best of both worlds, you can absolutely use canned pumpkin in this recipe. But if you’re here for
the full fresh-pumpkin experience, let’s do it properly.
Ingredients You’ll Need
For fresh pumpkin purée
- 1 small sugar pumpkin (about 3–4 pounds) or pie pumpkin
- Optional: a pinch of salt (helps the flavor pop)
For the crust (choose one)
Option A: Homemade flaky crust (recommended for max bragging rights)
- 1 1/4 cups all-purpose flour
- 1/2 teaspoon fine salt
- 1 tablespoon sugar (optional, but nice)
- 1/2 cup (1 stick) cold unsalted butter, cut into small cubes
- 3–5 tablespoons ice water
Option B: Store-bought 9-inch pie crust (still delicious, still valid)
For the filling (9-inch pie)
- 1 3/4 cups thick fresh pumpkin purée (see steps below)
- 3 large eggs
- 2/3 cup packed light brown sugar (or 1/2 cup brown + 2 tablespoons white)
- 1 tablespoon cornstarch (helps set the custard cleanly)
- 1 1/2 teaspoons ground cinnamon
- 1 teaspoon ground ginger
- 1/4 teaspoon ground nutmeg
- Pinch of cloves (seriously, a pinchcloves are loud)
- 1/2 teaspoon fine salt
- 1 teaspoon vanilla extract
- 1 1/4 cups evaporated milk (or 1 cup evaporated milk + 1/4 cup heavy cream for extra richness)
Step 1: Make Fresh Pumpkin Purée (Thick, Smooth, Pie-Ready)
- Heat the oven to 350°F. Line a baking sheet with parchment.
- Prep the pumpkin: Cut it in half. Scoop out seeds and stringy bits (save the seeds if you like roasting them later).
-
Roast: Place pumpkin halves cut-side down on the sheet. Roast until very tender when pierced with a fork,
about 45–60 minutes depending on size. - Cool slightly, then scoop the flesh into a blender or food processor.
- Blend until silky. If it looks fibrous, keep going. You’re aiming for baby-food smooth.
-
Strain for thickness (highly recommended): Spoon purée into a fine-mesh sieve lined with cheesecloth
(or a clean, thin kitchen towel). Let it drain 15–30 minutes. Stir once or twice.
You want a thick purée that holds shape on a spoon.
How much purée will I get? A 3–4 pound sugar pumpkin usually gives plenty for one pie
(and maybe a little extra for pancakes or oatmeal). Measure 1 3/4 cups for this recipe.
Step 2: Build a Crisp, Flaky Crust
If you’re making homemade dough
- Whisk flour, salt, and sugar in a bowl.
-
Add cold butter. Use a pastry cutter (or your fingers) to work it in until you have pea-size pieces plus some sandy bits.
That mix gives you both flake and tenderness. -
Drizzle in ice water 1 tablespoon at a time, tossing with a fork until the dough just holds together when squeezed.
(If it gets sticky, it’s too wet.) - Form into a disk, wrap, and chill at least 1 hour (overnight is even better).
-
Roll into a 12-inch circle, place in a 9-inch pie dish, and crimp the edges.
Chill the shaped crust while the oven heats.
Should you blind-bake?
For pumpkin pie, a partial blind-bake (also called par-bake) helps prevent a soggy bottomespecially if your purée
is extra moist or your pie dish is deep.
Quick par-bake:
- Heat oven to 425°F.
- Line crust with parchment and fill with pie weights or dried beans.
- Bake 10–12 minutes, remove weights, then bake 3–5 minutes more until the bottom looks matte (not raw).
- Cool slightly before filling.
Shortcut: If you’re using a store-bought crust, you can still par-bake it using the same method.
Your future self (the one eating crisp crust) will be grateful.
Step 3: Mix a Smooth, Balanced Filling
-
In a large bowl, whisk brown sugar, cornstarch, cinnamon, ginger, nutmeg, cloves, and salt.
This distributes spices evenly so you don’t bite into a surprise cinnamon boulder. - Whisk in eggs until smooth.
- Add pumpkin purée and vanilla. Whisk until glossy and uniform.
- Slowly whisk in evaporated milk (and cream, if using). Mix until fully combined.
Flavor upgrade (optional but excellent): Cover and refrigerate the filling for a few hours or overnight.
It gives spices time to “bloom” and taste more integrated, not just sprinkled-in.
Step 4: Bake Like a Pro (No Cracked Desert Surface)
- Heat oven to 425°F. Place a baking sheet on the middle rack to preheat (it helps the crust start strong).
- Pour filling into the crust. Set the pie dish on the hot baking sheet.
- Bake at 425°F for 15 minutes.
-
Reduce heat to 350°F and bake 35–45 minutes more,
until the edges are set and the center still has a small jiggle (like Jell-O that’s trying its best). - If the crust edges brown too fast, shield them with a pie ring or strips of foil.
Doneness test: The center should wobble slightly when you nudge the dish, but it shouldn’t slosh.
If you have an instant-read thermometer, aim for roughly 175–180°F in the center for a custardy set.
Step 5: Cool Without Cracks
Cracks usually happen when the custard overbakes or cools too quickly. A gentle cool-down helps:
-
When the pie is baked, turn off the oven, prop the door open with a wooden spoon, and let the pie sit inside
for 20–30 minutes. - Move pie to a rack and cool to room temperature for about 2 hours.
Now you can slicethough chilling makes neater slices. If you’re serving soon, room temperature also tastes wonderful
because spices smell stronger when they’re not ice-cold.
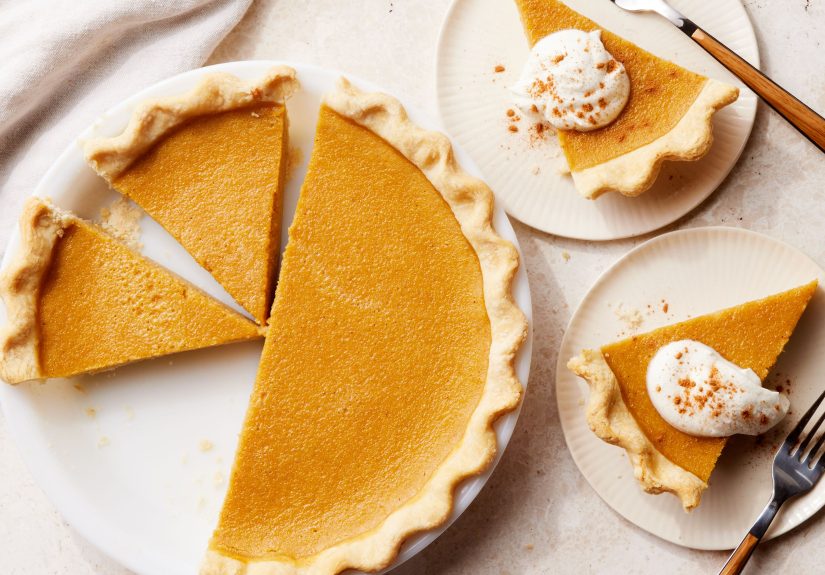
Serving Ideas
- Classic: whipped cream and a tiny dusting of cinnamon
- Grown-up: a drizzle of maple syrup and flaky salt
- Crunchy: toasted pecans or candied pepitas
- Extra-cozy: warm slices with vanilla ice cream
Make-Ahead, Storage, and Food Safety
Pumpkin pie is an egg-and-dairy custard, so treat it like the perishable treasure it is:
- Cool and refrigerate within 2 hours.
- Fridge life: about 3–4 days, covered.
- Freezer: wrap well and freeze for 1–2 months. Thaw overnight in the refrigerator.
Make-ahead strategy: You can roast and purée the pumpkin up to 3 days ahead (keep refrigerated),
or freeze purée in a zip-top bag (flatten it for quick thawing).
You can also par-bake the crust a day ahead and keep it wrapped at room temperature.
Troubleshooting (Because Pie Has Opinions)
My pie cracked
Usually overbaking or rapid cooling. Next time, pull it when the center still jiggles slightly, and cool gradually.
For this pie: cover cracks with whipped cream and call it “rustic.”
My filling is runny
It may need more time, or your purée was too watery. Make sure to strain fresh purée until thick,
and bake until the edges are set. Also: pie continues to set as it cools.
My crust is soggy
Par-bake the crust, bake the pie on a hot preheated sheet pan, and make sure the purée is thick.
My pie tastes bland
Add salt (seriously), use fresh spices, and consider resting the filling for a few hours so flavors blend.
Pumpkin is mild; spices are doing the heavy lifting.
Fun Variations (Choose Your Pumpkin Personality)
- Maple Bourbon: swap 2 tablespoons sugar for maple syrup + add 1 tablespoon bourbon
- Extra Creamy: replace 1/4 cup evaporated milk with heavy cream
- Tangy Twist: add 2–3 tablespoons cream cheese (whisk until smooth)
- Spice Remix: add a pinch of cardamom, or black pepper for subtle warmth
- Butternut “Pumpkin” Pie: use roasted butternut squash purée (often naturally sweeter and thicker)
FAQ: Quick Answers for Busy Bakers
What pumpkin is best for pie?
Small “sugar” or “pie” pumpkins tend to be sweeter and less watery than big carving pumpkins.
Carving pumpkins are great for jack-o’-lanterns… and not much else.
Can I make this without evaporated milk?
Yes. You can use half-and-half or a mix of whole milk and cream, but evaporated milk gives a classic flavor and texture.
Do I need a thermometer?
Not required, but helpful. The jiggle test works: set edges, slight wobble in the center.
Why does chilling improve slices?
Custard firms as it cools. If you want clean slices for photos (or for showing off to your group chat),
refrigerate after it reaches room temp.
Kitchen Notes: Real-Life Experiences with Fresh Pumpkin Pie ()
Fresh pumpkin pie has a special kind of magicright up until the moment you realize pumpkins are not
manufactured with consistent “pie settings.” If you’ve ever made fresh purée and thought,
“Wow, this looks a little… wet,” congratulations: you’ve met the #1 fresh-pumpkin pie plot twist.
The best kitchen move I’ve seen (and now recommend like it’s my job) is treating your purée like it just ran a marathon:
it needs to rest and drain. Ten minutes in a sieve can help. Thirty minutes can save a crust.
Another classic moment: you take your pie out and it looks perfectthen five minutes later,
a crack appears like the pie is doing dramatic interpretive dance about temperature changes.
The fix isn’t “bake harder” (pie does not respond well to bullying). It’s the opposite:
bake until the center still quivers, then cool gently. Think “spa day,” not “ice plunge.”
Letting the pie sit in the turned-off oven with the door cracked is one of those tips that feels
too simple to be true… until you see a smooth top that makes you want to take a victory lap.
Fresh-pumpkin bakers also tend to have a spice identity crisis at least once:
“Is this enough cinnamon? Too much ginger? Did I just create a clove-powered air freshener?”
Here’s what usually helps: use salt (it’s the quiet hero), and consider letting the filling
sit in the fridge for a few hours. The spices mellow and blend, and the flavor shifts from
“every ingredient is yelling its name” to “wow, this tastes like actual pumpkin pie.”
It’s the difference between a chaotic group project and a team that finally found a shared Google Doc.
Crust experiences are their own category. People assume crust failures mean they’re “bad at baking,”
but crust is really just physics with butter. If the dough is warm, butter melts early.
If butter melts early, flake disappears. The tiny habit that changes everything is chilling:
chill the dough, chill the shaped crust, and if your kitchen runs hot, chill your confidence too.
(Kidding. Mostly.) Also, baking the pie on a preheated sheet pan is an easy “why didn’t I do this sooner” trick.
It gives the bottom crust a fighting chance.
And finally, there’s the wholesome moment: the first slice. Fresh pumpkin pie tends to taste
slightly lighter and more “real pumpkin” than canned versionsespecially if you used a sugar pumpkin
and strained the purée until thick. When it’s right, you get a custardy center, spice that feels warm but not aggressive,
and a crust that snaps just a little at the fork. It’s the kind of dessert that makes people pause mid-bite,
then immediately ask, “Wait… you made this from an actual pumpkin?”
That’s when you casually nod and pretend it was effortless. You earned that moment.
Conclusion
A truly great homemade fresh pumpkin pie recipe isn’t about being complicatedit’s about being smart:
roast the pumpkin, strain the purée, keep the crust cold, bake hot-then-lower, and cool gently.
Do that, and you’ll get a pie that tastes like fall, slices like a dream, and disappears faster than
you can say, “I saved you a piece.”


