Table of Contents >> Show >> Hide
- Why Battery Cables Fail
- Before You Start: Safety Comes First
- Tools and Supplies You May Need
- How to Change Battery Cables Step by Step
- 1. Locate the Battery and Inspect the Area
- 2. Identify Positive and Negative
- 3. Disconnect the Negative Cable First
- 4. Disconnect the Positive Cable Second
- 5. Remove the Old Cable
- 6. Clean the Battery Posts and Connection Points
- 7. Compare the New Cable to the Old One
- 8. Install the New Cable
- 9. Reconnect the Battery: Positive First, Negative Last
- 10. Protect and Test
- When to Replace the Full Cable Instead of Just the Terminal End
- Common Mistakes to Avoid
- Quick FAQ
- Experiences and Lessons From Real-World Battery Cable Jobs
- Conclusion
Note: This article is for general educational purposes and web publication. Always check your owner’s manual for vehicle-specific battery location, cable routing, terminal style, memory-save procedures, and service precautions.
If your car has been slow to crank, randomly loses power, or greets you with that lovely white-green fuzz around the battery like it’s growing a science project under the hood, your battery cables may be asking for retirement. The good news is that changing battery cables is a very doable repair for many drivers. The even better news is that it does not require mystical talent, only patience, the right tools, and a serious respect for electricity, acid, and the phrase “negative first.”
Battery cables have one simple but important job: carry electrical current between the battery, starter, ground, and charging system. When they are loose, corroded, cracked, or damaged inside the insulation, the whole vehicle can act moody. You may get dim lights, clicking at startup, intermittent electrical issues, or a no-start condition that makes you question every life choice that led to being late for work.
This guide explains how to change battery cables safely, when to replace the full cable versus just the terminal end, what tools to use, what mistakes to avoid, and how to test your work when you are done. We will also cover real-world lessons from the driveway, because battery cable jobs are usually simple right up until a hidden bolt decides it has emotionally attached itself to the engine block.
Why Battery Cables Fail
Battery cables live in a rough neighborhood. They deal with heat, vibration, moisture, road grime, and corrosive gases from the battery. Over time, that can lead to visible corrosion on the terminal ends, swelling under the insulation, broken wire strands, loose connections, or damaged protective boots. In some cases, the battery itself is the bigger problem, but bad cables can create symptoms that look almost identical.
Common signs your battery cables may need attention include:
- Slow cranking or hard starting
- Clicking when turning the key
- Flickering or dim headlights
- Visible corrosion on the terminals or cable ends
- Loose clamps that will not stay tight
- Cracked insulation or exposed wire
- Intermittent electrical problems that come and go with bumps or temperature changes
If corrosion is only on the outside of the terminal and the cable itself is still solid, cleaning may be enough. But if the corrosion has crept under the insulation, the terminal is cracked, the cable is stiff or swollen, or the connection remains poor after cleaning, replacement is usually the smarter move.
Before You Start: Safety Comes First
Battery cable replacement is not difficult, but it is not the moment to improvise like a reality-show mechanic. Car batteries can release explosive gas, battery acid can burn skin and clothing, and a metal tool placed in the wrong spot can create a short faster than you can say, “That was definitely not supposed to spark.”
Before you touch anything:
- Park on a flat, dry surface
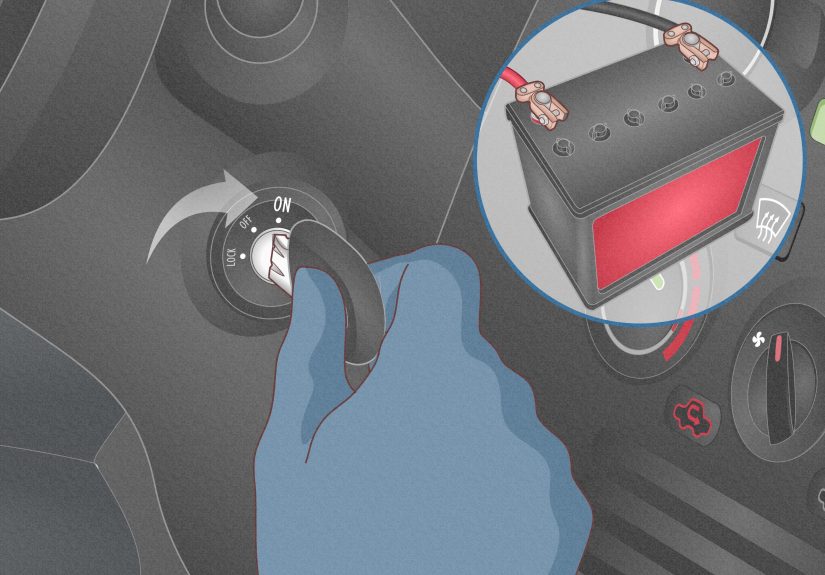
- Turn the ignition off and remove the key
- Set the parking brake
- Let the engine cool if the car was just running
- Wear gloves and safety glasses
- Do not smoke or work near open flames
- Remove rings, watches, and metal jewelry
On many modern vehicles, disconnecting the battery can erase radio presets, clock settings, seat memory, and learned electronic settings. If your vehicle is sensitive to battery disconnects, use a memory saver that plugs into the OBD-II port or 12-volt outlet. If you do not know whether your vehicle needs one, the owner’s manual is your best friend here. It is less exciting than guessing, but usually much cheaper.
Tools and Supplies You May Need
- Wrench or socket set
- Ratchet and extensions
- Battery terminal puller, if the clamp is stubborn
- Wire brush or battery terminal cleaning brush
- Baking soda and water or battery-terminal cleaner
- Shop rags or paper towels
- Replacement battery cable or terminal end
- Cable cutters and wire stripper, if replacing terminal ends
- Terminal grease or anti-corrosion spray
- Protective gloves and safety glasses
Some vehicles use top-post batteries, some use side-post designs, and some hide the battery in a trunk, under a seat, or beneath trim panels. That is why matching the replacement cable to your exact vehicle is important. The new cable should match the original for length, terminal style, routing, and connection points. A cable that is too short, too light-duty, or bent into a weird shape is not “close enough.” It is a future headache with excellent branding.
How to Change Battery Cables Step by Step
1. Locate the Battery and Inspect the Area
Open the hood and find the battery. If it is not under the hood, check the owner’s manual. Once located, inspect the battery case, terminals, and cables. If the battery is leaking, cracked, or bulging, stop and address that first. Replacing cables on a clearly failing battery is like buying new shoelaces for a shoe that is on fire.
2. Identify Positive and Negative
The positive terminal is usually marked with a plus sign and often has a red cable or red cover. The negative terminal is marked with a minus sign and is usually black. The negative cable often grounds to the body or engine block. Take a photo before removing anything. Future you will appreciate the evidence.
3. Disconnect the Negative Cable First
This is the golden rule. Loosen the negative terminal first and move it away from the battery so it cannot spring back into contact. Disconnecting the negative side first reduces the chance of accidentally shorting the system with your wrench against grounded metal.
4. Disconnect the Positive Cable Second
Now loosen the positive terminal and move it aside. If practical, cover the positive terminal end with a rag or non-conductive cover so it does not touch metal by accident. On some side-post batteries, the fasteners are different, so use the correct tool and do not force anything.
5. Remove the Old Cable
If you are replacing the full cable, follow it from the battery to the other end. The negative cable usually attaches to a grounding point on the chassis or engine. The positive cable may run to the starter, fuse block, or power distribution center. Remove any brackets, retainers, or protective covers, then unbolt the cable from its far-end connection.
If you are replacing only the terminal end, cut the old terminal off as close as possible to the damaged end without making the cable too short. Then strip back enough insulation to expose clean copper. If the wire strands are blackened, brittle, or crusty under the insulation, replace the entire cable instead of pretending everything is fine. It is not.
6. Clean the Battery Posts and Connection Points
Before installing anything new, clean the battery posts and cable contact surfaces. A wire brush works well. For corrosion, use baking soda and water, or an approved battery-terminal cleaner. Wipe everything dry afterward. The goal is bright, clean metal where the connection will be made.
Do not flood the battery with cleaning solution. Clean carefully, keep moisture under control, and avoid getting water into vented areas. If the corrosion is severe, also inspect the battery tray and hold-down hardware while you are there.
7. Compare the New Cable to the Old One
Lay the new cable next to the old one. Check the length, bend, terminal orientation, mounting eyelet size, and battery-end style. This step can save a lot of frustration. It is much better to discover a mismatch on the workbench than after routing everything halfway through the engine bay.
8. Install the New Cable
Route the new cable the same way as the original. Keep it away from exhaust components, moving belts, sharp edges, and anything that gets hot enough to cook dinner. Reinstall any clips, brackets, or protective sleeves that held the original cable in place. Secure the far end first, whether that is the ground point, starter, or fuse block connection.
If you are installing a repair terminal, slide the stripped wire fully into the terminal body and tighten the clamp or fasteners securely. Make sure the insulation does not get trapped where bare copper needs to make contact. You want clean metal-to-metal contact, not a clamp biting into plastic and optimism.
9. Reconnect the Battery: Positive First, Negative Last
Once the cable routing is correct and all hardware is snug, reconnect the battery. Positive goes on first. Negative goes on last. This order reduces the chance of accidental grounding while tightening the connection.
The clamps should be snug enough that they do not wiggle by hand, but do not overtighten and damage the battery post or terminal. After tightening, give each cable a gentle wiggle test. A loose battery connection can cause all kinds of strange electrical behavior, from no-start problems to random warning lights.
10. Protect and Test
Apply a light coat of terminal grease or anti-corrosion spray to help protect the connection. Reinstall any terminal covers, the battery hold-down, and any trim you removed. Then start the vehicle. If it cranks strongly and starts normally, you are on the right track.
Let the car idle for a few minutes and turn on the headlights, blower motor, and other accessories. Watch for flickering lights or voltage-related issues. If the vehicle still struggles to start, the issue may be the battery itself, the alternator, the starter, or another part of the charging system.
When to Replace the Full Cable Instead of Just the Terminal End
A universal terminal repair end can work well in some situations, especially when the cable is healthy and only the terminal clamp is damaged. But a full cable replacement is the better answer when:
- Corrosion has migrated under the insulation
- The cable feels swollen, stiff, or brittle
- Multiple wire strands are broken
- The insulation is cracked or burned
- The far-end connection is loose, rusty, or heat-damaged
- The vehicle uses a molded or specialized cable assembly
In short, if the damage is more than skin-deep, replace the whole cable. It costs more upfront but usually saves time, repeat labor, and mystery electrical problems later.
Common Mistakes to Avoid
- Disconnecting the positive terminal first: This increases the chance of a short.
- Skipping protective gear: Acid and debris do not care how confident you feel.
- Installing dirty connections: Corrosion left behind means resistance stays behind too.
- Using the wrong cable: Wrong length or wrong end style creates tension and poor fit.
- Forgetting the hold-down: A battery that moves around can damage cables and the tray.
- Ignoring a battery light: That may point to a charging-system issue, not just bad cables.
- Assuming “tight enough” is enough: If the terminal moves, it is not tight enough.
Quick FAQ
Can I drive with corroded battery cables?
You might, but it is a gamble. Corrosion increases resistance, reduces power flow, and can leave you stranded without much warning.
Do I need to replace both battery cables?
Not always. Replace the damaged cable, but inspect both closely. If one is in rough shape, the other may not be far behind.
Can bad battery cables mimic a bad battery?
Absolutely. Loose or corroded cables can cause slow cranking, clicking, dim lights, and no-start symptoms that look very much like a dead battery.
Should I clean or replace?
Clean if the corrosion is surface-level and the cable is still solid. Replace if the terminal is damaged, the cable is degraded under the insulation, or the connection will not stay secure.
Experiences and Lessons From Real-World Battery Cable Jobs
One of the most common experiences people have when changing battery cables is realizing the problem was not the battery at all. A car may crank slowly for weeks, get jump-started a few times, and seem like it obviously needs a new battery. Then the hood goes up, the terminals are cleaned, the negative cable is found hanging on by corrosion and stubbornness, and suddenly the mystery is solved. That is why visual inspection matters so much. A battery can test okay and still act weak if the cable connection is poor.
Another frequent lesson is that the negative cable deserves more respect than it gets. Many drivers focus on the positive side because it looks more dramatic, usually with a red cover and sometimes more hardware around it. But the negative cable is the grounding path, and a weak ground can cause everything from hard starts to flaky electronics. A vehicle with a loose engine ground may start one day, click the next, and leave the driver staring at the dashboard like it personally betrayed them.
People also learn quickly that corrosion rarely stays politely on the outside. What looks like a crusty terminal can hide damage under the insulation where moisture has crept inside. You cut back the insulation expecting bright copper and instead find dark, brittle wire that has the texture of old broom bristles. That is the moment when a terminal-end repair stops making sense and full cable replacement becomes the grown-up decision.
There is also the classic “simple job that became a scavenger hunt” experience. The battery-end clamp comes off easily, which builds dangerous levels of confidence. Then the other end of the cable disappears under an air box, behind a fuse block, or into a bracket designed by someone who clearly never had to service it. This is where taking photos, keeping bolts organized, and not rushing pays off. Ten extra minutes of calm usually beats one hour of trying to remember where the mystery fastener came from.
Many first-timers are surprised by how much difference clean connections make. After replacing or cleaning battery cables properly, the engine often cranks faster immediately. Headlights may look brighter. Electronics may behave better. The repair does not feel flashy, but it restores the kind of solid electrical foundation that modern vehicles depend on.
Finally, experienced DIYers often mention the same rule: if the battery and cables are already apart, do the small extra tasks. Clean the tray. Check the hold-down. Inspect the battery case. Look at the other cable. Add a light layer of terminal protectant. Those tiny steps are what separate a short-lived fix from a repair that stays fixed. Battery cable work is rarely glamorous, and nobody posts glamorous photos of a properly tightened ground strap. But when the car starts instantly on a cold morning, that is its own kind of victory.
Conclusion
Learning how to change battery cables is one of those practical skills that pays off quickly. It helps you diagnose electrical problems more intelligently, avoid unnecessary battery replacements, and restore reliable starting power without a complicated repair. The key steps are simple: work safely, disconnect the negative terminal first, clean everything thoroughly, replace damaged parts with the correct cable, reconnect the positive first and the negative last, and test the system before calling the job done.
If the cables are only lightly corroded, a thorough cleaning may solve the issue. If the terminal is cracked, the wire is degraded, or the cable is damaged under the insulation, replacement is the better long-term fix. Either way, neat work matters. Battery cables are not glamorous, but they are absolutely essential. Think of them as the vehicle’s electrical handshake: if the connection is weak, nothing good follows.


