Table of Contents >> Show >> Hide
- Why Fish Works So Well on a Barbecue
- How to Cook Fish on a Barbecue in 15 Steps
- Step 1: Choose a fish that can handle the grill
- Step 2: Buy fish that looks and smells fresh
- Step 3: Keep it cold until cooking time
- Step 4: Pat the fish dry
- Step 5: Decide on your flavor direction
- Step 6: Reserve clean sauce before raw fish goes in
- Step 7: Preheat the barbecue properly
- Step 8: Clean the grates like you mean it
- Step 9: Oil the fish or the grates
- Step 10: Place the fish on the grill with intention
- Step 11: Do not move it too soon
- Step 12: Flip gently and only when necessary
- Step 13: Cook by thickness, not by wishful thinking
- Step 14: Check for doneness the right way
- Step 15: Rest briefly and serve fast
- Extra Tips for Better Barbecue Fish
- Common Mistakes That Ruin Grilled Fish
- Backyard Fish-Grilling Experiences and Lessons Learned
- Conclusion
Cooking fish on a barbecue sounds romantic in theory: sunset, smoky air, a cold drink in hand, and a perfectly charred fillet sliding onto a platter like it knows it’s the star of dinner. In reality, fish can also turn into a flaky little rebellion if your grill is too cool, your grates are dirty, or your patience disappears the second you hear a sizzle.
The good news is that grilled fish is not some elite backyard magic trick. Once you understand a few simple rules, it becomes one of the easiest, fastest, and most impressive meals you can make outdoors. Fish cooks quickly, loves bright flavors, and takes beautifully to smoke, citrus, garlic, herbs, and a little char. Whether you’re working with salmon, halibut, mahi-mahi, snapper, trout, or tuna, the same core principles apply.
This guide breaks the process into 15 practical steps so you can barbecue fish with confidence, avoid sticking, and serve something that looks intentional instead of “rustic,” which is sometimes a polite word for “it broke apart but we’re staying positive.”
Why Fish Works So Well on a Barbecue
Fish and live fire are a great match because fish cooks fast, absorbs smoky flavor easily, and doesn’t need a long ingredient list to taste excellent. A little oil, salt, pepper, lemon, and heat can do a lot of heavy lifting. The challenge is texture. Fish is more delicate than steak or chicken, so every step matters a bit more: choosing the right cut, preheating the grill, drying the surface, and knowing when to leave it alone.
If you are a beginner, start with a firm, thicker fish. Salmon is famously forgiving. Tuna and swordfish are sturdy. Halibut, mahi-mahi, grouper, cod loins, and snapper are also strong candidates when cut thick enough. Very thin, delicate fish can absolutely be grilled, but they are better saved for the day when your confidence is high and your spatula has earned your trust.
How to Cook Fish on a Barbecue in 15 Steps
Step 1: Choose a fish that can handle the grill
The easiest fish to barbecue are thick fillets or steaks with some natural structure. Think salmon, tuna, swordfish, halibut, mahi-mahi, grouper, or snapper. If you are choosing between a paper-thin fillet and a hearty steak, pick the hearty one and thank yourself later. Skin-on pieces are especially helpful because the skin acts like a built-in safety jacket for the flesh.
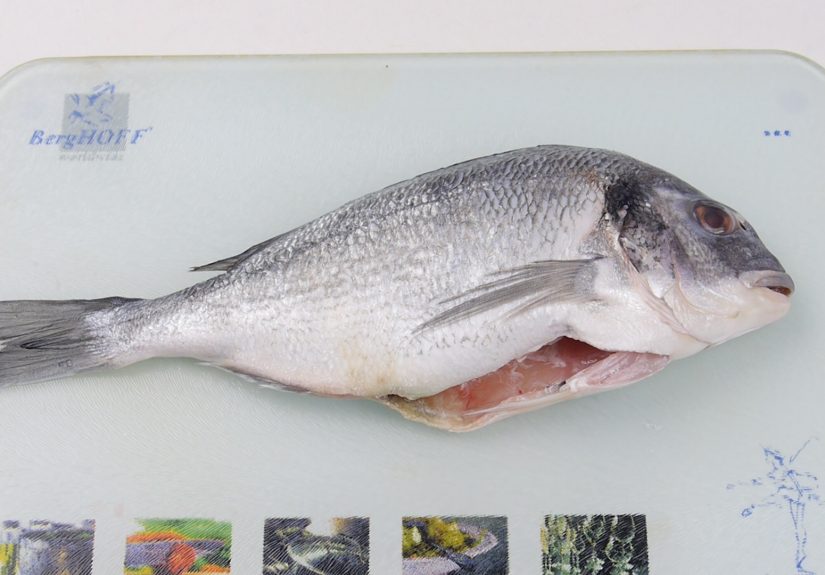
Step 2: Buy fish that looks and smells fresh
Fresh fish should smell clean and mild, not aggressively fishy. Whole fish should have clear eyes and firm flesh, while fillets should look moist, springy, and neatly cut rather than dull or dried around the edges. If the seafood counter gives you “maybe this was a bad idea” vibes, keep walking.
Step 3: Keep it cold until cooking time
Fish is not the food to let lounge around in the sun while you chat near the grill. Keep it refrigerated until you are ready to prep. If frozen, thaw it safely in the refrigerator, or use cold water or the microwave if needed and cook it promptly. Outdoor cooking should feel relaxed, but food safety is not the place for freestyle creativity.
Step 4: Pat the fish dry
This step is small, boring, and wildly important. Use paper towels to dry the fish thoroughly. A dry surface helps seasoning stick, promotes better browning, and reduces the steam effect that can make fish soft and clingy instead of beautifully seared. Moisture is the enemy of crisp edges and easy flipping.
Step 5: Decide on your flavor direction
You have two reliable paths here. The first is simple seasoning: oil, kosher salt, black pepper, and maybe lemon zest, paprika, garlic powder, or chopped herbs. The second is a quick marinade. A marinade can add flavor and moisture, but keep it sensible. Fish does not need an overnight spa treatment. Usually 15 to 30 minutes is enough for fillets, while firmer steaks may go a bit longer. Always marinate in the refrigerator, not on the counter.
Step 6: Reserve clean sauce before raw fish goes in
If you want to spoon extra marinade over the cooked fish, set some aside before the raw fish touches it. Do not brush cooked fish with marinade that held raw seafood unless you boil it first. This is one of those quiet kitchen rules that prevents a memorable dinner from becoming memorable for the wrong reason.
Step 7: Preheat the barbecue properly
Do not toss fish onto a barely warm grill and hope for the best. Preheat the barbecue until the grates are hot. For many fillets, medium to medium-high heat works well. A hot grill helps the fish release more easily and gives you the color and flavor you came outside for in the first place.
Step 8: Clean the grates like you mean it
Old bits of last weekend’s burger are not a seasoning blend. Brush the grates clean once the grill is hot. Fish is delicate and will absolutely find the one dirty patch you ignored. Clean grates are one of the biggest differences between a neat fillet and a barbecue tragedy told in hushed tones.
Step 9: Oil the fish or the grates
Lightly brush the fish with oil, or oil the hot grates carefully with a paper towel held by tongs. You do not need a deep fry situation. You just need a thin film to reduce sticking and encourage good grill marks. Neutral oils with a higher smoke tolerance are especially useful, though olive oil works fine for many home cooks.
Step 10: Place the fish on the grill with intention
For skin-on fillets, many grillers start with the flesh side down to get attractive marks, then finish skin-side down. Others keep salmon skin-side down the whole time for stability. Both approaches can work. The real rule is this: place the fish down carefully, then stop fussing. Constant repositioning is how fish begins to resemble a jigsaw puzzle.
Step 11: Do not move it too soon
This is the hardest step for enthusiastic people. Once the fish hits the grates, leave it alone long enough to sear. If it resists when you try to lift it, it probably is not ready. Fish often releases naturally when the surface has cooked enough. Translation: the grill is not rejecting you personally. It just needs another minute.
Step 12: Flip gently and only when necessary
Use a wide spatula, fish spatula, or a combination of spatula and tongs for larger pieces. Slide underneath with confidence, not panic. Thick fillets may be turned once halfway through. Thinner or skin-on fish sometimes need less handling. Whole fish can be flipped carefully once the skin is crisp and no longer clings to the grate.
Step 13: Cook by thickness, not by wishful thinking
A smart rule of thumb is to judge grilling time by thickness. Many fillets cook in roughly 4 to 6 minutes per half-inch over medium heat, or about 10 minutes per inch total depending on the fish and grill intensity. Thin trout will move quickly; a thick salmon fillet will take longer. A tuna steak may be cooked to a different finish than flaky white fish, so adjust based on the style you want.
Step 14: Check for doneness the right way
The fish should turn opaque and flake with gentle pressure at the thickest part. If you are using a thermometer, 145°F is the widely recommended safe internal temperature for fish. Visually, you want moist flesh, not dryness. Overcooked fish does not become “extra done.” It becomes an expensive lesson with lemon on top.
Step 15: Rest briefly and serve fast
Give the fish a minute or two off the heat before serving. This short rest helps juices settle and carryover heat finish the job. Then move quickly. Grilled fish waits for no one. Serve it with lemon wedges, salsa verde, herb butter, chimichurri, grilled vegetables, rice, potatoes, or a crunchy salad. The smoky fish is already doing most of the charisma work.
Extra Tips for Better Barbecue Fish
Use a grill basket for delicate fillets
If you are cooking a fragile white fish or simply want insurance, a grill basket is a great move. It makes turning easier and lowers stress immediately. There is no prize for doing it the hardest possible way.
Try a plank for gentle cooking
Cedar plank fish is popular for a reason. It adds smoky aroma, reduces direct contact with the grate, and makes delicate fish easier to manage. It is especially good for salmon and larger fillets you would rather not flip at all.
Whole fish is dramatic in the best way
A whole fish on a barbecue looks restaurant-level impressive but follows the same fundamentals: dry it well, oil it, season inside and out, and let it cook undisturbed until it releases. Stuffing the cavity with herbs and lemon can add aroma and encourage even cooking.
Keep a cooler zone on the grill
Two-zone grilling is useful if the outside colors too fast before the center is done. Start over hotter heat for sear, then move the fish to a cooler part of the grill to finish more gently.
Common Mistakes That Ruin Grilled Fish
The biggest mistake is using fish that is too delicate for your skill level and then blaming destiny. The second is putting fish on a dirty or underheated grill. After that comes excessive flipping, over-marinating, skipping the drying step, and cooking by superstition instead of checking doneness. Fish is actually very cooperative when you give it heat, structure, and a little peace and quiet.
Backyard Fish-Grilling Experiences and Lessons Learned
Anyone who cooks fish on a barbecue more than once usually ends up with a handful of very specific memories. One is the first successful salmon fillet that came off the grill with crisp edges and clean grill marks, which feels weirdly triumphant for something that only took a few minutes. Another is the first fish that stuck so badly it had to be “served” as tacos, which is a graceful recovery strategy and also a wonderful lie.
One of the most common experiences is learning that fish rewards calm more than force. People tend to get nervous because fish looks delicate, so they poke it, test it, slide under it, peek beneath it, and generally give it the kind of attention that makes it fall apart. Then, on the day they finally leave it alone, it releases beautifully and seems to say, “See? That’s all I wanted.” A lot of barbecue fish skill is really patience wearing an apron.
Many home cooks also discover that salmon is the confidence-builder of the outdoor seafood world. It has enough fat to stay moist, enough strength to survive a flip, and enough flavor to still taste fantastic with nothing more than salt, pepper, lemon, and smoke. After a few successful rounds with salmon, people often branch out to halibut, snapper, trout, tuna, or mahi-mahi. That progression feels natural because barbecue fish gets less intimidating once you realize the method matters more than the species.
Another relatable experience is underestimating how much grill condition affects the outcome. A clean, hot, lightly oiled grate can make the exact same piece of fish behave completely differently from one cooked on a cooler, dirty surface. It is one of those kitchen truths that sounds annoyingly practical until you see it happen with your own dinner. Suddenly the boring advice becomes the smart advice, and you become the person reminding everyone else to preheat properly.
There is also the flavor lesson. Fish on a barbecue does not need a complicated sauce to taste special. Smoke does a lot. Char does a lot. A squeeze of lemon at the end does a shocking amount. Fresh herbs, a spoonful of salsa, melted butter with garlic, or a fast vinaigrette can all make the meal feel finished without burying the fish under too many ingredients. People often start with elaborate plans and eventually realize the best grilled fish dinners are the simple ones.
Then there is the social experience, which is honestly part of the charm. Fish cooks fast enough that guests gather around and ask questions right as things are happening. Someone will always say, “Is it supposed to stick like that?” Someone else will suggest turning it too early. You will ignore both, wait another minute, and then lift a beautiful fillet off the grate like a backyard wizard. That small moment is one of the pleasures of cooking outdoors: it feels casual, but the results can still be genuinely impressive.
Perhaps the biggest lesson people take away is that grilling fish becomes easy right after it stops being mysterious. Once you know how to choose the right cut, dry it, season it, heat the grill properly, and let the fish tell you when it is ready to move, the whole process becomes far more forgiving. The fear goes down. The success rate goes up. And suddenly fish on the barbecue turns from a once-a-summer gamble into a regular dinner move that feels both smart and a little showy, which is really the best kind of cooking.
Conclusion
If you want perfectly grilled fish, the secret is not a secret at all. Start with the right fish, keep it cold, dry it well, season it simply, preheat and clean the grill, oil lightly, and resist the urge to fuss. From there, cook by thickness, not guesswork, and pull it off the heat before it dries out. That’s the formula.
Once you get comfortable with the method, barbecue fish becomes one of the best meals you can make at home: quick enough for a weeknight, impressive enough for guests, and flavorful enough to make you wonder why you ever thought grilling fish was difficult. In other words, it’s less “culinary tightrope walk” and more “easy summer power move.”


