Table of Contents >> Show >> Hide
- First, Decide What “Covered” Means
- Option 1: Cover Paneling Seams with Paintable Caulk (Fastest Win)
- Option 2: Fill Seams and Grooves with Compound (Drywall Look)
- Best for
- Materials you’ll likely use
- Step 1: Stabilize and prep (the part everyone wants to skipand shouldn’t)
- Step 2: Treat seams differently than grooves
- Step 3: Fill grooves (and feather the edges)
- Step 4: Cover panel-to-panel seams like a drywall finisher would
- Step 5: Skim coat (optional, but it levels the “paneling texture” problem)
- Step 6: Prime again, then paint
- Common mistakes to avoid
- Option 3: Hide Seams with Battens, Trim, or Molding (Design-Forward and Forgiving)
- Option 4: Overlay the Paneling (When You Want a Clean Slate)
- Option 5: Wallpaper, Wall Liner, or Texture (When You Want “Seams, Who?”)
- Troubleshooting: When Seams Come Back Anyway
- Which Method Should You Choose?
- Real-World Lessons and Experiences from Covering Paneling Seams (About )
- Conclusion
Paneling seams have a special talent: they’re invisible until the exact moment you paint the wall, turn on a lamp,
and suddenly your “smooth modern finish” looks like it’s wearing a pinstriped suit. The good news? You don’t have to
rip everything out to get a clean, updated wall. Whether you want seams to disappear completely or turn them into a
design feature, there’s a method that fits your budget, your patience level, and your tolerance for sanding dust.
This guide walks through the most reliable ways to cover paneling seamscaulk-and-paint fixes, full “make it look like
drywall” approaches, and trim overlays like board-and-batten. Along the way, you’ll learn what works, what cracks later,
and what to do when paneling decides to expand and contract like it’s training for a breathing competition.
First, Decide What “Covered” Means
Before you open a tub of joint compound, decide your end goal. “Covering paneling seams” can mean two very different
things:
-
Seams hidden but the panel “lines” stay: You minimize obvious joints between sheets, but you keep the
paneling look (grooves or faux grain may still show). - Seams and grooves gone (drywall look): You fill and skim so the wall reads as one continuous surface.
- Seams disguised as a feature: You cover seams with battens, trim, or molding so it looks intentional.
A Quick Reality Check: What Kind of Paneling Do You Have?
Solid wood paneling moves more with humidity than thin veneer panels. Faux wood (often hardboard/wood composite) can be
smoother, but it may be glossy and can resist adhesion unless properly prepped. Either way, seam-covering fails most
often because the surface wasn’t cleaned, scuffed, primed, or stabilized first.
Option 1: Cover Paneling Seams with Paintable Caulk (Fastest Win)
If the main issue is the joint between two panels (not every groove), paintable acrylic-latex caulk is often the
best “quick fix.” Why? Seams between panels tend to move a little. Caulk stays slightly flexible, which helps prevent
hairline cracks returning like an unwanted sequel.
Best for
- Minor gaps where two panels meet
- Paneling you plan to paint (not stain)
- Rooms where you want a cleaner look without chasing perfection
Step-by-step
- Clean the seam: Remove dust and oils. If the room is a kitchen or has old smoke residue, clean twice.
-
Re-secure loose paneling: If the panel flexes, add finish nails into studs (or appropriate fasteners)
so the seam doesn’t open and close. -
Apply caulk in a controlled bead: Cut a small tip opening. You can always add more; you can’t un-caulk
your soul once it’s on the wall. -
Tool the caulk: Smooth with a damp finger, caulk tool, or flexible putty knife. Aim for a shallow,
neat fillbulges telegraph under paint. - Let it cure fully: Dry-to-touch is not the same as ready-to-paint. Check the tube.
- Prime and paint: A quality primer helps lock the repair down and improves adhesion.
Pro tip
Caulk is great for seams. It’s not always ideal for filling every groove if your goal is a true drywall look.
Wide grooves filled only with caulk can shrink or remain slightly rubbery under sanding.
Option 2: Fill Seams and Grooves with Compound (Drywall Look)
If you want paneling to look like smooth drywall, you’ll usually do a combination of priming, filling, and skim coating.
This method is the “sweat equity” option: affordable materials, higher labor. But done correctly, it can transform a
room without the cost and mess of full demolition.
Best for
- Older faux wood paneling you want to modernize
- Basements, dens, and bedrooms where a smooth painted wall fits the plan
- Panels that are in decent condition and firmly attached
Materials you’ll likely use
- Degreasing cleaner (TSP substitute or a strong degreaser)
- Sandpaper (120–220 grit) or a deglosser
- Stain-blocking or bonding primer (chosen for your surface)
- Spackle or all-purpose joint compound (for grooves and skim coats)
- Paintable caulk (for moving seams and corners)
- Putty knives (small for grooves, wider for skim coats)
- Sanding sponge or pole sander, shop vacuum
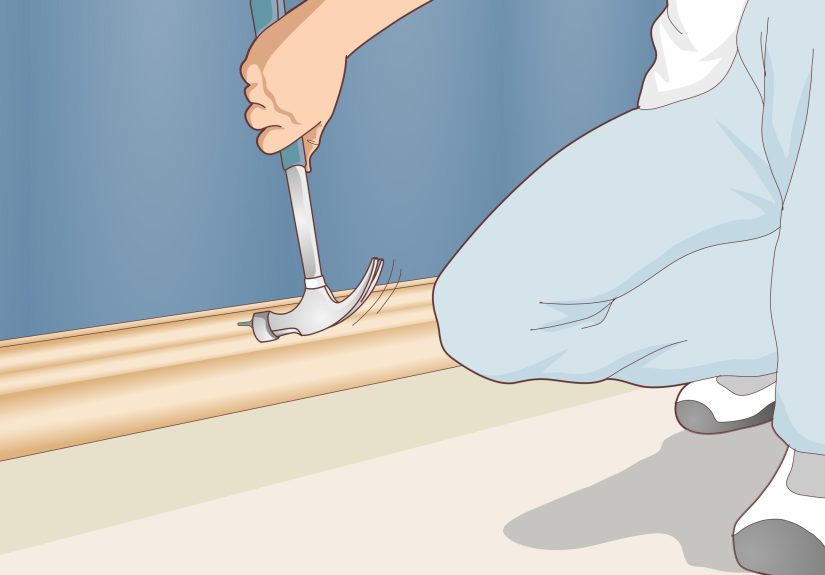
Step 1: Stabilize and prep (the part everyone wants to skipand shouldn’t)
-
Check for movement: Press around seams. If the panel flexes, fasten it better. Filler over movement
is basically writing a love letter to future cracks. -
Clean thoroughly: Paneling collects oils, waxes, and mystery grime. Paint hates mystery grime.
Wash, rinse, and let dry. - Scuff sand or degloss: You’re not trying to reshape the walljust dull the sheen so primer can grip.
-
Prime first: Priming before heavy filling helps compound bond and helps prevent stains/tannins from
bleeding through later. Use a stain-blocking/bonding primer appropriate for the surface.
Step 2: Treat seams differently than grooves
Here’s the big “why did nobody tell me this?”: seams between panels are more likely to move than the shallow decorative
grooves. That means you often get the best durability by using:
- Paintable caulk for seams where two panels meet (flex helps)
- Spackle or joint compound for grooves (sands smooth)
Step 3: Fill grooves (and feather the edges)
- Load a small knife: Press compound into each groove to avoid air pockets.
- Overfill slightly, then scrape flush: The goal is flat, not “frosted cupcake.”
- Let dry completely: Rushing this step leads to tear-out when sanding.
- Sand lightly: Smooth the ridge lines and blend. Vacuum dust.
- Repeat: Most grooves need at least two passes because compound shrinks a little as it dries.
Step 4: Cover panel-to-panel seams like a drywall finisher would
For stubborn seams that want to show through, consider a drywall-style approach: a thin layer of compound feathered
out wider than the seam, sometimes with reinforcing tape (depending on gap size and movement). Keep coats thin and
build gradually. Thick mud loves cracking and long dry times.
Step 5: Skim coat (optional, but it levels the “paneling texture” problem)
If your wall still reads as “paneling” after grooves are filledbecause the surface has grain, tiny ridges, or uneven
patchesa skim coat can unify everything. You spread a thin layer of compound across broader sections, then sand for a
consistent surface. This is where patience pays off: thin coats, clean tools, and realistic expectations.
Step 6: Prime again, then paint
After filling and sanding, prime again. This step evens porosity (mud vs. panel), helps you spot remaining flaws, and
improves paint uniformity. Then paint with two finish coats. Use a roller nap that matches your desired wall texture.
Common mistakes to avoid
- Skipping primer: Adhesion and stain-blocking become guesswork.
- Using thick coats of compound: More cracking, more sanding, more regret.
- Not fastening loose paneling: Movement = seam lines returning.
- Expecting one-pass perfection: Grooves usually need two coats to stay flush.
Option 3: Hide Seams with Battens, Trim, or Molding (Design-Forward and Forgiving)
If you’d rather outsmart paneling seams than erase them, trim is your best friend. Board-and-batten, vertical
battens, or even simple cover strips can hide seams and turn “dated paneling” into “custom millwork vibe.”
Best for
- Walls where seams line up in predictable vertical runs
- Homeowners who want a crisp style upgrade without skim-coating everything
- Rooms where a little dimension (shadow lines) is a feature, not a flaw
Popular trim-based approaches
1) Simple batten strips over seams
Cut narrow strips (often 1–3 inches wide) and place them directly over each panel seam. Nail into studs when possible,
then fill nail holes, caulk edges, prime, and paint. It’s straightforward, and it “frames” the wall in a clean way.
2) Board-and-batten (full or half wall)
Board-and-batten is essentially a pattern: larger flat areas (“boards”) with narrower strips (“battens”) covering the
joints. Indoors, you can run it floor-to-ceiling or as wainscoting. Layout mattersmeasure the wall, decide spacing,
and keep battens consistent. Then caulk all edges for a seamless painted finish.
3) Molding strategies: chair rail, picture-frame trim, panel molding
If seams are chaotic (or you’re not in the mood to align battens with them), decorative molding can distract the eye
and make seams visually irrelevant. A chair rail breaks up large wall expanses, while picture-frame molding creates
intentional geometry that screams “planned,” not “patched.”
Trim installation tips
- Prime raw wood/MDF before paint: Helps prevent tannin bleed and improves coverage.
- Caulk edges after installation: This is how trim looks built-in, not slapped-on.
- Fill nail holes, then sand: Tiny craters show up under glossy light like a guilt spotlight.
- Use a level and consistent spacing: “Almost straight” becomes “obviously not straight” once painted.
Option 4: Overlay the Paneling (When You Want a Clean Slate)
Sometimes the paneling is too damaged, too wavy, or too determined to keep its seams visible. In that case, covering it
with a new surface can be more efficient than fighting every joint.
1) 1/4-inch drywall over paneling
This approach creates a true drywall face. You’ll need longer fasteners and careful attention to outlets (box extenders
are typically required when wall thickness increases). You also need to address window/door trim depth. The upside is a
durable, familiar finish. The downside is more labor, more dust, and detail work at edges.
2) Thin wall panels or MDF sheets
Large sheets can cover a wall quickly, especially if paneling is relatively flat. Seams still exist, but now you’re
finishing fewer, straighter jointsoften easier than patching dozens of grooves.
3) Add new decorative wall systems: beadboard, shiplap-style planks, tongue-and-groove
If you actually like texture, consider installing a new paneling style over the old. This can also hide unevenness and
make seams irrelevant. Just be honest about dust-catching grooves and future cleaning, especially in kitchens.
Option 5: Wallpaper, Wall Liner, or Texture (When You Want “Seams, Who?”)
Wallpaper and wall liners can disguise minor seam lines, but they aren’t magic. If a seam is raised or a groove is deep,
it can telegraph through once the light hits just right. A paintable liner can help create a more uniform base, and a
subtle wall texture can hide minor imperfections. The trick is making sure the surface is stable and smooth enough
firstbecause wallpaper is a surprisingly honest critic.
Troubleshooting: When Seams Come Back Anyway
Problem: Hairline cracks along seams
- Likely cause: Panel movement, thick compound, or no flexible product at joints.
- Fix: Re-secure paneling, re-caulk seams, feather with compound if needed, prime and repaint.
Problem: Brown/yellow stains bleed through paint
- Likely cause: Insufficient stain-blocking primer or tannins/resins in wood.
- Fix: Spot-prime with a stain-blocking primer, then repaint.
Problem: “Shadow lines” show up where grooves were filled
- Likely cause: Uneven sanding, shrinkage after first coat, or differing surface porosity.
- Fix: Second fill coat, sand smoother, prime again before final paint.
Problem: Filler won’t stick or peels
- Likely cause: Glossy surface, residue, or skipped primer.
- Fix: Clean, degloss, prime properly, then patch again.
Which Method Should You Choose?
If you want the simplest “better than before” result, caulk the seams and paint. If you want a smooth,
modern wall, prime, fill grooves, and skim as needed. And if you want a stylish upgrade that’s more
forgiving (and often faster), cover seams with battens or trim. No single method is “best”the best one
is the one that fits your wall condition and your willingness to sand.
Real-World Lessons and Experiences from Covering Paneling Seams (About )
People who tackle paneling seams for the first time usually have the same emotional arc: optimism, confidence, the
discovery of how much sanding dust exists in the universe, and finally the quiet satisfaction of a wall that no longer
screams “1974 basement rec room.” A common lesson is that prep is the whole project. Homeowners often
say they were surprised by how much cleaning matteredespecially in rooms that had candles, cooking grease, or years of
“we’ll wipe that later” buildup. Once they cleaned and scuffed properly, primer went on smoother, and patch materials
stopped behaving like they were trying to escape the wall.
Another frequent experience: the first fill coat lies to you. It looks great while wet, then dries and
shrinks just enough to reveal faint grooves again. Many DIYers report that the second coat is where everything finally
starts to look convincing. The trick they wish they’d known earlier is to keep coats thin and widefeathering outward
instead of piling compound directly into one narrow trench. Thin coats dry faster, sand easier, and crack less, which is
basically the holy trinity of wall finishing.
Seams between panel sheets are where people get humbled. You can fill every groove perfectly, but a moving seam can
still “print through” later as a fine lineespecially with temperature swings or humidity changes. Folks who got the
best long-term results often treated seams differently: they fastened loose areas first, then used a paintable,
slightly flexible product at the seam before any cosmetic smoothing. Several homeowners also mention doing a “light test”
at night: shine a lamp along the wall at a sharp angle. If a seam is going to haunt you later, that lamp will summon it
immediately, saving you from discovering it after you’ve cleaned up and returned the sander to the garage with ceremony.
Trim-based solutions come with their own “why didn’t I do this sooner?” stories. Many people who started by considering
a full skim coat switched to battens after realizing they could turn seams into a design elementespecially in hallways,
entryways, or dining rooms where a little architectural detail feels intentional. The most repeated tip is to measure
twice and plan spacing before cutting anything. Slightly uneven spacing reads as “DIY,” while consistent spacing reads
as “custom.” And yes, everyone says they underestimated how long it takes to fill nail holes and caulk edges. Trim work
looks effortless only when you do the fussy finishing steps that are, unfortunately, not effortless.
Finally, people almost universally recommend building in small “dry time sanity breaks.” Instead of forcing everything
into one marathon day, they got better results by working in stages: clean and prime one day, fill and sand the next,
then prime again and paint. It’s less dramatic than an all-night renovation montage, but it produces a wall that looks
calm, smooth, and modernlike it never had a seam to begin with.
Conclusion
Covering paneling seams is part technique, part strategy. If your goal is speed, caulk and paint can tame obvious joints.
If your goal is a true drywall look, prime first, fill grooves in thin coats, and plan for a second pass. And if you
want a high-impact upgrade with less sanding, battens and trim can hide seams while adding character. Pick the method
that matches your wall, your time, and your patiencethen prep like you mean it. Paneling can be stubborn, but you can
absolutely outfinish it.


