Table of Contents >> Show >> Hide
- Why Harvest Timing Matters
- How to Harvest Onions: 10 Steps
- Step 1: Watch for the Right Harvest Signals
- Step 2: Let the Tops Fall Over on Their Own
- Step 3: Choose a Dry Day for Harvest
- Step 4: Loosen the Soil Before You Lift
- Step 5: Handle Each Bulb Like It Has Feelings
- Step 6: Brush Off Dirt, but Do Not Wash Storage Onions
- Step 7: Let Them Field-Dry Briefly if Conditions Are Good
- Step 8: Cure Onions Thoroughly
- Step 9: Trim, Sort, and Cull Before Storage
- Step 10: Store Onions the Smart Way
- Common Onion Harvesting Mistakes to Avoid
- Best Uses for Freshly Harvested Onions
- What Harvesting Onions Actually Feels Like: A Gardener’s Experience
- Final Thoughts
- SEO Tags
If you have ever stared at your onion patch and thought, “Are you ready, or are you just being dramatic?” welcome to the club. Onion harvesting looks simple from a distance. The tops flop over, the bulbs peek out of the soil like they pay property taxes, and suddenly you are expected to know exactly what to do next. But harvesting onions at the right time is the difference between a pantry full of firm, flavorful bulbs and a sad pile of squishy produce that smells like regret.
The good news is that learning how to harvest onions is not difficult. It is mostly about timing, gentle handling, proper curing, and resisting the temptation to treat onions like potatoes with attitude. Get those steps right, and your homegrown onions can last for months. Get them wrong, and they may rot, sprout, or shrivel faster than your motivation during midsummer weeding season.
This guide breaks the process into 10 simple steps, from spotting harvest-ready bulbs to curing and storing them like a seasoned gardener. Whether you are growing yellow storage onions, red onions, sweet onions, or a mixed patch of “I forgot what I planted,” this step-by-step guide will help you bring your crop in at the right moment.
Why Harvest Timing Matters
Before jumping into the steps, it helps to understand one big truth: onions are not done just because they look big. A mature bulb onion is ready when the plant has naturally shifted from active growth into drying down. That is why gardeners watch the tops and necks so closely. When the tops begin to fall and the necks lose their thick, green juiciness, the bulb is moving into its storage phase.
Harvest too early, and the bulbs may be small, moist, and more likely to rot in storage. Harvest too late, and the onions can split, regrow, or develop disease issues in the ground. In other words, onions reward patience but punish procrastination. Very on-brand for a crop that makes you cry.
How to Harvest Onions: 10 Steps
Step 1: Watch for the Right Harvest Signals
The first step in harvesting onions is knowing what “ready” looks like. For bulb onions meant for storage, wait until about half to three-quarters of the tops have fallen over naturally. The neck, which is the stem area right above the bulb, should start to dry and shrink. Mature bulbs usually have visible shoulders at the soil surface and a papery outer look beginning to develop.
If you are growing green onions or scallion-style onions, you can harvest much earlier when the tops are around 6 inches tall or when the stems reach the size you want. But for full-size storage onions, patience matters. Let the plant tell you it is done.
Step 2: Let the Tops Fall Over on Their Own
This is where many gardeners get a little too eager. Do not bend or stomp the tops over to speed things up. It may feel productive, but it can interrupt bulb development and reduce storage quality. The onion still uses those leaves to move sugars and energy into the bulb while it finishes maturing.
Natural flop is the goal. Forced flop is just garden meddling in a floppy disguise. If the tops are still standing proud and green, the onions are probably still filling out.
Step 3: Choose a Dry Day for Harvest
Once most tops are down, pick a warm, dry day to harvest onions from the garden. Dry weather helps the outer skins start drying quickly and reduces the risk of rot. Wet soil and damp bulbs are a bad combo when you want long-term storage.
Morning is often a smart time to harvest because the bulbs are cooler and easier to handle. Just avoid leaving them to bake too long in intense sun if your weather is scorching. A little drying is good; onion sunburn is not.
Step 4: Loosen the Soil Before You Lift
If your onions slide out of the ground with a gentle tug, great. If they resist, do not yank like you are starting a lawn mower in 1987. Use a garden fork or spading fork to loosen the soil underneath and around the bulbs first.
This step matters because bruised or nicked onions are poor candidates for storage. A damaged bulb may look fine for a day or two, then collapse into a mushy science project later. Lift carefully, especially if your soil is compacted or your bulbs are large.
Step 5: Handle Each Bulb Like It Has Feelings
Technically, onions do not have feelings. Practically, they behave like they do. Bumps, cuts, and bruises open the door to storage rot. Set the bulbs down gently rather than tossing them into a basket like baseballs.
As you harvest, separate obviously damaged, split, diseased, or bolted onions from the best bulbs. Onions that have sent up a flower stalk usually do not store well, so use them first in the kitchen. Think of them as your “eat now” onions, not your “winter pantry heroes.”
Step 6: Brush Off Dirt, but Do Not Wash Storage Onions
Once the bulbs are out of the ground, gently brush off loose soil with your hand, a glove, or a soft brush. Do not wash onions that you plan to store. Water adds moisture where you do not want it and can shorten storage life.
Also, leave the roots and tops attached at this stage unless you are dealing with a weather emergency and need to move the onions into protected curing trays right away. The less fussing you do before curing, the better.
Step 7: Let Them Field-Dry Briefly if Conditions Are Good
If the weather is cooperative, you can leave harvested onions in the garden for a short initial drying period. A day or two is often enough for the outer surfaces to dry a bit. Arrange them so the foliage helps shade the bulbs, or move them before heavy dew or rain arrives.
If the forecast includes rain, humidity, or blazing sun, skip the field-curing gamble and move your onions to a sheltered spot. For home gardeners, a porch, garage, shed, attic, or airy room often works better than trying to outsmart the weather.
Step 8: Cure Onions Thoroughly
Curing is the step that turns fresh-dug onions into storage onions. Spread the bulbs in a single layer on screens, slatted trays, shelves, or any clean surface with good airflow. Keep them in a warm, dry, well-ventilated place out of rain and, ideally, out of harsh direct sun.
Curing usually takes 2 to 3 weeks, though some onions need closer to 3 to 4 weeks depending on humidity and airflow. You will know they are ready when the necks are tight and dry, the outer skins feel papery, and the bulbs no longer seem damp or tender on the outside. Fans can help if your space is stuffy.
Step 9: Trim, Sort, and Cull Before Storage
After curing, trim the roots and cut the tops down to about 1 inch above the bulb. If you like the rustic look, you can leave the dried tops on and braid them instead. Either way, now is the time to sort your onions carefully.
Keep only the firmest, driest bulbs for storage. Set aside any with thick necks, green stems, soft spots, bruises, cuts, mold, or signs of disease. Those onions should be used soon, chopped and frozen, or otherwise enjoyed before they become tiny compost donations.
Step 10: Store Onions the Smart Way
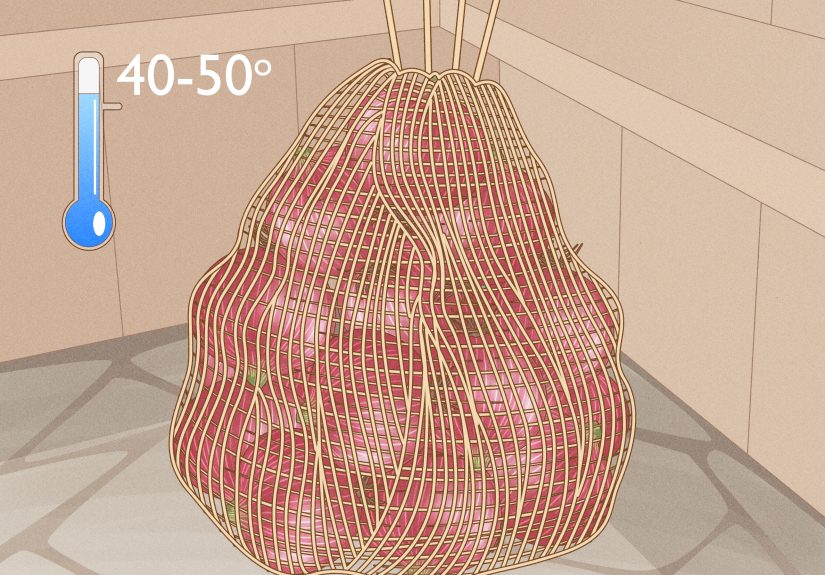
To store onions long term, use containers that allow air circulation, such as mesh bags, wire baskets, ventilated crates, or even old nylon stockings. Keep them in a cool, dry, dark location with good airflow. For long storage, many gardeners aim for temperatures near 32 to 40 degrees Fahrenheit with moderate humidity.
Check the bulbs regularly through fall and winter. Remove any that soften, sprout, or show rot. Also remember that not all onions store equally well. Yellow storage onions are usually the marathon runners. Sweet onions and many red onions are more like talented sprinters: wonderful, but not usually built for a full winter in the pantry.
Common Onion Harvesting Mistakes to Avoid
Even a strong onion crop can go sideways after harvest if you make a few classic mistakes. The first is harvesting too early, before the tops fall and the necks dry. The second is bruising bulbs during lifting and hauling. The third is rushing curing because everything looks “mostly dry.” Mostly dry is not the same as storage-ready.
Another common mistake is trimming the tops while they are still green and moist. That can invite neck rot, which is exactly as charming as it sounds. Washing onions before storage is also a frequent problem. Clean-looking onions are nice, but firm onions in January are nicer.
Finally, do not store poor-quality onions with good ones. One decaying bulb has a real talent for dragging its neighbors down with it. It is the bad influence of the vegetable drawer.
Best Uses for Freshly Harvested Onions
If you have bulbs that are slightly bruised, thick-necked, or not ideal for long storage, do not panic. These are perfect for immediate kitchen use. Slice them into fajitas, caramelize them for soup, roast them with chicken, or chop and freeze them for future meals. Fresh garden onions often have a sweeter, cleaner flavor than store-bought ones, so even the “use first” pile is still a win.
You can also harvest some onions early on purpose. Pulling a few immature bulbs during the season gives the remaining plants more space to size up. In that case, the harvest becomes both dinner and a garden strategy. Efficient and delicious is a fine combination.
What Harvesting Onions Actually Feels Like: A Gardener’s Experience
There is a very specific feeling that comes with harvesting onions, and it starts long before you lift the first bulb. It begins with suspicious observation. For days, maybe a week, you walk past the bed muttering things like, “You look close,” or “Don’t toy with me.” Then one morning the patch changes. The tops that were upright and bossy are bent over, the necks look thinner, and suddenly the whole row seems to have exhaled.
The first bulb always feels like a test. You loosen the soil, give it a careful tug, and out comes this dusty, glorious onion that somehow looks both humble and triumphant. It is one of the most satisfying harvests in the garden because onions are undercover performers. For months they do not look especially dramatic, and then one day they reveal they have been quietly building a pantry staple under your nose.
What surprises many gardeners is how much the process slows you down. Harvesting onions is not a yank-and-go situation. It asks for patience. You start paying attention to weather, airflow, screen trays, and whether your garage is breezy enough. You notice which bulbs are firm and which ones have thick necks. You begin making tiny judgment calls that feel weirdly important, because they are. The quality of your storage onions depends on those little decisions.
Then comes curing, which is the least flashy but arguably most valuable part of the whole adventure. Freshly harvested onions do not yet look like pantry onions. They look like they just returned from a mud wrestling tournament. But give them time in a warm, airy spot and they transform. The skins turn papery, the necks tighten, and the bulbs start to look like the polished version of themselves. It is oddly satisfying, like watching a rough draft become a final copy.
There is also a practical pleasure in sorting them. The best bulbs go into storage. The split one becomes tonight’s dinner. The bolted one gets used first. The slightly bruised one heads to the cutting board for freezing. Nothing feels wasted. The whole process teaches you that harvesting is not just about removing vegetables from the garden. It is about reading the crop, respecting timing, and matching each onion to its best use.
And months later, when it is cold outside and the garden is mostly sleeping, pulling a homegrown onion from storage feels like a tiny magic trick. You remember the warm day you harvested it, the screens in the garage, the papery skins, the smell of dried foliage, and the quiet pride of getting it right. That is the real reward of learning how to harvest onions well. It is not only about growing food. It is about extending the season, one bulb at a time, and giving your future self something wonderful to cook with.
Final Thoughts
Learning how to harvest onions is one of those gardening skills that pays off far beyond the harvest day itself. When you wait for the right signals, lift bulbs gently, cure them properly, and store only the best ones, you set yourself up for weeks or even months of great flavor. The process is simple, but every step matters.
So when your onion tops flop, do not panic. Grab a fork, choose a dry day, and harvest with a little patience and a little swagger. Your future soups, sautés, sandwiches, and roasts will thank you. Probably not out loud, but still.


