Table of Contents >> Show >> Hide
- Why This Linux Setup Matters
- Before You Install GameMaker Studio on Linux
- Step-by-Step: How to Install GameMaker Studio on Linux
- Step 1: Update Ubuntu first
- Step 2: Download the Ubuntu version of GameMaker
- Step 3: Install the downloaded .deb package the smart way
- Step 4: Install the Linux build dependencies GameMaker expects
- Step 5: Install the extra Ubuntu export tools
- Step 6: Launch GameMaker and sign in
- Step 7: Configure your Ubuntu target
- Common Problems and Easy Fixes
- Best Practices for a Clean Linux GameMaker Setup
- Quick Reality Check: Is GameMaker on Linux Worth It?
- Experience Section: What Installing GameMaker on Linux Usually Feels Like in Real Life
- Final Thoughts
- SEO Tags
If you have been hunting for a clear guide on how to install GameMaker Studio on Linux, welcome home. Pull up a terminal, grab a cup of coffee, and let’s make this painless. The good news is that GameMaker now offers an Ubuntu download, so Linux users are no longer forced to stare wistfully at Windows screenshots like they are peeking through the window of a fancy restaurant. The less-good news is that Linux support is not a wild anything-goes buffet. The officially supported path is Ubuntu, and the smoothest ride is usually on a current 64-bit Ubuntu LTS release.
This guide walks you through the full setup in plain English, from choosing the right Linux version to installing the package, adding the build tools, solving common errors, and getting your first project ready to run. It is written for beginners, but it also includes enough detail to help experienced Linux users avoid the usual “why is this one library ruining my day?” moment.
Why This Linux Setup Matters
Many people still search for GameMaker Studio on Linux, even though the modern product branding is simply GameMaker. Either way, the goal is the same: install the IDE, launch it cleanly, and build games without wrestling your operating system like it owes you money.
Linux users often assume that if a Debian-based distro can open a .deb file, the rest will sort itself out. Sometimes that works. Sometimes Linux smiles politely and hands you three missing dependencies, an audio library mismatch, and a completely avoidable headache. That is why an intentional setup matters. The right base OS, the right package method, and the right extra tools can turn your installation from “technically possible” into “actually pleasant.”
Before You Install GameMaker Studio on Linux
1. Use the right distro
The safest choice is Ubuntu 24.04 LTS 64-bit. That is the version most Linux users should target if they want the newest GameMaker releases with the fewest surprises. Ubuntu 22.04 may still appear in older guidance, but newer GameMaker Ubuntu IDE notes make Ubuntu 24 the smarter pick for current setups. If you are on Mint, Pop!_OS, Debian, or another distro, it may still work, but you are stepping outside official support territory.
2. Make sure your machine is 64-bit
GameMaker requires a 64-bit operating system. If you are somehow still trying to do modern game development on a 32-bit setup, Linux is not judging you, but GameMaker definitely is.
3. Leave room for the install
You should have at least a few gigabytes of free disk space available. GameMaker itself needs space, and once runtimes, caches, build tools, test projects, and exported files start piling up, your drive can go from “fine” to “why is everything slow?” faster than expected.
4. Keep internet access available
You will need internet access for downloading the installer, signing in, getting runtimes, and keeping the IDE healthy. This is not a perfect fit for an always-offline machine.
Step-by-Step: How to Install GameMaker Studio on Linux
Step 1: Update Ubuntu first
Before installing anything, update your package index and upgrade your system. This is the Linux equivalent of stretching before a workout. You can skip it, but you might regret your life choices.
This helps prevent dependency conflicts and makes sure your machine is not trying to build a shiny modern game engine on yesterday’s package metadata.
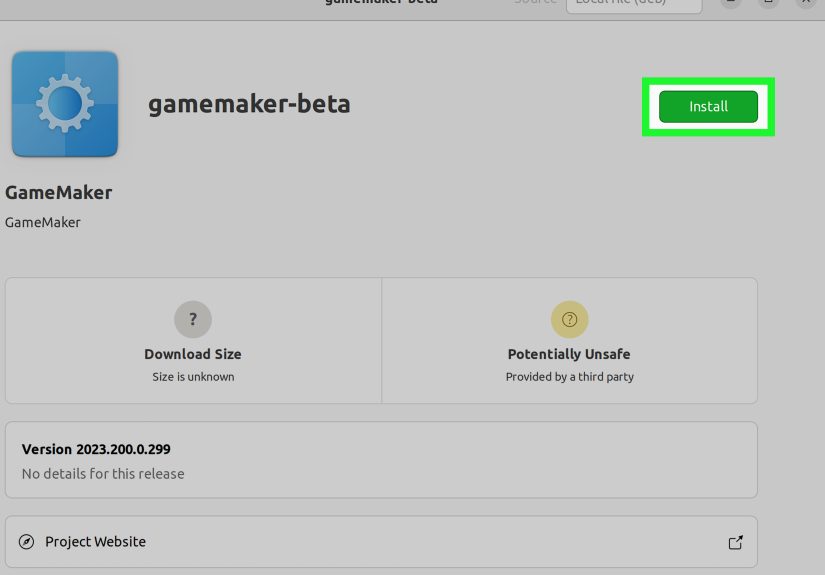
Step 2: Download the Ubuntu version of GameMaker
Download the Ubuntu build of GameMaker from the official GameMaker download page. You will usually see options for the regular release, plus Beta and sometimes LTS variants. For most users:
- Regular release is best if you want the latest stable features.
- LTS is best if you want fewer surprises and a steadier workflow.
- Beta is for brave souls, testers, and people who enjoy living slightly closer to the edge.
Step 3: Install the downloaded .deb package the smart way
On Ubuntu, the recommended way to install a local .deb package is with apt. Once the file has downloaded, open Terminal, switch to the folder where the file lives, and run:
Replace your-gamemaker-package.deb with the actual filename you downloaded.
This method is usually smoother than a bare dpkg -i install because apt handles dependencies more gracefully. If you prefer a fallback method, you can still use:
That second command tells Ubuntu to fix missing dependencies after the initial package install. It is the Linux equivalent of saying, “Okay, I made a mess, please help.”
Step 4: Install the Linux build dependencies GameMaker expects
If you want GameMaker to do more than simply exist on your machine, install the libraries and tools commonly required for Ubuntu builds and running projects. A practical setup includes packages such as build tools, OpenSSH, Clang, OpenSSL development files, OpenAL, Mesa OpenGL libraries, zlib, cURL, FFmpeg, FUSE support, and PulseAudio.
A convenient version of that setup looks like this:
If a package is already installed, Ubuntu will tell you. That is normal. Linux likes to narrate.
Step 5: Install the extra Ubuntu export tools
For modern Ubuntu target workflows, GameMaker also expects the Steam Runtime, linuxdeploy, and AppImage tooling. If your goal is only to poke around the IDE for a few minutes, you can postpone this. If your goal is to actually run, test, or build Ubuntu projects, do it now and thank yourself later.
That setup gives GameMaker the supporting cast it needs when you start targeting Ubuntu builds seriously.
Step 6: Launch GameMaker and sign in
After installation, launch GameMaker from your applications menu. On first launch, let it settle in, sign in with your account, and allow it to download any needed runtime components. This first run may take a little longer than later launches, which is normal. Your computer is not broken. It is just doing the “new software shuffle.”
Step 7: Configure your Ubuntu target
If you want to run or build Ubuntu projects, open the target settings and set up your Ubuntu device environment. GameMaker’s Ubuntu workflow uses a device configuration so the IDE can communicate with the Ubuntu machine that will host the run or build process. This is especially important if you develop on one system and build on another.
At this point, test the connection, confirm the tools are visible, and make sure your project can launch without missing dependency errors.
Common Problems and Easy Fixes
The .deb file will not install
Use apt install ./filename.deb instead of only double-clicking the file. The command-line route is often clearer, more reliable, and better at surfacing exactly what went wrong.
GameMaker installs but will not build projects
This usually means one of the required libraries or export tools is missing. Recheck the package list, verify FFmpeg is installed, and confirm you also installed Steam Runtime, linuxdeploy, and AppImage tooling if you are targeting Ubuntu builds.
Ubuntu 24 blocks project builds
Some users on Ubuntu 24 may run into a user namespace restriction related to AppArmor. If builds fail for that reason, there is a system-level workaround, but it relaxes a security restriction. Treat it as a targeted troubleshooting step, not something to apply casually just because the internet told you to type fast.
If you use this, understand the security tradeoff before making it persistent.
Ubuntu 22 feels flaky
That is not your imagination. Newer GameMaker Ubuntu notes place more emphasis on Ubuntu 24, and Ubuntu 22 setups may need extra FFmpeg-related attention depending on the GameMaker version. If you want the least dramatic path, upgrade to Ubuntu 24.04 LTS.
You are on a non-Ubuntu distro
It may work. It may even work beautifully. But if something breaks, you are outside the official support lane. That means more detective work, more package hunting, and more reliance on community fixes.
Best Practices for a Clean Linux GameMaker Setup
- Use Ubuntu 24.04 LTS if you are starting fresh.
- Install local
.debpackages withapt, not just blind optimism. - Keep GameMaker, Ubuntu packages, and runtimes updated in a controlled way.
- Choose LTS if you value stability over shiny new toys.
- Back up projects before opening them in Beta builds.
- Test a blank project first before blaming your big game on day one.
Quick Reality Check: Is GameMaker on Linux Worth It?
Yes, if you use the supported Ubuntu path and set it up properly. Linux is excellent for developers who like control, speed, and a workspace that does not constantly try to sell them something. GameMaker on Linux is not quite a magical one-click fairy tale, but it is absolutely usable. The key is accepting one simple truth: a successful Linux setup is less about luck and more about respecting the environment the software actually supports.
If you install the right package, add the right dependencies, and avoid forcing modern GameMaker onto an old or unofficial distro just because it “should probably work,” you can end up with a fast, capable game development setup that feels genuinely good to use.
Experience Section: What Installing GameMaker on Linux Usually Feels Like in Real Life
The first experience most people have with GameMaker on Linux is a mix of excitement and suspicion. Excitement, because getting a real game engine running on Linux feels a little like joining a secret club. Suspicion, because every Linux user has at least one scar from a “simple install” that turned into a side quest involving missing libraries, mysterious permissions, and a browser tab count that started to look medically concerning.
In practice, the experience gets dramatically better when users stop treating Linux as one giant interchangeable blob. The people who have the smoothest setup are usually the ones who start with Ubuntu 24.04 LTS, install the package using apt, and follow the dependency list before launching into project builds. They are not necessarily more technical. They just follow the boring steps first, and boring steps are often the hidden heroes of successful development environments.
Another common experience is realizing that “the IDE opened” and “the whole toolchain works” are two very different milestones. Many users feel victorious the moment GameMaker appears in the app launcher. Then they try to run a project, export for Ubuntu, or package a build and discover the supporting tools are still missing. This is where frustration sneaks in. The install looked finished, but the development environment was only half assembled. Once Steam Runtime, linuxdeploy, AppImage tooling, and the required libraries are added, that frustration usually drops fast.
There is also the classic Linux confidence trap: “I use a distro based on Ubuntu, so this should be identical.” Sometimes it is close enough. Sometimes it is not. A lot of weird behavior comes from tiny differences in package versions, library names, bundled codecs, or security defaults. That is why experienced users tend to separate two questions: “Can I make it run?” and “Am I using the officially supported setup?” Those are not always the same thing.
One surprisingly satisfying part of the Linux experience is how clean the environment can feel once everything is configured. GameMaker launches, projects open, builds are repeatable, and the system feels focused. There is less clutter, less background nonsense, and more of that nice “computer does exactly what I asked” energy. For developers who enjoy keyboard-driven workflows, terminals, and tight control over their machine, this setup can feel better than using a more mainstream desktop operating system.
The biggest emotional shift usually happens after the first successful test project. Before that moment, Linux installation feels theoretical. After that moment, it becomes real. You stop wondering whether GameMaker works on your machine and start thinking about the game you actually want to build. That is the point of the whole setup. Not to win an argument with your package manager, but to get to the part where your ideas become playable.
So if your first attempt is messy, do not panic. That does not mean Linux is bad, and it does not mean GameMaker is impossible to use. It usually means you are one or two practical fixes away from a stable environment. Once it clicks, the workflow feels less like hacking through a jungle and more like having a dependable little studio right on your desktop.
Final Thoughts
If you want the easiest route to installing GameMaker Studio on Linux, the formula is simple: use Ubuntu 24.04 LTS, install the official Ubuntu package with apt, add the required libraries, set up the export tools early, and keep your expectations tied to the officially supported path. Do that, and your Linux setup stops being an experiment and starts being a real development workstation.
In other words, do not fight the platform. Feed it the dependencies it wants, give it the Ubuntu version it prefers, and it will reward you by letting you get back to the fun part: making games.


