Table of Contents >> Show >> Hide
- Can You Paint Plastic Trim on a Car?
- Paint It or Restore It First?
- What You Need to Paint Plastic Car Trim
- How to Paint Plastic Trim on a Car: Step by Step
- 1) Clean the part like you mean it
- 2) Remove the part if possible
- 3) Scuff the surface without destroying it
- 4) Repair damage before you paint
- 5) Apply adhesion promoter
- 6) Prime only if your system needs it
- 7) Spray the color in light coats
- 8) Add clear coat when appropriate
- 9) Let it cure before you touch everything
- How to Paint Other Plastic Car Parts
- Common Mistakes That Ruin Plastic Paint Jobs
- Tips for a More Factory-Looking Finish
- Maintenance After Painting
- Real-World Experience: What Painting Plastic Trim Actually Teaches You
- Conclusion
- SEO Tags
If your car’s plastic trim has faded from “deep factory black” to “sad gray sidewalk,” you are not alone. Exterior trim, bumper covers, mirror caps, interior bezels, and other plastic parts take a daily beating from sun, rain, road grime, car washes, and the occasional mysterious parking-lot insult. The good news is that many of these parts can be painted successfully at home. The even better news is that you do not need a mystical body-shop wizard staff to do it.
You do, however, need patience, the right prep, and a little respect for the fact that plastic is not metal wearing a costume. It moves differently, holds contamination differently, and can reject paint if you skip the boring steps. In car painting, the boring steps are usually the steps that keep your finish from peeling off like a bad sunburn.
This guide walks you through how to paint plastic trim on a car, how to handle other common plastic parts, which products matter most, when to use adhesion promoter, and when painting is actually the wrong fix. We will also cover real-world mistakes, practical examples, and hands-on experience so your project looks intentional instead of “I had a free Saturday and too much confidence.”
Can You Paint Plastic Trim on a Car?
Yes, you can paint plastic trim on a car, and when it is done correctly, the results can look surprisingly close to factory. The catch is that success depends more on prep than on the final color can. Plastic trim, bumper covers, and interior parts often need cleaning, scuffing, and a plastic-friendly primer or adhesion promoter before color goes on.
That is especially true for slick plastics, textured exterior trim, and previously dressed surfaces. If the part has spent years marinating in silicone-heavy trim shine, wax residue, greasy fingerprints, and road film, paint will not magically “bond through it.” Paint is talented, not psychic.
Paint It or Restore It First?
Before you reach for paint, ask a simple question: is the part damaged, or just faded?
Paint is usually the better choice when:
- The original finish is peeling, blotchy, scratched, or beyond restoration.
- You want a color change, such as blacking out chrome-look trim or matching mirror caps to body color.
- You repaired the part and need a uniform finish.
- The trim has permanent discoloration that dressings cannot hide for long.
A trim restorer may be better when:
- The exterior plastic is only faded, not damaged.
- You want a quick refresh without sanding and masking.
- The part has a rough, molded texture that you do not want to fill or smooth out with paint.
- You are aiming for a natural OEM look rather than a fresh coated finish.
In other words, not every gray plastic panel needs a paint gun intervention. Sometimes a restorer is enough. Sometimes paint is the long-term answer. The smart move is choosing the right battle.
What You Need to Paint Plastic Car Trim
A simple DIY setup is usually enough for small to medium plastic parts. Here is a solid starter list:
- Car wash soap and clean water
- Wax and grease remover or paint prep cleaner
- Lint-free microfiber towels
- Gray scuff pad or fine sandpaper
- Masking tape and masking paper or plastic
- Plastic repair material or filler, if needed
- Adhesion promoter for plastic
- Plastic-safe primer, if your paint system requires it
- Trim paint, bumper paint, interior coating, or color-matched automotive paint
- Clear coat, if the finish calls for it
- Gloves and a respirator or proper mask for paint fumes
The exact paint system depends on the part. A satin-black trim paint for wiper cowl trim is not the same product you would use on a glossy mirror cap or a body-color bumper corner. Match the coating to the part and finish you want.
How to Paint Plastic Trim on a Car: Step by Step
1) Clean the part like you mean it
Start with a full wash to remove dirt and grit. Then clean the part again with wax and grease remover or a surface prep product. This second cleaning matters because trim often holds invisible contamination from old protectants, road oil, and car wash residue.
If you skip this, sanding can grind contamination deeper into the surface. That is a fantastic way to create fish-eyes, poor adhesion, and regret.
2) Remove the part if possible
Painting trim off the car usually gives a cleaner result. You avoid hard tape lines, overspray on nearby panels, and awkward spray angles. Parts like mirror caps, grille surrounds, interior bezels, or separate trim strips are often worth removing.
If removal is not practical, mask carefully and give yourself extra room around the target area. Paint has a magical ability to land exactly where you did not want it.
3) Scuff the surface without destroying it
Use a fine sandpaper or gray scuff pad to dull the surface. You are not trying to carve a canyon into the plastic. You just want enough tooth for the next layer to grip. On textured trim, go gently so you do not flatten the grain. On smoother parts like mirror caps or painted plastic covers, sand evenly and feather any damaged edges.
If the piece has peeling paint, failed clear, or deep scratches, remove the loose material first and smooth the transition. Uneven edges do not disappear under “one more coat.” They just become glossy reminders.
4) Repair damage before you paint
If a bumper cover or plastic trim piece is cracked, gouged, or heavily scarred, repair it first. Use a plastic-compatible repair material designed for automotive parts. After the repair cures, sand it smooth and re-clean the surface.
Paint is a finish, not a magic trick. It can improve appearance, but it does not erase bad prep or structural damage.
5) Apply adhesion promoter
This is the step many DIY painters skip, then later describe the result with words not suitable for a family blog. Adhesion promoter helps topcoats bond to difficult plastic surfaces. It is especially useful on raw exterior plastics, bumper covers, trim, and some chrome-look pieces that are being refinished.
Apply light, even coats according to the label instructions. Do not drench the part. Adhesion promoter is there to help the system bond, not to become the world’s shiniest puddle.
6) Prime only if your system needs it
Some trim and bumper paints are designed to go over properly prepped plastic with minimal extra steps. Others work best over a dedicated primer. Follow the system you chose. If a primer is recommended, use thin coats and let it flash properly between passes.
For satin or textured trim finishes, build coverage carefully so you do not fill in the texture. For smoother show-piece parts, you can sand the primer lightly after it dries if the product instructions allow it.
7) Spray the color in light coats
This is where restraint becomes a superpower. Hold the can or gun at a consistent distance and apply several light coats rather than one heavy coat. Heavy coats are famous for runs, sags, uneven gloss, solvent trapping, and sadness.
Start with a light tack coat, then add coverage gradually. Overlap each pass slightly. Keep your hand moving. If you stop spraying while pointed at the part, you are basically autographing it with a blob.
For black trim paint, aim for even color and correct sheen. For body-color plastic parts, build color until coverage looks uniform and the part matches the panel tone as closely as possible.
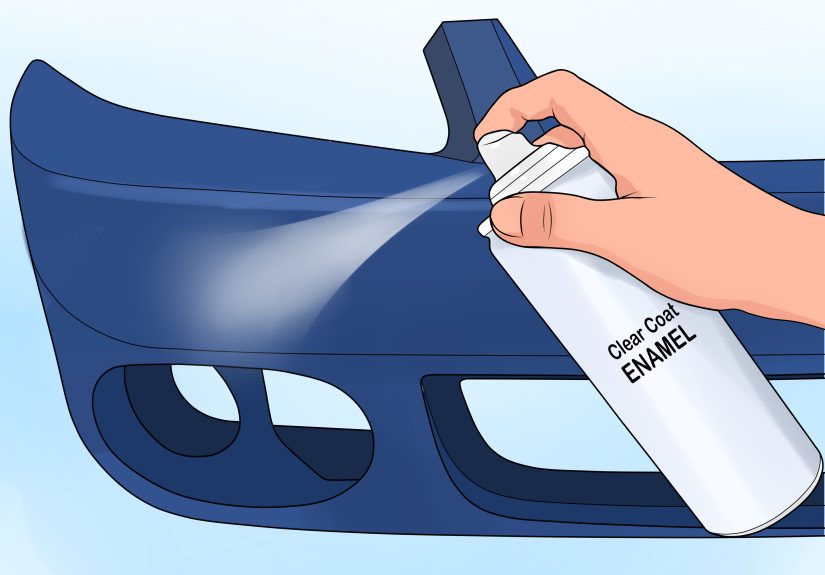
8) Add clear coat when appropriate
Clear coat is common for glossy body-color plastics such as mirror caps, bumper sections, and spoiler pieces. It is usually unnecessary for many satin-black trim paints unless the product system specifically calls for it.
If you want a factory trim appearance, do not automatically reach for gloss clear. A shiny cowl panel can make the car look less restored and more accidentally lacquered.
9) Let it cure before you touch everything
Dry-to-touch is not the same thing as fully cured. Let the part sit as long as the product instructions recommend before reinstalling, washing, or exposing it to rough use. Early handling can leave fingerprints, pressure marks, or tape impressions. That “I’ll just test it real quick” move has ruined many nice finishes.
How to Paint Other Plastic Car Parts
Bumper covers
Bumper covers can be painted successfully, but prep matters even more because they live on the front line of road abuse. Clean thoroughly, repair any cracks or gouges, use adhesion promoter, and choose a bumper-safe coating system. If the bumper is textured, be careful not to overbuild paint and bury the grain.
Mirror caps and door handles
These parts are highly visible, so surface smoothness matters. Remove them if possible, scuff evenly, use the correct primer or promoter, and spray color and clear in a controlled environment. This is a good place to go slow. A mirror cap is basically a tiny billboard for your technique.
Interior trim pieces
Dash bezels, door panel accents, console pieces, and pillar trim can often be refinished with interior-specific coatings. These products are made to bond to plastic and flex with normal use. Clean off skin oils and dressings carefully. Interior parts look best when the finish matches the cabin style rather than screaming, “Look, I found metallic red on sale.”
Engine covers and underhood plastic
Underhood pieces can be painted, but heat resistance matters. Use coatings intended for higher temperatures and prep the part thoroughly. Engine bays collect oil film, which is the sworn enemy of adhesion.
Common Mistakes That Ruin Plastic Paint Jobs
- Skipping degreasing: silicone and wax residue can wreck adhesion.
- Using the wrong paint: household or generic craft paint is not your friend here.
- Ignoring adhesion promoter: some plastics simply do not want to cooperate without it.
- Spraying heavy coats: runs are not a design feature.
- Painting in bad weather: extreme heat, cold, humidity, or direct sun can make the finish unpredictable.
- Handling parts too soon: impatience leaves marks, smudges, and sometimes new vocabulary words.
- Painting over faded trim without deciding the goal: sometimes restoration, not paint, is the better answer.
Tips for a More Factory-Looking Finish
- Match the sheen, not just the color. Many trim pieces are satin, not gloss.
- Test your system on a hidden area or scrap piece first.
- Use fresh masking materials and clean towels.
- Keep dust down in your work area.
- Do not rush reassembly.
- Protect finished trim from UV with appropriate maintenance once fully cured.
Maintenance After Painting
Once the finish cures, wash gently with normal car soap. Avoid aggressive chemicals for a while, and do not slap trim dressings on freshly painted parts. If the finish is glossy and clear-coated, treat it like paint. If it is satin trim paint, clean it gently and avoid greasy products that can alter the sheen.
Long-term care matters because plastic parts live hard lives. Sun exposure, road salt, heat, and automatic car washes all chip away at appearance over time. A careful wash routine and sensible UV protection can help your new finish stay sharp longer.
Real-World Experience: What Painting Plastic Trim Actually Teaches You
The first thing most people learn from painting plastic trim is that the project looks deceptively easy right up until the can starts spraying. Before that moment, everything feels wonderfully manageable. You wash a part, sand a little, wipe it down, and think, “I have absolutely become the kind of person who refinishes automotive trim now.” Then you lay down the first coat and discover that plastic has opinions.
One of the most useful real-world lessons is how much contamination old trim holds. A cowl panel or mirror cap may look clean after a wash, but the towel used with wax and grease remover often comes away dirty anyway. That moment changes your whole attitude toward prep. It also explains why so many rushed DIY trim jobs peel, fisheye, or look patchy within weeks.
Another common experience is realizing that texture changes everything. Smooth mirror caps are forgiving compared with rough black cladding. On textured trim, too much paint fills the grain and makes the piece look oddly swollen, like the trim ate a very salty lunch. Light coats preserve the original pattern and usually look more factory-correct. That lesson tends to arrive right after someone thinks, “I’ll just do one wetter pass so I can finish faster.” Famous last words.
People also learn quickly that satin is harder than it looks. Glossy finishes get a lot of attention, but matching the soft sheen of OEM trim can be trickier. Too flat and the part looks chalky. Too glossy and the trim suddenly looks custom in a way the rest of the vehicle did not agree to. The sweet spot comes from picking the right trim paint and resisting the urge to “improve” the look with extra clear coat.
There is also the patience lesson. Fresh paint can feel dry surprisingly fast, which tempts people to reinstall parts early. That is usually when fingerprints appear, edges scuff, or a clip leaves a permanent witness mark. Experienced DIYers learn to let painted trim sit longer than their impatient brain thinks is necessary. The part rarely gets uglier from waiting.
Finally, painting plastic trim teaches a broader car-care truth: the best-looking results usually come from doing ordinary steps extremely well. Not glamorous steps. Not social-media-hero steps. Just cleaning carefully, scuffing evenly, spraying lightly, and letting things cure. That is what separates a finish that lasts through weather and washes from one that starts flaking the next time someone looks at it too aggressively.
So yes, painting plastic trim and other car parts is absolutely a DIY-friendly project. But it rewards respect, not shortcuts. Treat the plastic properly, choose the right products, and go slow. Your car will look better, your confidence will go up, and you will gain the deeply satisfying ability to stare at faded trim in parking lots and think, “I know exactly how I’d fix that.”
Conclusion
Painting plastic trim on a car is one of those jobs that sounds small but makes a big visual difference. Done right, it can sharpen the whole vehicle, refresh faded areas, and make older trim look years younger. The secret is not brute force or blind optimism. It is preparation, the right paint system, and enough patience to let each step do its job.
Whether you are refinishing bumper trim, mirror caps, interior bezels, or other plastic car parts, the same formula holds up: clean thoroughly, scuff smartly, use the proper adhesion products, spray light coats, and let the finish cure. Do that, and your trim will not just look better for a weekend. It will have a real shot at lasting.


