Table of Contents >> Show >> Hide
- Before You Touch Anything: Quick Assessment (60 Seconds That Saves Hours)
- Gather Your Supplies (A.k.a. Your Wall-Rescue Kit)
- The Golden Rules (So You Don’t “Remove the Wall”)
- Step-by-Step: Removing Spray Paint From Painted Drywall
- Step 1: Start with warm soapy water (yes, really)
- Step 2: Try a baking soda paste for extra bite (still gentle)
- Step 3: Use a melamine sponge cautiously (good, but sneaky)
- Step 4: Move to rubbing alcohol (controlled, targeted)
- Step 5: Non-acetone nail polish remover (a cautious upgrade)
- Step 6: Acetone or a commercial graffiti remover (only if needed)
- Step 7: When removal isn’t cleanblend and touch up
- How to Remove Spray Paint From Brick, Concrete, and Stucco (Porous Surfaces)
- Wallpaper and Specialty Finishes: Proceed Like It’s a Museum Exhibit
- Common Mistakes (That Make the Wall Worse)
- When to Call a Pro (A.k.a. The “Save Your Weekend” Option)
- How to Prevent Spray Paint Problems Next Time (Yes, Even Indoors)
- Real-World Experiences & Lessons Learned (About )
- Final Takeaway
Spray paint on a wall is one of those problems that feels personal. Like the wall looked at the can and said,
“Yes, I would love a permanent neon autograph.” The good news: you can usually remove spray paint from walls
(or at least make it disappear enough that no one will ever speak of this again) without turning your drywall
into a crumbly science experiment.
The trick is to match the method to the wall, start gentle, and level up only as needed.
Most damage happens when people skip straight to “industrial-strength mystery solvent” and accidentally remove
the wall’s actual paint finish along with the graffiti. Let’s avoid that.
Before You Touch Anything: Quick Assessment (60 Seconds That Saves Hours)
1) Is the paint still fresh or fully cured?
Fresh spray paint (minutes to a few hours old) is dramatically easier to remove. Cured paint (overnight and beyond)
bonds harder and often needs a solvent or specialty remover.
2) What kind of wall surface is it?
- Painted drywall (most interior walls): easiest to damage, but often easiest to clean if you’re gentle.
- Glossy enamel / semi-gloss paint: more durable, but can show dull “clean spots” if scrubbed aggressively.
- Textured walls (orange peel, knockdown): spray paint hides in bumps and valleysrequires patience.
- Masonry (brick, concrete, stucco): porous; paint soaks inoften needs remover + brush + rinse.
- Wallpaper: high risk; removal may mean replacing a section (or the whole wall covering).
3) Safety note for older homes (important)
If your home was built decades ago and you’re considering sanding or scraping, pause. Older painted surfaces can contain
lead-based paint under newer layers. Dry sanding or aggressive scraping can create hazardous dust. When in doubt, avoid
dust-making methods and use wet-cleaning and gentle chemical approachesor hire a certified professional.
Gather Your Supplies (A.k.a. Your Wall-Rescue Kit)
You won’t need all of thesestart with the mild stuff and work up:
- Microfiber cloths (several)
- Warm water + mild dish soap
- Soft sponge
- Melamine sponge (the “magic eraser” type) (use lightly; it’s mildly abrasive)
- Baking soda (for a gentle paste)
- Plastic putty knife or old credit card (for lifting softened paint)
- Isopropyl rubbing alcohol (70% or higher)
- Non-acetone nail polish remover (gentler option)
- Acetone (strong; test carefully)
- Mineral spirits (best for some oil-based residues; often more useful on fresher paint)
- Nitrile gloves, eye protection, and good ventilation (open windows, use a fan)
- Painter’s tape and plastic sheeting (to protect trim/floors)
- Touch-up paint + small brush/roller (because perfection is sometimes spelled “repaint”)
The Golden Rules (So You Don’t “Remove the Wall”)
- Test in a hidden spot first. Always. Even “gentle” products can dull or lift paint.
- Work from mild to strong. Soap → light abrasion → alcohol → specialty remover/acetone.
- Apply solvent to a cloth, not the wall. This gives you control and reduces seepage into drywall.
- Use short contact times. Letting solvents sit too long can soften the wall’s finish.
- Blot and lift; don’t grind. Aggressive scrubbing can burnish or dull the sheen.
- Ventilation matters. Many solvents are flammable and fume-y. No open flames. No heroics.
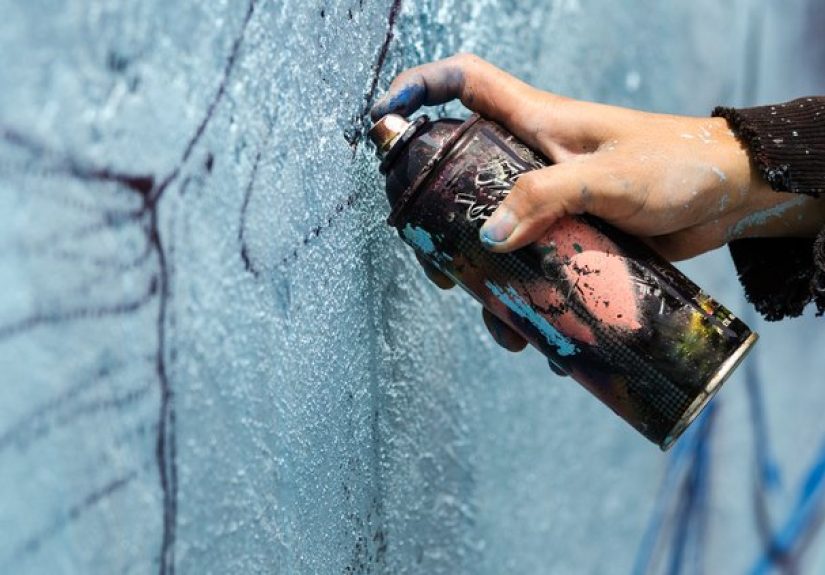
Step-by-Step: Removing Spray Paint From Painted Drywall
Step 1: Start with warm soapy water (yes, really)
Mix warm water with a few drops of dish soap. Dampen a microfiber cloth (wring it outtoo much water can mess with drywall),
then gently wipe the spray paint using light pressure. If the paint is fresh, you may see it lift immediately.
Pro move: Wipe in one direction, then switch to a clean section of cloth. Otherwise you’ll just redistribute pigment
and create a pastel “smear mural.”
Step 2: Try a baking soda paste for extra bite (still gentle)
If soap alone isn’t cutting it, make a paste: baking soda + a little water (think toothpaste consistency). Apply lightly with a soft sponge,
rub in small circles with minimal pressure, then wipe clean with a damp cloth. This can help on scuffs and thin overspray.
Step 3: Use a melamine sponge cautiously (good, but sneaky)
Melamine sponges work like ultra-fine sandpaper. They can remove marks beautifullyand also dull glossy paint if you go too hard.
Use very light pressure, keep the sponge slightly damp, and stop as soon as you see improvement.
Step 4: Move to rubbing alcohol (controlled, targeted)
For dried spray paint on a painted wall, rubbing alcohol is often the next sensible step. Put a small amount on a cloth (not dripping),
then dab and gently rub the spray paint. Work a few square inches at a time. Once the paint starts lifting, switch to blotting and wiping
with clean cloth sections.
Watch for this: If the wall paint starts coming off (you’ll see the wall’s color on your cloth), stop. At that point you’re no longer
“removing spray paint,” you’re “starting a repaint project,” which is a different hobby.
Step 5: Non-acetone nail polish remover (a cautious upgrade)
If alcohol barely annoys the spray paint, try non-acetone nail polish remover. Apply to a cloth and test an inconspicuous spot first.
Use quick, light passes and immediately wipe with a damp cloth to remove residue.
Step 6: Acetone or a commercial graffiti remover (only if needed)
Acetone is strong and evaporates fast. It can also damage wall paint finishes quickly. If you use it:
dab a cloth, work fast, and rinse/wipe with clean water after each small section. Never soak the wall.
Alternatively, a commercial graffiti remover can be effectiveespecially gel formulas that cling to vertical surfaces.
Follow the label exactly, keep contact time short on painted drywall, and rinse/wipe thoroughly afterward.
Step 7: When removal isn’t cleanblend and touch up
Sometimes the spray paint lifts but leaves a “ghost” stain or a dull patch. At that point, the best finish is often:
- Clean the area with mild soap/water and let dry fully.
- Very light sanding (only if you’re sure it’s safe to do so and you can control dust) or skip sanding altogether.
- Prime if needed (especially for staining) and touch up with matching paint.
- Feather the edges with a small roller for texture match.
How to Remove Spray Paint From Brick, Concrete, and Stucco (Porous Surfaces)
Porous materials act like paint sponges. The goal is to dissolve the paint without driving it deeper. The most common approach is:
remover → dwell time → agitation → rinse (often with pressure).
Best method: Graffiti remover + stiff nylon brush
- Wet the area lightly first (especially in hot weather) so the remover doesn’t flash-dry instantly.
- Apply a graffiti remover intended for porous surfaces (check the label).
- Let it dwell for the recommended time (often several minutes).
- Scrub with a stiff nylon brush. Avoid metal brushes that can damage masonry.
- Rinse thoroughly. Outdoors, higher-pressure rinsing often helpsuse care to avoid etching softer brick or mortar.
- Repeat if needed. Multiple gentle passes beat one aggressive attempt.
Why not just pressure wash first?
Pressure washing alone can fade surface paint, but it often won’t fully remove spray paint that soaked in. In some cases, it also spreads pigment
or roughens the surface. Using a remover first is usually more effective.
Wallpaper and Specialty Finishes: Proceed Like It’s a Museum Exhibit
Wallpaper
Wallpaper can stain, tear, or delaminate. If the spray paint is light overspray, you can try a barely damp cloth and mild soap.
Avoid alcohol and acetone unless you’re comfortable risking damage. In many cases, the “best” fix is replacing the affected strip or panel.
Flat/matte paint
Flat paint is less washable. Even water can sometimes burnish it (leave shiny marks). Use minimal moisture, very light pressure,
and expect that a touch-up may be the cleanest outcome.
High-gloss paint
Glossy finishes are tougher, but they show scratches and dull spots. Use microfiber cloths and gentle cleaners; avoid abrasive pads.
Common Mistakes (That Make the Wall Worse)
- Going straight to acetone and melting the finish off the wall paint.
- Scrubbing with rough pads and leaving shiny/dull patches that catch light forever.
- Over-wetting drywall and causing bubbling, swelling, or paper fuzz.
- Letting solvent sit too long because “more time = more better” (it doesn’t).
- Skipping ventilation and turning your room into a headache incubator.
- Creating dust with sanding/scraping on older surfaces without considering hazards.
When to Call a Pro (A.k.a. The “Save Your Weekend” Option)
Consider professional help if:
- The wall is historic, specialty-finished, or wallpapered throughout.
- Spray paint covers a large area or multiple surfaces (brick + painted trim + siding, for example).
- You suspect older underlying paint layers and you’re tempted to sand or aggressively scrape.
- The stain keeps bleeding through after cleaning and repaintingthis may require specialty primers and process.
How to Prevent Spray Paint Problems Next Time (Yes, Even Indoors)
If your situation was “DIY overspray” rather than vandalism, these small steps help:
- Use plastic sheeting and painter’s tape to mask edges and trim.
- Create a “spray zone” outdoors or in a garage with drop cloths.
- Use a spray shield (even cardboard works) to block drift.
- Keep a damp microfiber cloth nearby and wipe accidental overspray immediately.
Real-World Experiences & Lessons Learned (About )
In real homes, spray paint on walls rarely happens in a neat, single-color rectangle. It’s usually chaoticlike a mystery novel,
except the culprit left a fluorescent signature and the detective is you holding a sponge.
One of the most common scenarios is overspray from a “quick project”. Someone sprays a chair, a shelf, or a craft piece
“just for a second,” and the airflow in the room does what airflow does: carries pigment to the nearest vertical surface with ambitions.
In these cases, the spray paint is often a light mist rather than thick coverage, and that’s good news. Warm soapy water and a microfiber cloth
can remove a surprising amountespecially if you catch it early. The key lesson: don’t panic-scrub. Overspray usually comes off best with
gentle wiping and frequent cloth changes so you’re lifting pigment instead of smearing it.
Another frequent situation is kids experimenting (or adults who are kids at heart) and going heavier than overspray.
Here the biggest lesson is that “stronger” isn’t always “safer.” People reach for harsh solvents, then realize the wall’s paint finish is
coming off too. When that happens, the smartest pivot is to treat the wall like a finish-restoration project: remove what you reasonably can,
clean and dry the area, then plan for a touch-up. Done well, a small repaint can look better than a “mostly removed” blob that still catches light.
If you don’t know the wall color, that’s when saving leftover paint cans (or writing the paint code somewhere) suddenly feels like a genius move.
Textured walls bring their own personality. Spray paint settles into tiny ridges, and even if the top layer lifts, a faint tint can remain
in the valleys. The lesson here is patience: multiple short passes with the right cleaner beats one aggressive assault. It’s also where
blending helpsafter cleaning, a light roll-over with matching paint can unify the texture and hide the last traces better than endless scrubbing.
For exterior masonry (brick, concrete, stucco), the “experience lesson” is that repetition is normal. Porous surfaces
drink paint. Even with a graffiti remover, you may need two or three cycles of apply–dwell–agitate–rinse. People often quit too early
because the first round removes only the surface pigment. Staying consistent, following label dwell times, and using the right brush
usually gets better results than escalating to extreme methods that can etch or damage the surface.
Finally, there’s the emotional lesson: it’s okay if the last step is paint. Truly. Removing spray paint from walls is sometimes a cleaning task,
sometimes a repair task, and sometimes a “reset the surface” task. The win is a wall that looks normal againnot proving you can erase every molecule
of pigment using only household items and stubbornness.
Final Takeaway
To remove spray paint from walls without damage, start gentle (soap and water), step up carefully (baking soda, melamine sponge),
and use solvents sparingly and strategically (alcohol, then stronger options only if needed). For porous surfaces like brick and concrete,
a graffiti remover plus agitation and thorough rinsing is usually the most effective path. And when the wall’s finish starts to suffer,
don’t fight itclean, dry, and touch up for the best-looking result.


