Table of Contents >> Show >> Hide
- What Is a Double-Hung Window, Exactly?
- Signs Your Double-Hung Windows Need Weatherstripping
- Best Types of Weatherstripping for Double Hung Windows
- Tools and Materials You’ll Need
- How to Weatherstrip Double Hung Windows: Step by Step
- How to Weatherstrip Older Wood Double-Hung Windows
- Common Mistakes to Avoid
- When to Use Caulk, Window Film, or Storm Windows Instead
- How Long Does Weatherstripping Last?
- Experience-Based Tips for Better Results
- Real-World Experiences With Weatherstripping Double-Hung Windows
- Final Thoughts
- SEO Tags
Double-hung windows are charming, practical, and just a little dramatic. They slide up, they slide down, they let in fresh air, and when they start leaking drafts, they also let your heating and cooling budget quietly float out into the neighborhood. The good news is that learning how to weatherstrip double hung windows is one of those rare home-improvement jobs that feels both grown-up and deeply satisfying. You fix a draft, the room feels better, and suddenly you’re walking around like you personally defeated winter.
If you have older wood windows, newer vinyl windows, or anything in between, weatherstripping can help reduce drafts, improve comfort, and keep the sash operating smoothly. The trick is using the right material in the right place. Double-hung windows have moving parts, so this is not a “stick foam everywhere and hope for the best” kind of project. A little strategy goes a long way.
In this guide, you’ll learn where double-hung windows usually leak, which types of weatherstripping work best, how to install them step by step, and what mistakes to avoid if you want your window to close properly instead of behaving like a stubborn gym locker. We’ll also cover a few real-life experiences at the end, because DIY advice always sounds nicer when it has survived contact with actual paint buildup, mystery drafts, and one slightly bent putty knife.
What Is a Double-Hung Window, Exactly?
A double-hung window has two operable sashes: an upper sash and a lower sash. Both can move vertically within the frame. That design makes these windows great for ventilation, but it also creates multiple places where air can sneak in. Any spot where two moving parts meet is a potential leak point.
The most common draft zones on a double-hung window are the side jambs, the meeting rail where the two sashes come together, and the top or bottom edges of the sash. On older wood windows, you may also deal with worn parting beads, loose stops, shrunk wood, and layers of old paint that turned a once-precise fit into a breezy relationship.
Signs Your Double-Hung Windows Need Weatherstripping
You do not need a dramatic whistling sound effect to know your windows need help. Sometimes the clues are subtle:
Common Warning Signs
- You feel cool air around the sash even when the window is closed and locked.
- Dust builds up quickly on the sill or around the meeting rail.
- The room near the window feels noticeably colder or hotter than the rest of the house.
- The sash rattles on windy days.
- Your lock lines up, but the window still does not feel tightly sealed.
- The old weatherstripping looks flattened, brittle, torn, or missing.
A simple way to confirm a leak is to hold your hand near the sash on a windy day. Another smart trick is using smoke from incense to spot air movement near the jambs and meeting rail. If the smoke wiggles like it heard gossip, you probably found your draft.
Best Types of Weatherstripping for Double Hung Windows
Not all weatherstripping is created equal. Some materials are meant for areas with friction, and some are better for nonmoving contact points. For double-hung windows, the best setup often combines more than one product.
1. V-Strip or Tension Seal
V-strip is one of the best options for the side channels of double-hung windows. It compresses when the sash closes, which helps block drafts without permanently gluing your window into retirement. It works especially well along the side jambs and sometimes at the meeting rail, depending on your window design.
2. Foam Tape
Closed-cell foam tape works well on the bottom of the lower sash or the top of the upper sash, where there is little to no friction. It is affordable, easy to cut, and beginner-friendly. The downside is that foam is usually less durable than better mechanical seals, so think of it as a practical fix, not a forever crown jewel.
3. Spring Bronze
If you have older wood double-hung windows and want a durable, low-profile solution, spring bronze is a classic. It lasts a long time, looks more appropriate in traditional homes, and can be nearly invisible when installed well. It also takes more patience to install, so it is ideal for homeowners who don’t mind a little finesse.
4. Pile or Brush Weatherstripping
Many modern double-hung windows use manufacturer-specific pile or bulb-style weatherstripping. If your vinyl, fiberglass, or clad window already has a track-based seal, the smartest move is often to replace it with the same profile rather than improvising with generic foam. Otherwise, the sash may bind, fail to seal, or do both just to keep things interesting.
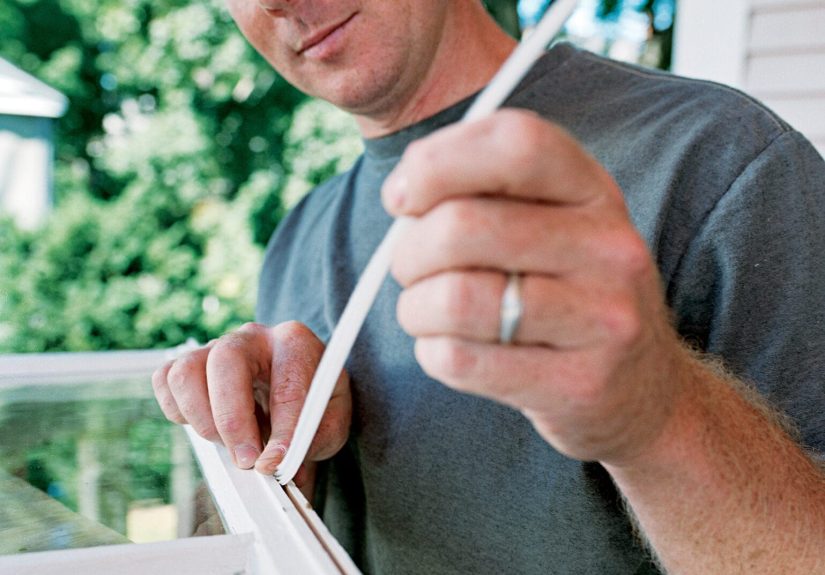
5. Rope Caulk for Temporary Draft Control
Rope caulk is a removable, flexible option for seasonal use. It is handy if you need a quick winter fix on older windows, especially when you are not ready for a full weatherstripping project. It is not the ideal long-term solution for a frequently operated window, but it can buy you comfort fast.
Tools and Materials You’ll Need
- Tape measure
- Utility knife or scissors
- Soap and water or mild cleaner
- Clean cloths
- V-strip or tension-seal weatherstripping
- Closed-cell foam tape
- Finishing nails and hammer if using nail-in weatherstripping
- Putty knife for older painted windows
- Optional: spring bronze, rope caulk, minimal-expansion foam, or window film
How to Weatherstrip Double Hung Windows: Step by Step
Step 1: Inspect the Window Before You Buy Anything
Open and close both sashes. Lock and unlock the window. Look for damaged weatherstripping, warped sash edges, cracked glazing, loose stops, or piles of dirt in the track. If the window does not operate properly, weatherstripping alone may not solve the problem. A window that is out of square, painted shut, or missing hardware may need repair first.
Step 2: Clean the Surfaces Thoroughly
This step is not glamorous, but it matters. Adhesive-backed weatherstripping sticks best to clean, dry surfaces. Wipe down the inside edges of the frame, side jambs, and sash edges with mild soap and water. Dry everything completely. If you skip this and stick foam onto dust, you are basically asking lint to insulate your house.
Step 3: Measure Every Contact Point
Measure the height of both side jambs and the width of the sash edges where you plan to install weatherstripping. Do not eyeball it unless you enjoy buying the same roll twice. Cut each strip slightly longer if the product instructions recommend a little extra tuck at the ends.
Step 4: Apply Foam Tape Where There Is Little Friction
For many double-hung windows, foam tape works best on the bottom edge of the lower sash and the top edge of the upper sash. These are pressure points when the window closes, not sliding surfaces. Press the foam firmly into place so it forms a continuous seal. Avoid installing foam on surfaces that rub constantly during operation, or the sash may drag and the foam may wear out quickly.
Step 5: Install V-Strip Along the Side Jambs
Cut two lengths of V-strip for the side channels. Open the window and place the adhesive or nailed strip inside the jamb where the sash rides. The V should open toward the sash so it compresses when the window closes. If you use nail-in V-strip or spring bronze, keep the fasteners neat and check that the sash doesn’t scrape against them.
If your window has both an inner and outer sash track, seal each one as needed. The goal is to block air without interfering with movement. That balance is the whole game.
Step 6: Seal the Meeting Rail
The meeting rail is where the top of the lower sash meets the bottom of the upper sash. This is one of the sneakiest draft zones on a double-hung window. Depending on your window type, you can use a compatible V-strip, pile weatherstripping, or the manufacturer’s replacement part. When the window is shut and locked, the meeting rail should feel snug and aligned.
Step 7: Close, Lock, and Test the Window
Once all the weatherstripping is in place, close the window fully and lock it. That lock does more than secure the window; it helps pull the sashes together for a tighter seal. Test for smooth movement, look for any spots where the sash catches, and make adjustments if necessary. A properly weatherstripped window should move with some resistance, but not feel like it is negotiating terms.
How to Weatherstrip Older Wood Double-Hung Windows
If you own an older wood window, especially in a historic house, you may want a more thorough repair rather than a quick stick-on solution. In many cases, that means removing one inside stop, taking out the lower sash, pulling the parting beads, and installing new weatherstripping more precisely. This approach can dramatically improve performance while preserving the original window.
When the Full Method Makes Sense
- The existing sash channels are badly worn.
- The old seals are missing or broken.
- You want a more durable and discreet finish.
- The house is older and you want to preserve original windows rather than replace them.
For traditional wood windows, spring bronze or replacement parting beads with integrated weather seals are often worth the extra effort. They tend to last longer and look more appropriate than bulky stick-on products.
Common Mistakes to Avoid
Using Caulk on Moving Parts
Caulk is for stationary gaps, not for places where the sash slides. If a part moves, it should be weatherstripped, not caulked. Otherwise you may end up with a sealed draft and a sealed window, which is not the same kind of victory.
Installing Foam on Friction Surfaces
Foam tape is great where the sash compresses against the frame, but not where it rubs during operation. On double-hung windows, this is a big distinction. Foam in the wrong place wears out fast and can make the sash hard to open.
Ignoring Dirt, Paint, and Old Adhesive
Weatherstripping sticks and seals best on smooth, clean surfaces. If you have old paint ridges, dried adhesive, or gritty tracks, deal with them first. A dirty jamb can ruin an otherwise perfect installation.
Using the Wrong Replacement Part on Modern Windows
If your window originally used a specific kerf-in, pile, bulb, or channel weatherstrip, replace it with the correct profile whenever possible. Modern window brands often design seals to fit exact grooves and clearances. Generic substitutes can fail to seal or prevent the sash from moving freely.
Forgetting the Lock
If the meeting rail seals only when the window is locked, that is normal. Always test your final fit with the window fully shut and locked.
When to Use Caulk, Window Film, or Storm Windows Instead
Weatherstripping is only one part of weatherproofing windows. Sometimes the real problem is outside the sash system. Use caulk on fixed exterior joints around the frame, trim, and casing if those gaps are the source of air leakage. Do not block drainage paths or weep holes on modern units.
If you still feel drafts after weatherstripping, temporary interior window film can help reduce air leakage and improve comfort for the season. And if you have older windows, storm windows can add another layer of protection. In fact, sealing the primary window first and then adding a good storm window can make a noticeable difference without sacrificing the original character of the home.
How Long Does Weatherstripping Last?
That depends on the material, exposure, and how often the window is used. Foam tape is usually the shortest-lived option, especially in high-friction spots. Spring bronze and higher-quality tension seals tend to last much longer. Manufacturer-installed or manufacturer-matched replacement weatherstripping can also perform very well, provided the window is clean, aligned, and maintained.
A good habit is to inspect your weatherstripping once a year, especially before peak heating or cooling season. Look for flattened spots, peeling adhesive, tears, or areas where the sash no longer compresses the seal.
Experience-Based Tips for Better Results
First, start with the worst window, not the prettiest one. You’ll learn more on the draftiest, crankiest unit than on the easy one in the guest room nobody opens. Second, buy a little extra material. Nothing tests your inner peace quite like coming up three inches short on the last jamb. Third, if you have several similar windows, finish one fully before copying the method to the rest. Small adjustments in placement can make a big difference in how smoothly the sash operates.
Also, keep expectations realistic. Weatherstripping can make a huge comfort difference, but it will not magically correct rotten wood, broken balances, or a frame that has shifted over time. Think of it as a smart upgrade, not wizardry.
Real-World Experiences With Weatherstripping Double-Hung Windows
People who weatherstrip double-hung windows for the first time usually have the same reaction somewhere around the middle of the project: “Why didn’t I do this sooner?” The first window often takes the longest because there is a learning curve. You clean the jamb, cut the V-strip, second-guess the direction of the fold, press it in place, close the sash, open it again, move it slightly, and then finally get that satisfying moment when the window shuts with a gentle, cushioned feel instead of a loose rattle.
Older wood windows create the most memorable experiences. One homeowner may start with a simple plan to add foam tape and end up discovering three layers of old paint, a parting bead that looks original to the Roosevelt administration, and a sash cord that has been relying mostly on optimism. But once those issues are addressed, the improvement can be dramatic. Rooms that used to feel chilly near the glass suddenly feel stable and usable again. The draft that once hovered around the sofa like an uninvited ghost finally packs up and leaves.
Modern double-hung windows create a different kind of lesson. Instead of dealing with paint buildup and ancient trim, you are more likely to find worn pile weatherstripping, dirt in the tracks, or a lock that no longer pulls the meeting rail tight enough. In those cases, cleaning the moving parts and replacing the seal with the correct manufacturer-style part often restores performance better than trying to invent a workaround. This is especially true on vinyl and fiberglass units, where clearances are tighter and the wrong material can make the sash stick.
Another common experience is realizing that not every draft is actually the sash. Sometimes homeowners weatherstrip the window beautifully and still feel air movement because the fixed trim joint around the frame needs caulk, or because the exterior casing has gaps. That is not a failed project. It is just your house revealing the next clue in the mystery. Homes love doing that.
There is also the seasonal satisfaction factor. Many people tackle this project in fall, when the first cool morning makes every leak suddenly personal. After weatherstripping, they notice the furnace runs a little less often, the room feels less uneven, and the curtains do not flutter when nobody is anywhere near the window. Those are small wins, but they add up. Comfort changes the way a room feels every single day, not just on utility-bill day.
And perhaps the most universal experience is this: the second and third windows go much faster. Once you understand where the weatherstripping belongs and how the sash should feel when it closes, the project becomes less intimidating and more rhythmic. Measure, clean, cut, press, test, adjust. By the final window, many homeowners are no longer nervous. They are mildly offended that the rest of the house has not already thanked them.
Final Thoughts
If you want a practical way to make your home more comfortable without replacing every window in sight, weatherstripping double-hung windows is a smart place to start. The key is choosing materials that match how the sash moves, sealing the right points, and resisting the urge to use one product for everything. V-strip, foam tape, spring bronze, and manufacturer-matched replacement seals all have their place.
Done well, this project can reduce drafts, improve comfort, and help your windows feel tighter, smoother, and less temperamental. And for a DIY job that mostly involves measuring, cleaning, and sticking things in the correct place, that is a pretty excellent return on effort.


