Table of Contents >> Show >> Hide
- What Is a Ring Light for Macro Photography?
- Why Macro Photos Are So Hard Without Good Lighting
- How an Inexpensive Ring Light Makes Macro Photos Easier
- Best Subjects to Photograph With a Budget Ring Light
- LED Ring Light vs. Macro Ring Flash
- What to Look for in an Inexpensive Ring Light
- How to Use a Ring Light for Better Macro Photos
- Camera Settings for Macro Photos With a Ring Light
- Common Ring Light Mistakes to Avoid
- Budget Macro Setup Ideas
- When a Ring Light Is Not the Best Choice
- Real-World Experience: What It Feels Like to Use an Inexpensive Ring Light for Macro Photos
- Conclusion
Macro photography has a sneaky way of turning normal household objects into tiny movie stars. A quarter becomes a moon crater. A strawberry looks like a red planet with seeds. A houseplant suddenly reveals veins, texture, and drama worthy of a nature documentary. The only problem? Once you move the camera close enough to capture those tiny details, light becomes the bossy director on set.
That is where an inexpensive ring light can save the day. You do not need a suitcase full of studio gear, a lighting assistant named Chad, or a credit card that starts sweating. A simple LED ring light or compact macro ring light can make close-up photography brighter, sharper, and much easier to control. For beginners, hobbyists, online sellers, crafters, food bloggers, gardeners, and anyone who has ever tried to photograph a shiny coin under a kitchen lamp, this little circle of light can feel like cheatingin the best possible way.
This guide explains why an affordable ring light works so well for macro photos, how to use one correctly, what to look for before buying, and how to avoid the flat, “science lab evidence photo” look that sometimes happens with direct lighting. Let’s zoom in.
What Is a Ring Light for Macro Photography?
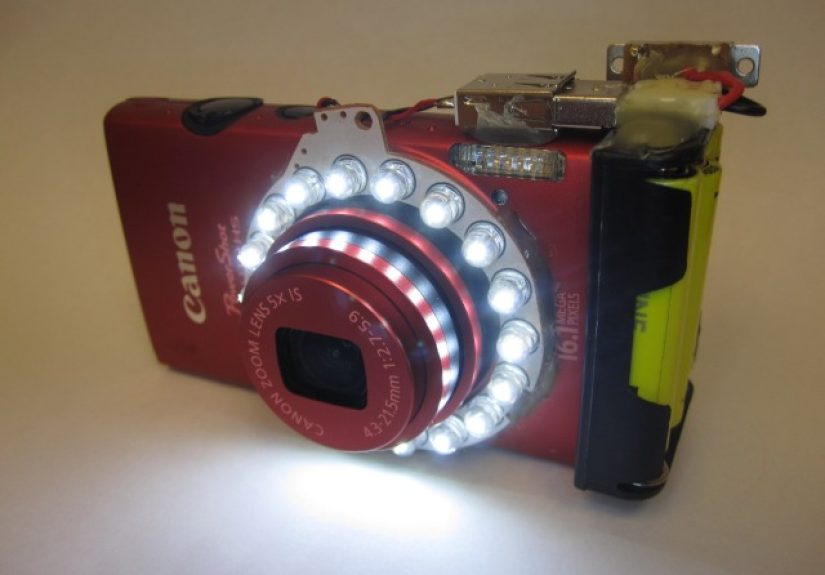
A ring light is a circular light source designed to surround or sit close to the camera lens. In macro photography, many small ring lights attach near the front of the lens, while larger LED ring lights sit on a tabletop stand or light stand. The goal is simple: place soft, even light close to the subject so tiny details are easier to photograph.
Macro photography usually means shooting very small subjects at close range. Think flowers, insects, jewelry, coins, stamps, model cars, food textures, watch faces, makeup details, craft projects, and the mysterious crumbs living inside your keyboard. Because the camera is so close, your lens and camera body can block available light. Even worse, small subjects often need small apertures, such as f/8, f/11, or f/16, to keep more detail in focus. Smaller apertures reduce the light entering the lens, which can force slower shutter speeds or higher ISO settings.
An inexpensive ring light solves several of these problems at once. It adds light exactly where the camera needs it, reduces harsh shadows, and makes it easier to use practical camera settings without turning every photo into a blurry ghost sighting.
Why Macro Photos Are So Hard Without Good Lighting
Macro photography looks peaceful from the outside. A flower. A camera. A person quietly kneeling in the garden. But behind the scenes, chaos is doing jumping jacks.
Close focusing reduces working room
When you move close to a subject, there is very little space between the lens and whatever you are photographing. This makes it harder for natural light to reach the front of the subject. A normal lamp may cast a shadow from the camera. A pop-up flash may blast light from the wrong angle. Direct sunlight may create sharp highlights and dark shadows that hide texture instead of revealing it.
Depth of field becomes extremely shallow
At close distances, the area that appears sharp can be razor-thin. You may focus on the front edge of a ring, only to find the gemstone is soft. You may capture the eye of an insect while the wings vanish into blur. To increase depth of field, photographers often use a smaller aperture, but that requires more light.
Small movements look huge
In macro work, a tiny hand movement can ruin sharpness. A slow shutter speed makes this worse. Extra light from a ring light allows faster shutter speeds, reducing blur from camera shake, moving flowers, active insects, or a subject that refuses to sit still because apparently even a paperclip has attitude.
How an Inexpensive Ring Light Makes Macro Photos Easier
The biggest advantage of a budget ring light is convenience. It gives you controllable light without a complicated setup. Instead of juggling lamps, reflectors, flash triggers, diffusers, and hope, you can turn on the ring light, adjust brightness, and start shooting.
It provides even illumination
Because the light comes from around the lens or close to the lens axis, it spreads across small subjects more evenly than a lamp placed off to one side. This is especially useful for photographing coins, product labels, craft details, flat artwork, stamps, leaves, and small collectibles.
It reduces harsh shadows
Macro subjects often have texture, edges, holes, ridges, and reflective surfaces. A single hard light can create distracting shadows. A ring light helps fill those shadows, making details easier to see. This is one reason ring lights are popular for close-up product photography, jewelry photography, dental photography, and beauty details.
It helps beginners learn faster
Continuous LED ring lights let you see the lighting effect before you take the photo. Unlike flash, which appears for a fraction of a second, continuous light shows shadows, reflections, brightness, and color in real time. That makes it beginner-friendly. What you see is much closer to what you get, which is comforting when your camera menu already looks like it was designed by a committee of owls.
It works with phones and cameras
You do not need a professional DSLR or mirrorless camera to benefit. Many inexpensive ring lights work well with smartphones, compact cameras, and entry-level camera kits. For phone macro photography, a small clip-on macro lens combined with a tabletop ring light can produce surprisingly detailed results for social media, online listings, and blog images.
Best Subjects to Photograph With a Budget Ring Light
A ring light is not perfect for every close-up situation, but it shinesliterally and emotionallywhen the goal is clean detail.
Jewelry and rings
Jewelry is small, reflective, and dramatic. It also loves to show every bad lighting choice you make. A ring light can help brighten gemstones, engravings, metal textures, and fine details. For highly reflective rings, angle the jewelry slightly instead of pointing it straight at the light. This reduces hot spots and gives the metal more shape.
Flowers and plants
Petals, pollen, leaf veins, water droplets, and tiny garden textures look beautiful under soft close-up lighting. A ring light is especially useful indoors or on cloudy days when natural light is weak. Try placing the flower near a window and using the ring light as gentle fill.
Insects and tiny creatures
Insects require patience, respect, and the ability to accept rejection from a beetle. A ring light can help keep shutter speeds higher and details visible. However, avoid blasting living subjects at full brightness for long periods. Use only the light you need, work quickly, and give wildlife plenty of space.
Coins, stamps, and collectibles
Flat or semi-flat collectibles benefit from even lighting. A ring light helps reveal engraving, print texture, scratches, and surface details. For coins, experiment with a slight side angle because fully front-facing light may reduce the sense of depth.
Food textures
Macro food photography can make sugar crystals sparkle, citrus pulp glow, and chocolate look dangerously persuasive. A ring light can help with small food details, though adding a white card or reflector from one side often creates a more natural, appetizing shape.
LED Ring Light vs. Macro Ring Flash
The terms “ring light” and “ring flash” are often used together, but they are not exactly the same.
LED ring light
An LED ring light provides continuous light. It stays on while you compose, focus, and shoot. It is easy to use, usually inexpensive, and helpful for both photos and videos. Many budget LED ring lights allow brightness adjustment and color temperature control. The downside is that small LED units may not be as powerful as flash, especially outdoors in bright conditions.
Macro ring flash
A macro ring flash emits a short burst of light when the photo is taken. It is usually more powerful than a basic LED ring light and can freeze motion better. Some models support automatic exposure through TTL metering, while cheaper models may be manual only. A ring flash can be excellent for insects, handheld close-ups, and high-magnification work, but it may cost more and require more learning.
Which one should beginners choose?
For most beginners, an inexpensive continuous LED ring light is the easiest starting point. You can see the light, adjust it quickly, and use it for multiple purposes. If you later become deeply interested in insect macro photography or handheld outdoor shooting, a dedicated macro flash may be a smart upgrade.
What to Look for in an Inexpensive Ring Light
Cheap does not have to mean useless. But “cheap and cheerful” can become “cheap and why is this thing purple?” if you buy without checking a few basics.
Adjustable brightness
Brightness control is essential. Full power may be too harsh for shiny subjects, while low power may be perfect for petals, paper textures, or soft product shots. Look for a model with several brightness levels or smooth dimming.
Color temperature options
Many LED ring lights offer warm, neutral, and cool settings. Neutral daylight-style light is often easiest for accurate colors. Warm light can make food and crafts feel cozy, while cool light may suit tech products or clinical detail shots. Avoid mixing different light colors unless you enjoy editing photos while muttering at your screen.
Lens or stand compatibility
If you use a camera, check whether the ring light can attach to your lens size or mount securely near the subject. If you use a phone, a tabletop ring light or clip-on light may be more practical. For product photography, a ring light on a small stand gives you flexibility.
Power source
USB-powered ring lights are convenient for desk setups. Battery-powered models are better for gardens, workshops, and location shoots. Rechargeable lights save money over time, especially if you shoot often.
Diffusion quality
A good ring light should soften the LEDs so the light does not look like tiny dots reflected in every shiny surface. Built-in diffusion helps create smoother highlights and a more polished image.
How to Use a Ring Light for Better Macro Photos
Using a ring light is simple, but using it well takes a little thought. The difference between “nice detail” and “passport photo for a ladybug” often comes down to angle, distance, and intensity.
Start with low to medium brightness
Do not automatically crank the light to maximum power. Start lower and increase brightness only if the shutter speed is too slow or the image is underexposed. Softer light usually looks more natural.
Move the light closer or farther away
Light changes dramatically with distance. Moving the ring light closer can make it brighter and softer relative to the subject. Moving it farther away can reduce intensity and change the shadow pattern. For tabletop macro photography, small distance adjustments can make a big difference.
Angle the subject
If your subject looks flat, rotate it slightly. This is especially helpful for coins, jewelry, glass, glossy leaves, and food. A small angle can create shadows that reveal shape without losing the clean look of ring lighting.
Add a reflector
A white card, foam board, paper towel, or even the back of an envelope can bounce light into shadows. Reflectors are inexpensive, portable, and surprisingly powerful. They are basically the photography version of “use what you have in the drawer.”
Use manual exposure when possible
Auto mode can work, but manual exposure gives more control. Try a starting point such as ISO 100 to 400, aperture around f/8 to f/11, and a shutter speed fast enough to avoid blur. Adjust based on your subject, camera, and light strength.
Camera Settings for Macro Photos With a Ring Light
There is no one magical setting for every macro photo, but these starting points help.
For stationary tabletop subjects
Use ISO 100 or 200 for clean image quality. Choose f/8 to f/11 for useful depth of field. Place the camera on a tripod or stable surface. Use a two-second timer or remote shutter to avoid camera shake. Adjust ring light brightness until the exposure looks balanced.
For handheld close-ups
Use a faster shutter speed, such as 1/125 second or faster, depending on your lens and magnification. Increase ISO if needed. Use the ring light to add enough illumination so your camera does not drag the shutter too slow.
For smartphones
Tap to focus on the most important detail. Lower exposure slightly if highlights look blown out. Use portrait mode carefully because artificial background blur can struggle with tiny subjects. For best results, stabilize the phone with a mini tripod or lean it against something solid.
Common Ring Light Mistakes to Avoid
A ring light is helpful, but it is not a magic donut. Use it carelessly and your images may look flat, shiny, or oddly sterile.
Using too much light
Overlighting can wash out texture and create harsh reflections. Reduce brightness or add diffusion if the image looks too bright or plastic.
Standing too close without checking focus
Every lens has a minimum focusing distance. If you move closer than the lens allows, the camera cannot focus, no matter how nicely you ask. Back up slightly or use a true macro lens, extension tube, close-up filter, or phone macro attachment.
Ignoring background
Macro photos often show very little background, but what appears still matters. A clean paper sheet, wood board, fabric scrap, leaf, tile, or matte surface can improve the image instantly.
Letting reflections take over
Shiny objects may reflect the ring shape. Sometimes that looks cool. Sometimes it looks like your subject has been abducted by a tiny UFO. Change the angle, reduce brightness, or use diffusion to control reflections.
Budget Macro Setup Ideas
You can build a useful macro setup without spending much. Here are a few practical combinations.
Phone macro setup
Use a smartphone, clip-on macro lens, small tabletop ring light, white paper background, and a mini tripod. This setup works well for crafts, jewelry, coins, plants, and social media content.
Entry-level camera setup
Use a DSLR or mirrorless camera with a kit lens plus extension tubes or a budget macro lens. Add a lens-mounted LED ring light or small ring flash. Use a tripod for stationary subjects.
Product detail setup
Place your subject on a matte surface near a window. Use a ring light as front fill and a white card on the opposite side. This creates bright, clean product images without a large studio.
When a Ring Light Is Not the Best Choice
Ring lights are useful, but they are not always the most creative lighting tool. Because the light is close to the lens axis, it can reduce shadows and make subjects appear flatter. For dramatic textures, side lighting may work better. For transparent objects, backlighting may reveal more glow. For food, a side or back light often looks more natural and delicious.
The best approach is to treat the ring light as one tool, not the entire toolbox. Use it alone for simple, clean detail. Combine it with window light, reflectors, or side lighting when you want more depth. Photography is less about owning every gadget and more about learning how light behaves. Although owning gadgets is fun, and we should not pretend otherwise.
Real-World Experience: What It Feels Like to Use an Inexpensive Ring Light for Macro Photos
The first time you use a cheap ring light for macro photography, the experience can feel almost suspiciously easy. Before the ring light, you may spend ten minutes trying to photograph a tiny object under a desk lamp, only to discover that your own camera is casting a shadow across the subject like a dramatic villain entrance. Then you attach or position the ring light, turn it on, and suddenly the whole scene becomes visible. Not perfect, but workable. That is a big deal.
One of the most useful experiences is photographing textured everyday objects. Try a coin, a zipper, a coffee bean, a leaf, a seashell, or the woven edge of a fabric napkin. Without controlled light, the details may look dull or uneven. With a ring light, the texture becomes clearer, and focusing becomes easier because the camera has more contrast to lock onto. This is especially helpful for beginners who are still learning manual focus or focus peaking.
Another practical lesson appears when photographing jewelry. A ring light can make a ring sparkle, but it can also create circular reflections in polished metal or gemstones. At first, this may seem like a problem. Then you realize it is also a teaching moment. By tilting the ring, changing the height of the light, or adding a piece of white paper as diffusion, you start to understand reflection control. Suddenly, you are not just taking pictures; you are negotiating with physics. Physics is stubborn, but at least it does not charge hourly.
For plant photography, an inexpensive ring light is especially enjoyable. Place a leaf on a table, mist it lightly with water, and move the light around while watching how the droplets change. At low brightness, the image may feel soft and natural. At higher brightness, the droplets may sparkle more, but highlights can blow out. This simple exercise teaches exposure control faster than reading ten camera manuals while drinking cold coffee.
Food macro photography is another fun test. A ring light can reveal the sugar crystals on a cookie, the bubbles in a slice of citrus, or the rough surface of toasted bread. However, food often looks better with a little direction in the light. If the ring light makes everything too flat, shift it slightly to one side or combine it with window light. A white card can fill shadows, while a dark card can add contrast. The affordable ring light becomes the starting point, not the final recipe.
The biggest personal advantage is confidence. Macro photography can feel intimidating because the smallest mistakes are magnified. Focus errors, blur, dust, reflections, and shadows all become obvious. A ring light removes one major obstacle: not having enough usable light. Once that problem is reduced, you can focus on composition, background, subject choice, and patience.
There is also a creative bonus. Because inexpensive ring lights are lightweight and easy to move, you are more likely to experiment. You can shoot at your desk, in the kitchen, on a balcony, in the garden, or next to a window. You can photograph handmade products for an online shop, document small repairs, create educational images, or simply explore the tiny worlds hiding in plain sight. The gear does not need to be fancy to open the door.
After using a budget ring light for a while, you may still want better tools. A stronger macro flash, a dedicated macro lens, a focusing rail, or advanced diffusers can all improve results. But the inexpensive ring light remains valuable because it teaches the most important lesson in close-up photography: light is not an accessory. Light is the image. The camera records it, the lens shapes it, and the photographer learns to boss it around politely.
Conclusion
An inexpensive ring light makes macro photos easy because it solves the most common close-up photography problem: poor lighting at short distances. It gives beginners a simple way to brighten tiny subjects, reduce shadows, improve focus, and use better camera settings. Whether you photograph flowers, rings, coins, crafts, food, insects, or product details, a budget ring light can help you capture sharper and cleaner images without building a full studio.
The key is to use it thoughtfully. Adjust brightness, watch reflections, angle your subject, try diffusion, and combine the ring light with natural light or reflectors when needed. Macro photography rewards curiosity, patience, and a willingness to look slightly ridiculous while photographing a paperclip from six angles. Luckily, that is part of the fun.
Note: This article is original, publication-ready content synthesized from real macro photography lighting principles, practical camera guidance, and common ring light usage recommendations.


