Table of Contents >> Show >> Hide
- Why DIY a Decorative Wall Mirror Instead of Buying One?
- Plan Your DIY Decorative Mirror Project
- Step-by-Step: Simple DIY Decorative Wall Mirror
- Creative Variations for Your Decorative Home Wall Mirror
- Styling Tips for Your New DIY Wall Mirror
- Common Mistakes to Avoid
- Real-Life DIY Experiences: What You Learn While Making Mirrors
- Ready to See Your Space in a New Light?
If you’ve been eyeing those luxe mirrors on your feed and then quietly choking on the price tag, this guide is for you. A decorative home wall mirror doesn’t have to cost as much as a new appliance. With a few budget-friendly supplies, a free afternoon, and a dash of Hometalk-style creativity, you can turn a plain mirror into a showstopping focal point that brightens your room, bounces light, and makes your home feel instantly more “designer.”
Home decor editors and DIYers love mirrors because they’re the ultimate multitasker: they visually expand small spaces, amplify natural light, and add a sculptural element to otherwise flat walls. The best part? You don’t need a woodworking shop or art degree. You just need a plan, the right adhesive, and a willingness to get a little bit messy.
Why DIY a Decorative Wall Mirror Instead of Buying One?
1. You’ll Save Serious Money
High-end sculptural mirrors can run into the hundreds of dollars, especially blob-style frames and oversized arch mirrors. Lifestyle outlets regularly feature designer pieces priced at $300–$650 and up. Meanwhile, you can start with an inexpensive basic mirror from Walmart, IKEA, or a thrift store and add your own decorative frame for a fraction of the cost.
Dollar store mirrors, clearance finds, and secondhand frames all become fair game for your DIY wall mirror. Hometalk and similar platforms are full of people turning $1–$10 mirrors into glamorous décor using simple materials like ornament balls, scrap wood, and peel-and-stick tiles.
2. You Get a Custom Look
When you build a decorative home wall mirror yourself, you’re not limited to what’s in stock this season. Want a chunky modern blob frame? A nautical rope mirror? An antique mercury-glass look? All of these are achievable at home with basic craft supplies: air-dry clay, rope, spray paint, and mirror-effect paint.
3. You Can Match Your Existing Decor
Interior designers lean on mirrors to support a room’s stylefrom minimalist and modern to coastal, farmhouse, or vintage. When you DIY, you’re free to stain your frame to match existing wood tones, paint it matte black to mimic metal, or wrap it in rope for beachy charm. The mirror becomes the missing puzzle piece instead of a “close enough” compromise.
Plan Your DIY Decorative Mirror Project
Choose the Perfect Spot
Before you buy anything, decide where your DIY wall mirror will live. This does a few important things:
- Height and scale: Above a console or entry bench, aim for the mirror’s center to be around eye level (roughly 57–60 inches from the floor). Over a sofa or sideboard, leave 6–8 inches of space between the furniture and the bottom of the frame.
- Light bounce: Designers like placing mirrors opposite windows or across from something pretty, like artwork or a view, to reflect it back into the room.
- Wall type: Drywall, plaster, and masonry all affect the hardware you’ll need. If your mirror is heavy, you’ll want wall anchors or studsnot just a couple of lonely nails.
Pick Your Mirror Style
Here are some popular DIY mirror styles you can recreate at home:
- Framed panel mirror: A simple flat mirror mounted on a plywood backer with wood trim around the edges. Clean, classic, and beginner-friendly.
- Multi-tile feature wall: Multiple square mirror tiles arranged to form a grid or accent wall, inspired by designer mirror walls and IKEA hacks.
- Blob or sculptural frame: A basic mirror surrounded by a hand-shaped clay or foam frame that mimics high-end sculptural mirrors, often for the price of coffee.
- Nautical rope mirror: A simple round mirror framed with thick rope for coastal or farmhouse décor.
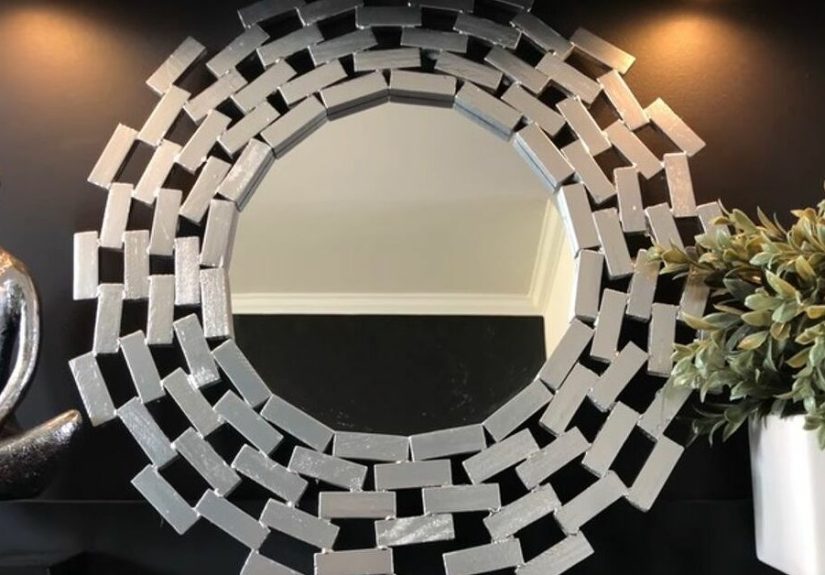
- Sunburst mirror: A central mirror with radiating sticks, skewers, or dowels, finished in gold or black for a retro glam vibe.
- Antique or mercury-glass mirror: Regular glass or mirror given an aged appearance using mirror-effect paint and a vinegar mixture.
Gather Your Tools and Materials
Your exact supply list will depend on style, but most decorative wall mirror projects use some combination of:
- A base mirror (frameless or cheap framed mirror)
- Backing material (plywood, MDF, or pre-made frame)
- Construction adhesive rated for mirrors or glass
- Decorative elements (wood trim, rope, clay, tiles, bamboo skewers, stencil paint, etc.)
- Primer and paint or stain
- Hanging hardware (D-rings, wire, French cleat, wall anchors)
- Safety gear (gloves, eye protection, drop cloth)
Budget-wise, you can make a stylish decorative home wall mirror for $20–$75 using affordable mirrors and materials from Walmart, IKEA, or big-box hardware stores, far less than comparable designer versions.
Step-by-Step: Simple DIY Decorative Wall Mirror
This core project uses a plain rectangular mirror, a wood backer, and decorative trim. Once you master this method, you can remix it with rope, tiles, or clay details.
Step 1: Cut and Prep the Backer Board
- Measure your mirror and decide how wide you want the frame around it (for example, a 1.5–3 inch border).
- Cut a piece of plywood or MDF big enough to create that border around all sides.
- Lightly sand the board, then wipe off dust so paint and adhesive will stick properly.
Step 2: Attach the Mirror
- Flip the board face up and mark where the mirror will sit, leaving an even border on all sides.
- Use mirror-safe construction adhesive (check the label; some glues can damage the mirror backing over time). Apply in zigzag lines within your outline.
- Press the mirror onto the adhesive, using spacers or painter’s tape to keep it from sliding while it cures. Follow drying times on the adhesivethis is not the moment to be impatient.
Step 3: Build the Decorative Frame
You can keep this step simple or go full Pinterest hero. A few options:
- Wood trim: Cut trim pieces to fit around the mirror like a picture frame. Paint or stain them before gluing them in place for a crisp, finished look.
- Mosaic tiles: Use peel-and-stick or regular tiles around the border. This mimics glam store-bought mirrors and looks especially luxe in a bathroom or entryway.
- Rope or cord: Wrap the edges with thick rope for a nautical style; hot glue in short sections so it sits smoothly.
Whichever option you choose, dry-fit everything before gluing so you’re not stuck (literally) with crooked corners.
Step 4: Finish and Seal
Once the trim or embellishments are attached:
- Fill any gaps in wood with caulk or wood filler.
- Paint or stain the frame, using a primer first if you’re going from dark to light.
- Consider adding a clear sealer if the mirror will live in a humid spot like a bathroom to help prevent warping or peeling.
Step 5: Hang Safely (Very Important!)
Designers and safety experts strongly recommend not hanging heavy mirrors with adhesive hooks or strips because the weight and fragile glass make failures expensive and dangerous. Instead, use one of these methods:
- French cleat: A two-part metal bracket system that locks the mirror to the wallideal for heavier pieces.
- D-rings and wall anchors: Attach D-rings on the back of the mirror and screw into wall anchors rated for the full weight.
- Stud mounting: Whenever possible, attach hardware into a wall stud for maximum support.
Measure twice, drill once, and if the mirror is large or heavy, recruit a friend. Your drywall (and your toes) will thank you.
Creative Variations for Your Decorative Home Wall Mirror
Dollar Store Glam Mirror Wall
One of the most shared Hometalk-style projects involves turning a stack of cheap small mirrors into a dramatic mirror wall or oversized cluster. DIYers glue individual mirrors onto a larger backer or directly onto the wall in a grid, then add metallic frames or ornament balls for a high-impact installation. It’s a perfect way to fill a blank hallway, stair landing, or rental-friendly accent wall.
Blob-Frame Modern Mirror
Inspired by trending designer “blob mirrors,” you can wrap a basic mirror with a sculptural, wavy frame using air-dry clay or foam. Shape organic curves around the mirror, let the material dry, sand lightly, and paint in a soft neutral or bold color. The result looks like something from a high-end boutique, but your bank account will know the truth.
Nautical Rope Mirror
For beach houses, coastal vibes, or just people who own more striped shirts than they care to admit, rope mirrors are a classic. Wrap thick jute rope around a round mirror, securing it with glue as you go. Add a loop of rope at the top to mimic a hanging ship’s mirror and pair it with weathered wood and blue-and-white textiles.
Sunburst Mirror
Sunburst mirrors never really go out of style. A small round mirror in the center, plus wooden skewers or dowels radiating outward, plus metallic spray paint equals instant drama. Hang one above a bed or console table, or cluster several smaller sunbursts for a gallery-wall effect.
Etched, Frosted, or Mercury-Glass Mirror
If you like a softer, vintage, or romantic look, try surface treatments:
- Etched designs: Use stencils with etching cream or specialty paint to add subtle patterns to the glass, like botanicals or borders.
- Frosted details: Frosted glass paint and stencils can turn a boring builder-grade mirror into a custom piecegreat for bathrooms where you still want privacy.
- Mercury-glass effect: Spray mirror-effect paint on the back of glass and spritz a vinegar-water mix to create aged spots. Follow with black paint for depth.
Styling Tips for Your New DIY Wall Mirror
Use Mirrors to Transform Small Spaces
Designers frequently use mirrors to open up cramped entryways, dark hallways, and tiny bathrooms. A decorative home wall mirror placed behind a console in a narrow entry will reflect light from the door and make the space feel intentional, not like a leftover hallway.
On TV design competitions, pros often pair a large mirror with a storage bench and hooks to create a welcoming, functional entry in one shot. You can recreate this look at home by combining your DIY mirror with baskets and a slim bench to corral shoes and bags.
Think About What the Mirror Reflects
A mirror is basically a second windowonly this one reflects your mess if you’re not careful. Avoid positioning your decorative wall mirror directly across from cluttered shelves or a busy kitchen. Instead, aim it at a window, a favorite piece of art, or a calm, styled corner with plants and soft lighting.
Mix and Match Shapes
Round mirrors soften sharp architectural lines, while rectangles and arches feel tailored and classic. If your room is full of straight edges, a round or blob-shaped mirror can break up the geometry in a good way.
Hang with Confidence, Not Wishful Thinking
One more time for the people in the back: heavy mirrors do not belong on adhesive hooks. Designers specifically warn against using temporary adhesive strips for mirrors or valuable framed pieces because the weight and glass are a risky combo. Use appropriate hardware, check weight ratings, and err on the side of overbuilding your hanging system.
Common Mistakes to Avoid
- Using the wrong adhesive: Some generic construction adhesives can eat through the mirror’s silver backing. Always choose an adhesive labeled safe for mirrors or glass.
- Skipping prep work: Dusty wood, greasy thrift-store mirrors, or damp surfaces can cause peeling or failed adhesion.
- Overloading anchors: Guessing the weight is a bad strategy. If your mirror feels hefty, weigh it (or estimate based on similar products) and choose anchors rated well above that number.
- Ignoring humidity: Bathroom mirrors need moisture-resistant paint and sealed edges to stay beautiful long-term.
- Rushing the finish: Paint and glue need proper drying times. Hanging too soon can warp frames, smudge paint, or shift tiles.
Real-Life DIY Experiences: What You Learn While Making Mirrors
On paper, a decorative home wall mirror sounds simple: stick mirror on board, add cute frame, hang, done. In real life, the project teaches you some surprisingly useful lessons about patience, precision, and the power of painter’s tape.
The First-Time Wobbly Frame
Almost every first-time DIYer has a wobbly frame story. You measure once, cut twice, and suddenly those corners don’t quite meet. The good news? Wood filler and caulk are extremely forgiving. Sanded and painted, slightly imperfect joints disappear. The experience nudges you to slow downcheck that your saw is set at a true 45 degrees, label each piece, and dry-fit before committing to glue or nails.
That “oops” moment also makes you braver with future projects. Once you realize you can fix minor mistakes, you stop waiting for perfection and start actually building things.
Discovering How Much Adhesive Is Too Much
Another classic learning curve: the adhesive avalanche. It’s tempting to squeeze out half a tube “just to be safe.” Then you press the mirror down and glue squirts everywhere. You’re frantically wiping the edges while the mirror slowly slides out of place like a glacier.
That experience teaches control. You figure out how far a small zigzag of adhesive really goes, why manufacturers print those neat little diagrams on the tube, and how helpful temporary spacers or clamps can be. You also learn that a pack of inexpensive plastic shims is worth its weight in gold.
The Great Light-Bounce Surprise
One of the best surprises people report after installing a DIY wall mirror is how different the room feels. A dark corner suddenly looks inviting. A cramped entry feels taller and wider. You might notice that you naturally keep that area tidier because the mirror “doubles” whatever’s in front of itmess included.
After living with your decorative mirror for a while, you start to understand why designers place mirrors where they do. You notice angles, reflections, and sightlines. You might even move the mirror once or twice to find the sweet spot where it reflects the best view and the most light.
Respecting the Hardware
Hanging a heavy mirror is humbling in the best way. Stud finders, wall anchors, drill bits you’ve never used beforethey all enter the chat. That process builds confidence with tools and teaches a healthy respect for gravity.
Many DIYers share that after installing their first large decorative wall mirror, they feel more comfortable tackling shelves, curtain rods, and even TV mounts. It’s like leveling up in a home-ownership video game: once you’ve successfully hung a large, heavy piece of glass without disaster, everything else feels approachable.
The “I Made That” Effect
Finally, there’s the quiet joy of walking past something you created. Every time you catch your reflection, you’re also seeing your own handiwork: the color you chose, the frame you cut, the pattern you laid out. Friends ask where you bought it, and you get to say, “Actually… I made it.”
That feeling is addictive in the best way. Your first decorative home wall mirror often leads to a second projectmaybe a bathroom mirror glow-up, a mirror gallery wall on the stairs, or a sculptural piece for your bedroom. With each one, your skills sharpen, and your home becomes just a little more “you.”
Ready to See Your Space in a New Light?
Creating your own decorative home wall mirror is one of those projects that delivers huge visual impact for a modest budget. You learn new skills, customize your space, and end up with a piece that looks far more expensive than it really was. Whether you choose a simple framed mirror, a rope-wrapped coastal piece, or a sculptural blob frame, the process is approachableeven if you’re new to DIY.
Start small if you like: pick up an inexpensive mirror, some trim or rope, and mirror-safe adhesive. Plan your design, take your time on the cuts, and treat the hanging hardware with respect. Before long, you’ll have a Hometalk-worthy decorative wall mirrorand the satisfying bragging rights that come with doing it yourself.


