Table of Contents >> Show >> Hide
- The Hack in One Sentence: Put Storage Behind a Mirror That Looks Like a Regular Mirror
- Pick Your Path: 3 Ways to Pull Off the Medicine Cabinet Hack
- Plan First, Panic Less: A Quick Reality Check Before You Start
- The Step-by-Step Hack: Create a Mirror-Front Storage Zone
- Design Add-Ons That Take This Hack From “Useful” to “Wow”
- The “Stays Clean” Organization System (So You Don’t Re-Clutter in Two Weeks)
- Important Note: What You Shouldn’t Store in a Steamy Bathroom
- Real Examples: How This Hack Solves Common Bathroom Problems
- Troubleshooting: If Something Feels Off, It’s Usually One of These
- Conclusion: A Cleaner Countertop Is the Fastest Bathroom Upgrade
- Real-Life Experiences: What People Notice After This Medicine Cabinet Hack (Plus Lessons Learned)
If your bathroom vanity looks like a tiny convenience store checkout lane (toothpaste, hair ties, mystery bobby pins, three half-used lotions, and one lone contact lens case living its best life),
you don’t need a full remodelyou need a smarter hiding place.
The easiest way to make a bathroom feel “new” is to make it feel calm. And the calmest bathrooms all share one not-so-glamorous secret:
they put the everyday clutter somewhere else. That “somewhere else” is a medicine cabinetspecifically, a medicine cabinet that doesn’t scream,
“Hello, I was installed in 1998 and I’m still emotionally attached to beige.”
This article breaks down a high-impact medicine cabinet hack: upgrading from a basic mirror (or an outdated cabinet) to a mirror-front cabinet that adds hidden storage,
looks intentional, and makes your countertop breathe again. You’ll get options for every skill levelfrom “I own a screwdriver” to “I label my drill bits.”
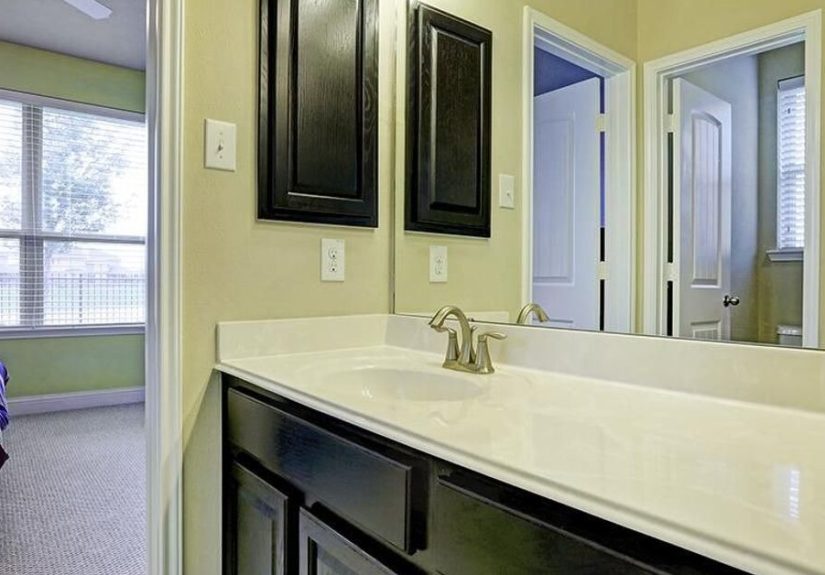
The Hack in One Sentence: Put Storage Behind a Mirror That Looks Like a Regular Mirror
The magic trick is simple: you keep the clean, modern look of a statement mirror, but you add a cabinet behind iteither recessed into the wall (built-in look)
or mounted on the surface (fastest install). From the front, it reads like décor. From the side, it reads like “Where has this been all my life?”
Why this feels like a bigger upgrade than it costs
- It clears visual clutter: fewer items on the vanity makes the whole room feel larger.
- It upgrades function: daily essentials become easy to grab without digging through drawers.
- It adds “designer logic”: storage is integrated, not bolted on as an afterthought.
Pick Your Path: 3 Ways to Pull Off the Medicine Cabinet Hack
Option 1: The 30-Minute Glow-Up (No Construction)
If you already have a medicine cabinet, the hack can be purely internal: make it look and work like a custom system.
Add a small riser for bottles, a couple of clear bins for categories, and a slim magnetic strip on the inside wall for tweezers and nail clippers.
Suddenly you’re not “organizing,” you’re “installing a system” (the vibes are different).
Option 2: The Disguised Upgrade (Surface-Mount, Looks Built-In)
Don’t want to cut drywall? Choose a surface-mounted cabinet and make it look like a framed mirror.
Many cabinets can be paired with trim or a frame detail so they read like décor rather than a box on a wall.
This works especially well in older homes, rentals (with permission), or bathrooms where plumbing/wiring lives exactly where you wish it didn’t.
Option 3: The “Wait, That’s a Cabinet?” Reveal (Recessed Behind-Mirror Look)
This is the signature hack: a cabinet recessed between studs so it sits flush to the wall, with a mirror-front door that blends in.
It’s the cleanest look and the biggest storage-per-square-inch winespecially in small bathrooms where every inch matters.
Plan First, Panic Less: A Quick Reality Check Before You Start
A medicine cabinet hack goes smoothly when you treat it like a mini projectnot a spontaneous wall adventure.
Take 15 minutes to check these items and you’ll save hours of “Why is this not fitting?” later.
1) Location: what’s inside the wall matters
- Use a stud finder to map studsand be alert for plumbing and wiring near sinks.
- Avoid exterior walls when possible (insulation and vapor barriers complicate recessed installs).
- Think about door swing so you’re not opening the cabinet into a light fixture or a nearby door.
2) Height: aim for “works for humans,” not “works for basketball players”
Most bathrooms feel best when the mirror is comfortable for the main users and doesn’t fight the faucet or vanity lighting.
Leave breathing room above and below, and make sure the door can open without bumping anything.
3) Depth: shallow is your friend
For a recessed cabinet, shallow depth keeps the unit within the wall cavity and prevents an awkward “nose bump” when you lean in.
For a surface cabinet, shallow depth keeps the look streamlined and prevents the cabinet from dominating the space.
The Step-by-Step Hack: Create a Mirror-Front Storage Zone
The exact steps vary by cabinet style, but the workflow stays consistent. If you’re doing a recessed install, keep it simple:
measure carefully, frame the opening properly, and install the cabinet square and level so the door behaves.
Step 1: Measure like you mean it
- Measure the vanity width and choose a cabinet that looks proportionate (especially for single vs. double vanities).
- Check vertical clearance between faucet, backsplash, and vanity light.
- Mark the centerline so the cabinet aligns with the sink (unless your wall realities demand a slight shift).
Step 2: Remove what’s there (mirror or old cabinet)
If you’re replacing a mirror, remove it carefully to avoid wall damage. If you’re removing an old cabinet,
support it while you back out screws so it doesn’t do a surprise drop-and-dent.
Step 3: Create the opening (recessed installs)
Trace the cabinet’s rough opening carefully. Cut the drywall neatly so you can patch/trim cleanly.
If you hit unexpected resistance, stop and verify you’re not dealing with wiring or plumbing in the cut path.
Step 4: Frame the opening so the cabinet has real support
This is the difference between “professionally installed” and “my cabinet wobbles when I blink.”
Add solid framing so the cabinet can be fastened securely and sit square in the opening.
Think of it as giving your cabinet a spine.
Step 5: Set the cabinet level and secure it
Dry-fit first. Then shim as needed until it’s plumb and level. A cabinet that’s even slightly out of square can cause a door that doesn’t close cleanly.
Once it’s aligned, fasten according to the manufacturer’s instructions.
Step 6: Make it look expensive (even if it wasn’t)
- Add trim: A thin frame detail around the mirror can turn “basic” into “boutique hotel.”
- Finish the edges: Caulk gaps, touch up paint, and keep lines crisp.
- Upgrade the hardware: A small knob or pull (or a finger notch) can make the door feel intentional.
Design Add-Ons That Take This Hack From “Useful” to “Wow”
Wallpaper or paint the interior like it’s a tiny closet
A patterned liner or a deep paint color inside the cabinet makes it feel customespecially when the door swings open.
It’s a small detail with big impact, and it distracts from the fact that you’re storing six different types of floss.
Adjustable shelves (because your stuff refuses to be one height)
Look for adjustable shelving or add it if your cabinet allows. The goal is to avoid wasted vertical space and keep everyday items within easy reach.
Anti-fog and lighting upgrades (optional, but fancy)
Some mirror cabinets offer built-in lighting or anti-fog features; if yours doesn’t, you can still upgrade the experience with better vanity lighting
or a targeted task light. Keep electrical upgrades safe and code-compliantwhen in doubt, hire a licensed pro.
The “Stays Clean” Organization System (So You Don’t Re-Clutter in Two Weeks)
A new cabinet is great. A cabinet that stays organized is the real flex. Use a simple zoning strategy:
daily, weekly, and “only when something goes wrong.”
Zone 1: Daily grab items
- Toothpaste, floss, contact solution, deodorant, daily skincare
- Keep these at eye level in one bin or one shelf section
Zone 2: Weekly routine items
- Hair masks, exfoliants, nail tools, whitening strips
- Store in a labeled bin so they don’t migrate across shelves
Zone 3: First-aid and sick-day supplies
- Bandages, antiseptic, thermometer, basic OTC essentials
- Use a small caddy you can carry to another room if needed
Micro-hacks that make a big difference
- Two-tier riser: lets bottles sit in rows, not piles.
- Clear bins with labels: categories prevent “everything shelf syndrome.”
- Magnetic strip: keeps tiny tools visible and easy to grab.
- Dry-erase note: write “running low” items so you stop buying your fourth backup toothpaste.
Important Note: What You Shouldn’t Store in a Steamy Bathroom
Here’s the slightly ironic truth: a “medicine cabinet” is often not the best place for many medications.
Heat and humidity can be rough on certain products, and bathrooms are basically humidity theme parks.
If you keep medications in the bathroom, consider limiting it to short-term essentials and keep them sealed in original containers.
For anything sensitive (or anything you’re unsure about), a cooler, drier location is usually safer.
Always follow the storage instructions on the label, and keep all medications out of reach of children and pets.
Real Examples: How This Hack Solves Common Bathroom Problems
Example 1: The tiny powder room
A powder room often has zero storage, so even a shallow cabinet behind a mirror can hold soap refills, tissues, stain remover pens,
and a “company is coming” kit. The mirror stays sleek, and the room stops functioning like a decorative closet with a sink.
Example 2: The shared family bathroom
Divide shelves by person: left, center, right. Give each person one labeled bin, plus one shared bin for first-aid and extras.
This eliminates the daily scavenger hunt for “my face wash” that somehow always ends up behind someone else’s hair gel.
Example 3: The “I have no counter space” vanity
When the vanity top is small, the cabinet becomes the command center. Store toothbrushes, skincare, and grooming tools inside,
and leave only the truly essential items out. The bathroom instantly looks more upscale because the surfaces are clear.
Troubleshooting: If Something Feels Off, It’s Usually One of These
The door doesn’t close smoothly
Most often, the cabinet isn’t perfectly level or the wall is slightly out of plane. Recheck level, adjust shims,
and confirm hinges are aligned and snug (not overtightened).
The cabinet feels too small
Add a riser, switch to slimmer bins, and store bulky backstock elsewhere. Cabinets work best when they hold “active use” items,
not your entire storehouse of backups.
The cabinet looks like an obvious add-on
Add a frame detail, upgrade the hardware, and make sure the perimeter is caulked cleanly. A few finishing steps can move the look from “installed” to “designed.”
Conclusion: A Cleaner Countertop Is the Fastest Bathroom Upgrade
You don’t need new tile, a new vanity, or a dramatic demolition montage to update your bathroom.
This medicine cabinet hack works because it fixes what makes most bathrooms feel dated: visible clutter and awkward storage.
Whether you choose a quick internal organization refresh, a disguised surface-mount cabinet, or a flush recessed install,
the payoff is the sameyour bathroom feels calmer, looks sharper, and works better every single day.
Real-Life Experiences: What People Notice After This Medicine Cabinet Hack (Plus Lessons Learned)
Once the cabinet is in and the shelves are zoned, the biggest “experience upgrade” people describe is how quickly their bathroom routine becomes automatic.
Not because they suddenly became morning people (let’s not get carried away), but because the space stops fighting them.
When items have a designated home, you don’t spend your first five minutes awake doing micro scavenger hunts for toothpaste caps and tweezers.
One common surprise: the bathroom looks cleaner even when it isn’t freshly cleaned. That’s the power of clear surfaces.
When your vanity top is mostly empty, your eyes read the room as calm and intentional.
People often report they start wiping down the counter more often, toobecause it takes ten seconds, not ten minutes of moving stuff around like a tabletop puzzle.
In shared bathrooms, the “bin per person” approach tends to be the turning point. Instead of a cabinet turning into a chaotic communal pile,
each person has a defined zone. The experience shifts from “Who moved my face wash?” to “My stuff is where it belongs.”
Parents often say this makes it easier for kids and teens to keep the space tidy because the system is visual and simple:
your bin comes out, you use it, it goes back. No advanced organizational philosophy required.
Another frequently mentioned win is getting a grip on duplicates. When a cabinet is organized into categoriescold/flu, first aid, skincare, dental
it becomes obvious when you’ve accidentally built a small museum exhibit of half-used products.
People say they waste less money because they can actually see what they already have, which is a nice bonus for a project that started as “I just want my sink area to look normal.”
The most common lesson learned is about sizing and clearance. Many DIYers wish they’d measured with the cabinet door swing in mindespecially if there’s a sconce,
a nearby door, or a bulky faucet. The fix is usually straightforward (adjust placement, choose a different door style, or use a shallower cabinet),
but it’s a good reminder that a bathroom is a tight space where inches matter. The second lesson is about shelf height:
adjustable shelves (or shelf risers) make the cabinet feel twice as big because you stop wasting vertical space.
Finally, people often describe the emotional payoff as “quiet.” Not in a dramatic waymore like the bathroom stops feeling like a cluttered backstage area.
It becomes a space that looks put-together even on rushed mornings, which is exactly what a good hack should do:
make the everyday easier, without demanding more effort from you.


