Table of Contents >> Show >> Hide
- What Black Magic Actually Is
- Why Add WiFi to Black Magic?
- How the WiFi Black Magic Trick Works
- What Makes Wireless GDB with Black Magic So Appealing
- High-Level Setup Process
- Real Benefits in Real Projects
- The Downsides You Should Respect
- Is This Better Than a Standard Black Magic Probe?
- Best Practices for a Smoother Wireless Debugging Setup
- Hands-On Experience: What It Feels Like to Actually Use WiFi with Black Magic
- Conclusion
If you have ever debugged embedded firmware while draped in USB cables like a holiday tree that lost the will to sparkle, this project will speak to your soul. The idea behind adding WiFi to Black Magic is delightfully nerdy and surprisingly practical: take the no-nonsense debugging workflow of the Black Magic Probe, then untether it from USB so GDB can talk to your target over the network instead.
In plain English, that means you can step through code, set breakpoints, inspect memory, and poke registers without being physically chained to the board. For developers working on robots, enclosures, battery-powered prototypes, or just messy benches with too many cables and not enough dignity, wireless GDB action sounds less like a gimmick and more like civilized living.
This guide breaks down what Black Magic is, how WiFi-enabled versions work, what hardware and firmware are involved, where the setup shines, and where reality politely reminds you that radio links are not magic. They are just wireless. Which is still pretty magical when your firmware finally stops crashing.
What Black Magic Actually Is
The Black Magic Probe is an embedded debug probe built around a very appealing idea: the probe itself speaks GDB directly. That is what makes it different from many other debug adapters that rely on extra PC-side middleware such as OpenOCD or vendor-specific server software. Instead of running a separate daemon, you point GDB at the probe and get to work.
That design has made Black Magic popular with embedded developers who want a lean, scriptable, command-line-friendly workflow. It supports standard on-chip debugging interfaces such as SWD and JTAG, and it can handle the usual firmware-debugging jobs: target detection, loading code, setting breakpoints, single-stepping, reading memory, viewing registers, and monitoring serial output through a second interface.
In its standard wired form, a Black Magic Probe typically shows up as two serial interfaces when connected over USB. One interface is used for the GDB server connection, while the other works as a USB-to-UART bridge. That second channel is handy when you want both source-level debugging and old-fashioned serial logs at the same time, because nothing says “embedded engineering” like watching a breakpoint and a printf argue about who is more useful.
Why Add WiFi to Black Magic?
Because sometimes the target is in an awkward place, sometimes the laptop is in an awkward place, and sometimes both are in an awkward place because hardware development is a lifestyle choice.
Adding WiFi to Black Magic moves the GDB connection from a local USB serial link to a network connection. Instead of plugging the probe into your computer and then connecting GDB to a COM port or /dev/ttyACM* device, you connect GDB to an IP address and TCP port. Same mission, fewer cables.
That matters in real projects. A wireless Black Magic setup can be useful when:
- the target board is mounted inside a robot, drone, appliance, or enclosure
- you want to leave a debug probe attached during longer bench testing
- you need both debugging and a remote serial console without hovering over the board
- you are developing from across the room, across the lab, or across a workbench that has become emotionally unavailable
Wireless debugging also feels cleaner. Not necessarily faster. Not necessarily easier the first time. But cleaner, and sometimes that is enough to improve your mood by a full firmware version.
How the WiFi Black Magic Trick Works
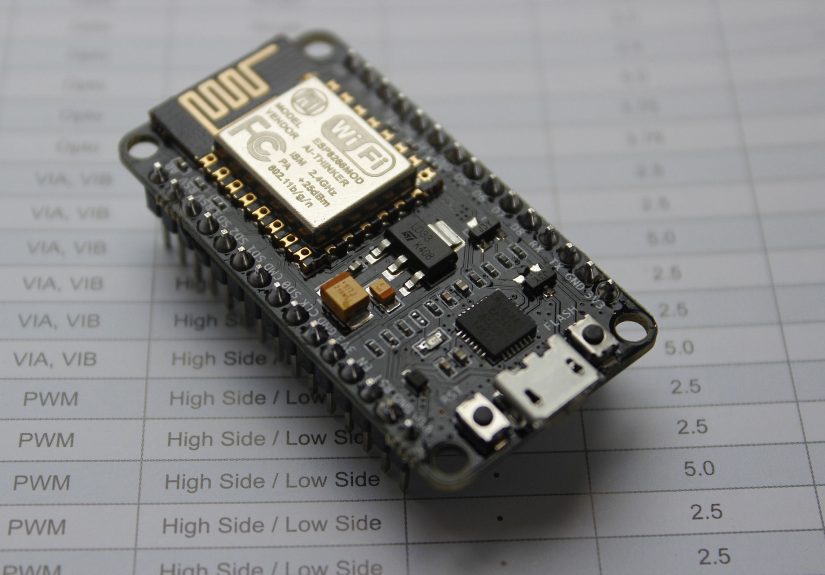
The most notable approach is to port Black Magic firmware onto WiFi-capable hardware such as an ESP8266. In that setup, the ESP board becomes the debug probe. It runs firmware that exposes a GDB server over TCP, and it can also provide a serial console over the network. In other words, the ESP board is not just “helping” the probe. It is the probe.
One well-known implementation built on the ESP8266 uses the Espressif RTOS SDK and exposes the GDB server on TCP port 2022. It also offers serial access on TCP port 23, plus optional browser-based and debug interfaces. That makes the whole arrangement feel less like a hacky proof of concept and more like a tiny embedded debugging appliance with WiFi manners.
There are ESP32-based ports and forks as well. Those are interesting because the ESP32 brings more horsepower to the party, but support can vary depending on the fork and target combination. In many community builds, SWD support comes first, with other features added later or marked as experimental. Translation: the idea is solid, but the exact feature set depends on which firmware tree you choose and how adventurous you are feeling that week.
Typical Hardware Requirements
A common ESP8266-based build calls for an ESP8266 module with at least 2 MB of flash, with 4 MB often used as the default configuration when OTA updates are enabled. If OTA is disabled, smaller flash configurations may still work. The default pin mapping in one popular implementation assigns GPIO0 to SWDIO and GPIO2 to SWCLK, while the ESP’s hardware UART pins can be used for target serial monitoring.
That means the barrier to entry can be pretty low. Instead of buying a dedicated wireless debugger, you can experiment with a modest ESP board and community firmware. It is a very on-brand embedded move: use one microcontroller to help debug another microcontroller, then spend an hour debugging the helper microcontroller because life enjoys symmetry.
What Makes Wireless GDB with Black Magic So Appealing
The big win is that you keep the Black Magic philosophy. You are still working with GDB. You are still using Black Magic style target control. You are still avoiding bulky middleware. The transport changes, but the mental model stays familiar.
That is important because tooling fatigue is real. Many embedded developers already have enough things to remember: flashing tools, board configs, startup scripts, device packs, SVD files, SDK versions, linker quirks, boot pins, and the location of that one cable that vanished three weeks ago. A wireless Black Magic setup can simplify part of that by keeping the debug workflow close to the standard BMP experience.
It is also good for mixed workflows. A lot of engineers still want a serial console while debugging, especially when diagnosing boot issues, watchdog resets, or startup code that decides to face-plant before breakpoints become useful. A WiFi Black Magic build can expose that serial channel over the network too, which means one small board can cover both source-level debugging and text output.
High-Level Setup Process
The exact steps vary by firmware build, but the overall process is usually straightforward once you understand the moving parts.
1) Flash the WiFi-Capable Black Magic Firmware
First, you build or download the firmware image for the ESP8266 or ESP32 port you want to use. Many builds use the Espressif development framework and can be flashed over a serial connection during initial setup. Some support OTA updates later, which is a nice quality-of-life improvement once the board is already on the network.
2) Wire the Probe to the Target
Next, connect the debug signals to the target board. For SWD, that typically means:
- SWDIO
- SWCLK
- GND
- target reference voltage
- optional reset
- optional UART TX/RX for serial monitoring
Keep wiring short and sane. Debug interfaces are not impressed by creative spaghetti.
3) Put the Probe on WiFi
Many wireless Black Magic builds support either access point mode or station mode. Access point mode is easy for quick testing because the probe can create its own network. Station mode is better for regular development because the probe joins your existing WiFi network and becomes easier to reach from your normal machine.
4) Connect GDB Over the Network
Once the probe is online, launch GDB with your ELF file and connect to the probe’s IP and port. A typical session might look like this:
That sequence will look very familiar to anyone who has used a wired Black Magic Probe. Some wireless builds add convenience features like automatic attach, but the classic flow is still the right mental model.
Real Benefits in Real Projects
The value of a wireless Black Magic setup becomes obvious when the target stops living on a tidy dev board and starts living in the real world.
Imagine debugging a motor controller buried inside a mobile robot. A USB tether is annoying. It can snag, limit motion, and force your workstation into the robot’s personal space. A WiFi-connected probe lets the target move while you stay at a safer and more comfortable distance.
Or picture a board installed inside a half-finished product enclosure. With a wired setup, you may need to leave the shell open or route a cable in a silly way. With wireless GDB, the probe can remain tucked inside, exposing only power and the debug header connections. That makes long test runs cleaner and less fragile.
For teaching and demos, the wireless angle is also fun. It makes the debugging workflow look modern and a little dramatic, which is never a bad thing when you are trying to convince people that stepping through firmware is cooler than it sounds.
The Downsides You Should Respect
Now for the less glamorous truth: wireless debugging is not always the best debugging.
WiFi adds latency. Usually that is tolerable for setting breakpoints, stepping around code, reading registers, and doing general bring-up. But it can feel less snappy than USB, especially if the network is crowded or the signal is weak. If you are already debugging a time-sensitive problem, adding RF unpredictability may not improve your mood.
There is also the question of reliability. USB is boring in a very productive way. WiFi is convenient in a very negotiable way. If the board roams, the access point hiccups, the power dips, or the signal gets noisy, your GDB session may become less “debugging” and more “relationship counseling.”
Security matters too. If the probe exposes a debug server over the network, you do not want that floating around on an untrusted network without a plan. Use a controlled lab network, isolate test gear, and avoid pretending that “it’s probably fine” is a security policy.
Finally, signal integrity still matters on the target side. WiFi does not erase bad SWD wiring, missing grounds, voltage mismatch, or flaky reset circuitry. If your physical debug connection is messy, going wireless will not fix it. It will simply help you fail from farther away.
Is This Better Than a Standard Black Magic Probe?
Not universally. It is better when the cable is the problem.
If you work mostly at the bench with easy physical access to the board, a standard wired Black Magic Probe is still wonderfully practical. It is stable, simple, and supported by well-documented workflows. For many developers, that is the sweet spot.
But if you routinely debug targets in motion, in enclosures, or in awkward spaces, adding WiFi to Black Magic is one of those ideas that sounds slightly ridiculous until you use it. Then it starts feeling obvious.
The most sensible view is this: wireless Black Magic is not a replacement for every wired debugger. It is a specialized upgrade for situations where physical tethering is the real pain point.
Best Practices for a Smoother Wireless Debugging Setup
Keep a Wired Fallback
Always keep a known-good wired workflow available. When the wireless path misbehaves, you want a baseline that tells you whether the bug is in your firmware, your target wiring, or your clever new debug transport.
Use Stable Power
Power the WiFi probe cleanly and make sure the target reference voltage is correct. Debugging problems caused by a sick power rail are the embedded equivalent of being haunted by your own bench supply.
Use Station Mode for Daily Work
Access point mode is nice for quick experiments, but station mode is usually better for repeatable development. It fits into your normal network and keeps the probe easier to find.
Log Serial Output Too
One of the nicest parts of this setup is combining GDB with networked UART access. Use both. Breakpoints tell you where things broke; serial output often tells you why they were already unhappy.
Hands-On Experience: What It Feels Like to Actually Use WiFi with Black Magic
In practice, adding WiFi to Black Magic feels a bit like giving your debugger house slippers and a coffee subscription. The workflow becomes more relaxed. You are no longer forced to arrange your laptop exactly where the cable allows. You can power up the target, leave the probe attached, sit back at your desk, and connect when you are ready. That small change makes longer debug sessions less physically annoying, which sounds trivial until you realize how much embedded development is secretly influenced by cable geometry.
The first impression is usually delight. GDB connects over the network, the target responds, and suddenly your cheap little WiFi board is behaving like a remote debugging appliance. Hitting a breakpoint on a board sitting across the room never stops being slightly satisfying. It feels like you cheated, even though you very much did the work.
Then the second impression arrives, and it is called reality. Wireless sessions are usually good, but they are not always elegant. If the network is noisy, stepping can feel a little sticky. If the probe is in access point mode and your computer keeps trying to be clever about network priority, you may spend ten minutes debugging your operating system instead of your firmware. Embedded engineers know this pattern well: every solution creates one new layer where nonsense can happen.
That said, the convenience can absolutely outweigh the tradeoffs. On moving systems, the difference is dramatic. Instead of dragging a USB cable behind a robot like it is a suspicious tail, you can let the platform move naturally while keeping an eye on code flow and serial logs. On enclosed hardware, it is even better. You can leave the setup mostly assembled, crack open only what you need, and avoid turning every debug session into a small disassembly project.
Another pleasant surprise is how well the Black Magic model carries over. If you already like the ordinary BMP workflow, the wireless version does not feel alien. You still think in terms of GDB commands, target scans, attaches, loads, and monitor commands. The transport changes, but the personality remains. That continuity matters. It means you are learning one new trick, not an entirely new religion.
My biggest practical takeaway is simple: use wireless Black Magic when it removes friction, not because it sounds futuristic. For bench bring-up, wired is often still the fastest path. For awkward hardware, field rigs, moving targets, and long-running test setups, WiFi can be an absolute quality-of-life upgrade. In other words, this is not black magic in the mystical sense. It is black magic in the best engineering sense: a clever tool that looks improbable until you understand it, and then you wonder why you did not try it sooner.
Conclusion
Adding WiFi to Black Magic for wireless GDB action is one of those embedded hacks that manages to be both practical and a little bit showy. It keeps the elegance of Black Magic’s direct-to-GDB approach, adds the convenience of network access, and opens up better workflows for robots, enclosed targets, and awkward bench setups.
It is not perfect. USB still wins on raw simplicity and reliability. But when the cable is the problem, wireless Black Magic is a genuinely smart answer. Done well, it gives you remote source-level debugging, remote serial access, and more freedom in how you build and test embedded systems. That is a pretty nice return from one small WiFi board and a willingness to make your debugger slightly more ambitious.


