Table of Contents >> Show >> Hide
- Why a Mudroom Laundry Room Combo Works So Well
- Start With a Smart DIY Plan
- The Best Layout Ideas for a DIY Mudroom Laundry Room Makeover
- DIY Features That Make the Biggest Difference
- Choose Materials That Can Survive Real Life
- Color and Style Ideas That Keep the Room Cheerful
- Small-Space Mudroom Laundry Makeover Tips
- Step-by-Step DIY Mudroom Laundry Room Makeover
- Mistakes to Avoid During a DIY Laundry Mudroom Makeover
- Final Thoughts
- Experience: What a DIY Mudroom Laundry Room Makeover Really Feels Like
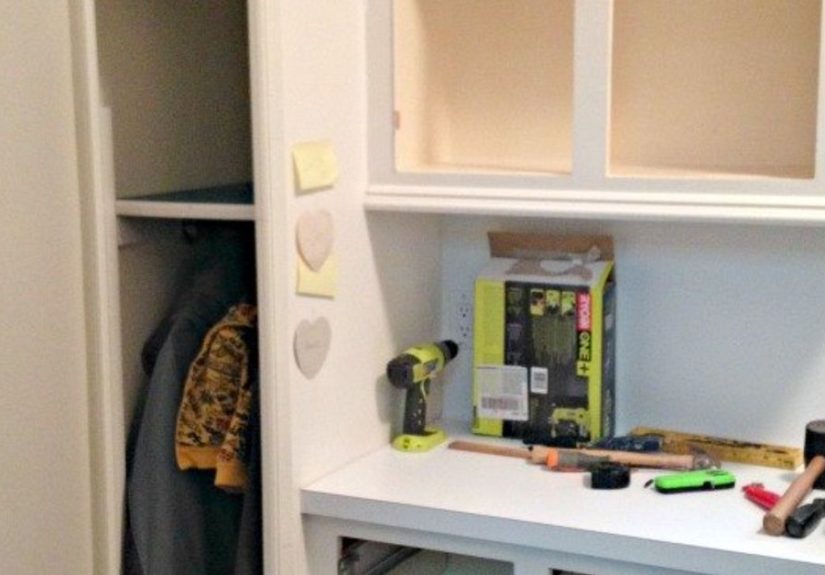
A mudroom laundry room makeover is one of those home projects that feels wildly grown-up. One minute you are stepping over sneakers, rogue backpacks, and a sock that has clearly seen things. The next minute you are standing in a smart, hardworking space that says, “Yes, this household has its life together.” Or at least it looks that way, which is sometimes the same thing.
If your entryway and laundry area are fighting for dominance like two reality-show contestants in one tiny room, the good news is this: a DIY mudroom laundry room makeover can solve both problems at once. With the right layout, practical storage, water-friendly finishes, and a few budget-conscious upgrades, you can create a room that handles wet boots, dirty uniforms, pet chaos, and Mount Laundrymore without losing its charm.
This guide walks through how to plan, design, build, and style a mudroom laundry combo that looks good, works hard, and does not require a trust fund or a contractor entourage.
Why a Mudroom Laundry Room Combo Works So Well
A combined mudroom and laundry room is basically the multitasking champion of the house. It catches dirt before it travels through your floors, gives coats and shoes a home, and puts dirty clothes close to the washer where they belong. That means less mess drifting into your kitchen, hallway, or living room like it pays rent.
It also makes daily routines easier. Kids can drop backpacks on hooks, kick shoes into cubbies, and toss muddy sports gear straight into a basket. Adults can sort towels, air-dry delicates, and fold clean clothes in the same zone. In practical terms, a good mudroom laundry design reduces clutter, shortens cleanup time, and turns a forgotten pass-through area into a genuinely useful room.
Start With a Smart DIY Plan
1. Measure Before You Buy Anything
Before you fall in love with beadboard, brass hooks, or a bench that belongs in a design magazine, measure everything. Measure the washer and dryer footprint, appliance door swing, walkway clearance, wall height, outlet locations, vent access, and plumbing placement. Then measure it again because drywall and optimism are not the same thing.
2. Decide What the Room Must Do
The best mudroom laundry room makeover starts with function, not paint color. Ask yourself what the room needs to handle every day. Does it need shoe storage for five people? A folding counter? A dog-washing station? A place for umbrellas, sports gear, and reusable grocery bags? Once you know the room’s job description, the design becomes much easier.
3. Set a Realistic Budget
DIY can save real money, especially if you keep your existing plumbing and electrical in place. Painting cabinets, installing shelves, adding wall hooks, building a bench, changing hardware, and laying peel-and-stick or click-lock flooring can all create a dramatic upgrade without turning your bank account into a ghost town. Save bigger spending for features that improve daily use, such as better storage, tougher flooring, or a more useful countertop.
The Best Layout Ideas for a DIY Mudroom Laundry Room Makeover
Create Zones
Even in a small room, zoning makes everything feel intentional. Divide the space into three simple work areas: a drop zone, a wash zone, and a storage zone. The drop zone handles coats, shoes, and bags. The wash zone includes the washer, dryer, detergent, and sorting space. The storage zone holds cleaning supplies, seasonal gear, pet items, or extra paper goods.
Use Vertical Space Like a Genius
When floor space is tight, the walls need to start earning their keep. Add upper cabinets, floating shelves, peg rails, wall hooks, and narrow cubbies. A tall cabinet can hold brooms, mops, and ironing boards. A row of sturdy hooks above a bench creates an instant mudroom. Shelves over the washer and dryer give you room for baskets, detergents, and bins without eating into the walkway.
Consider Stacked Appliances
If your room is narrow or doubles as a main entry, stacked laundry units can free up space for a bench, cabinets, or a folding station. If you have side-by-side appliances, use the top surface wisely by adding a countertop over them, as long as the setup allows safe installation and service access.
DIY Features That Make the Biggest Difference
Build or Install a Bench
A mudroom bench is not just cute. It is one of the most functional features in the room. It gives people a place to sit while taking off shoes and creates storage underneath for baskets, boots, or labeled bins. A simple plywood bench with trim can look custom once painted. If building from scratch is not your idea of a relaxing weekend, use stock cabinets or a storage bench and trim it out for a built-in look.
Add Hooks, Not Hangers
Hooks win in busy households because they are fast. Kids rarely hang coats on hangers with enthusiasm. Hooks are forgiving. Install a row at adult height and another lower row for children. Suddenly, your room becomes more independent, and you become slightly less annoyed before 8 a.m.
Use Cubbies and Baskets
Open cubbies are excellent for shoes, hats, lunch boxes, and grab-and-go gear. Baskets make the room look less chaotic and more intentional. Label them by person or category so every item has a home. That phrase sounds suspiciously simple, but it is the difference between organized and “Where is my left cleat?”
Install a Folding Counter
A folding counter over front-load machines gives the room a clean, built-in appearance and creates a work surface you will use constantly. It is perfect for folding towels, sorting laundry, wrapping small packages, or pretending you are finally going to match every sock. Wood adds warmth, while laminate or solid-surface counters are easy to wipe down.
Add a Hanging Rod or Drying Rack
A hanging rod under a shelf or a wall-mounted drying rack is one of those upgrades you appreciate immediately. It is ideal for air-drying delicates, hanging damp jackets, or keeping shirts wrinkle-free before they reach a closet. In a hardworking utility space, little conveniences matter a lot.
Choose Materials That Can Survive Real Life
Flooring
The floor in a mudroom laundry room has to handle moisture, dirt, heat, and daily traffic. That is not a job for precious materials with fragile feelings. Durable, water-resistant options such as tile and luxury vinyl are smart picks for most DIY makeovers. They are easier to clean, more forgiving around wet shoes and detergent drips, and available in styles that mimic wood, stone, or patterned cement tile.
Wall Finishes
Washable paint in a satin or semi-gloss finish is practical for high-touch areas. If you want a more custom look, consider beadboard, board and batten, or shiplap on the lower half of the walls. These details add character while helping the room hold up to scuffs from bags, pet leashes, and the occasional backpack body slam.
Cabinetry and Storage Surfaces
Closed cabinets help hide the visual noise of detergent bottles, cleaning products, and paper goods. Open shelving works best when you are disciplined about baskets and decanting containers. If you know your personal style leans more “functional tornado,” use more doors and fewer display moments.
Color and Style Ideas That Keep the Room Cheerful
A DIY mudroom laundry room makeover should feel clean and uplifting, not like a punishment chamber for chores. Soft white, warm greige, dusty blue, sage green, charcoal, and muted black all work beautifully in this type of room. Light colors help small spaces feel larger, while darker lower cabinets can hide scuffs and shoe marks.
To add personality, try patterned floor tile, playful wallpaper, striped runners, woven baskets, or vintage-style signage. The goal is to make the room feel designed without making it precious. This is still where muddy cleats and mystery stains report for duty.
Small-Space Mudroom Laundry Makeover Tips
If your room is more “closet with ambition” than full mudroom, do not panic. Small spaces can still work beautifully with a few strategic choices.
- Use stacked appliances to free up floor space.
- Choose shallow cabinets or narrow shelves.
- Mount hooks and organizers on walls and doors.
- Use one bench with baskets underneath instead of multiple storage pieces.
- Add a slim rolling cart between appliances and the wall if clearance allows.
- Pick one bold design detail, such as a patterned floor or painted cabinets, rather than crowding the space with too many decorative elements.
Small rooms do not need more stuff. They need smarter stuff.
Step-by-Step DIY Mudroom Laundry Room Makeover
Step 1: Clear the Room
Take everything out. Yes, even the random tote bag full of batteries, coupons, and one lonely mitten. Empty rooms make better decisions.
Step 2: Patch, Sand, and Paint
Repair holes, sand rough spots, caulk trim, and paint the walls before installing new storage. Fresh paint gives maximum visual payoff for relatively low cost.
Step 3: Install Flooring
If your existing floor is beyond saving, replace it with a material that can handle moisture and traffic. This is one of the most important practical upgrades in the room.
Step 4: Add Storage Bones
Install the bench, cubbies, shelves, cabinets, hooks, and rods before decorating. The room needs infrastructure first. Cute comes later.
Step 5: Add the Countertop
Once major storage is in place, add a countertop over the laundry machines or along an available wall. This instantly makes the room more usable.
Step 6: Organize by Category
Sort supplies into baskets and bins by use: laundry, pet gear, shoes, seasonal accessories, cleaning products, and paper items. Label everything you can. Future You will be grateful and slightly smug.
Step 7: Style the Space
Finish with a washable rug, matching hangers, a small lamp, framed print, or plant if the room has enough light. The best makeover is one that feels warm and lived-in, not sterile.
Mistakes to Avoid During a DIY Laundry Mudroom Makeover
- Ignoring appliance door swing and walkway clearance.
- Choosing flooring that cannot handle moisture.
- Using only open storage in a busy family home.
- Skipping a place to sit while removing shoes.
- Forgetting about damp-item drying space.
- Overdecorating a room that needs to function first.
- Making every hook adult-height when children use the space daily.
A beautiful room that annoys you every morning is not a makeover. It is a very pretty prank.
Final Thoughts
A DIY mudroom laundry room makeover is one of the most satisfying projects you can tackle because the payoff shows up every single day. This is not just about pretty shelves and matching baskets. It is about creating a system that helps your home run better. When shoes have a landing spot, jackets have hooks, and laundry supplies live where they belong, the whole house feels calmer.
Start with function, choose durable materials, build in storage wherever you can, and add personality once the hard-working basics are covered. Whether your makeover is a weekend refresh or a full-room transformation, the goal is the same: less clutter, easier routines, and a room that can handle real life with style.
Experience: What a DIY Mudroom Laundry Room Makeover Really Feels Like
The funny thing about a DIY mudroom laundry room makeover is that it usually starts with one innocent thought: “I’ll just add a few hooks.” That is how many homeowners wander into this project. You begin with hooks, and somehow, three weekends later, you are debating cabinet hardware like it is a Supreme Court matter. But that is also part of the charm. This kind of makeover is personal because the room reflects your daily habits more than almost any other space in the house.
One of the most common experiences people have is realizing that the mess was never really about “too much stuff.” It was about the lack of a system. The first time a family adds a bench with baskets underneath, the room starts behaving differently. Shoes stop migrating into the kitchen. Backpacks stop collapsing dramatically in the hallway like exhausted actors. Even laundry gets easier because hampers, detergent, and folding space are finally in the same area.
Another real-life lesson is that convenience beats perfection every time. You may imagine a picture-perfect mudroom with carefully folded blankets and one tasteful pair of rain boots by the door. Real life usually brings school papers, dog leashes, muddy cleats, and a sweatshirt someone swears they need immediately. The makeover works best when it is designed for those everyday habits. Hooks are often more useful than closets. Open bins can be better than deep drawers. A countertop above the washer may end up being the true hero of the room because it gives you somewhere to sort, fold, drop groceries, or set down life for five minutes.
People also tend to underestimate the emotional payoff of this project. A refreshed mudroom laundry room can make the house feel lighter. It creates a cleaner transition from outdoors to indoors. On busy mornings, the room feels less like an obstacle course and more like a launch pad. On chaotic afternoons, it becomes the place where wet coats, sports uniforms, and shopping bags can land without taking over the rest of the house.
Of course, the DIY journey itself comes with stories. Paint samples will betray you under bad lighting. One shelf may go up slightly crooked and become your “character shelf.” Someone will absolutely lose the tape measure. Yet by the end of the project, most homeowners say the same thing: the room finally works for them instead of against them. That is what makes this makeover so rewarding. It is not just a cosmetic update. It is a quality-of-life upgrade disguised as a storage project, and honestly, that is a pretty great deal.


