Table of Contents >> Show >> Hide
- Why Most Paint Jobs Go Sideways Before the Roller Touches the Wall
- DIY Paint Roller Setup That Actually Makes Sense
- Choose the Right Roller Nap Before You Blame the Paint
- Prime When It Matters, Not Just When It Sounds Fancy
- How to Prep a Wall for a Better Finish
- The Order of Painting Matters More Than You Think
- How to Cut In Without Losing Your Nerve
- How to Roll Paint Like You Know What You’re Doing
- Nifty Painting Tips That Save Time, Sanity, and Cleanup
- Common Mistakes to Avoid
- Final Thoughts
- Real-World Experience: What DIY Painting Actually Feels Like
Painting a room looks easy right up until you’re standing in old socks, balancing on a step stool, wondering why the wall now has the texture of oatmeal. The good news is that a great paint job is not reserved for contractors with mysterious white pants and laser focus. With the right prep, the right roller, and a few smart tricks, you can get cleaner lines, smoother walls, and far less regret.
This guide covers the practical stuff that actually matters: how to set up a DIY paint roller workflow, how to choose the right nap, when to prime, how to cut in without turning your trim into modern art, and how to avoid roller marks, lap lines, and random fuzz glued to the wall forever. If you want a finish that looks polished without feeling like the room fought back, you’re in the right place.
Why Most Paint Jobs Go Sideways Before the Roller Touches the Wall
Here’s the truth nobody loves but every good paint job proves: painting is mostly prep with a glamorous finish line. If your walls are dusty, greasy, cracked, glossy, or patched and not sanded smooth, fresh paint will put those flaws on center stage. Paint is many things, but a miracle cloak is not one of them.
Before you even think about dipping a roller into a tray, clear the room as much as possible. Remove switch plates, move furniture away from the walls, cover floors, and wipe down the surfaces you plan to paint. Dust, cooking residue, and mystery smudges can interfere with adhesion and leave you wondering why your beautiful new color looks weirdly blotchy. Then inspect the wall like a detective. Tiny nail holes, hairline cracks, and rough patch areas are much easier to fix before paint goes on than after you notice them under daylight and disappointment.
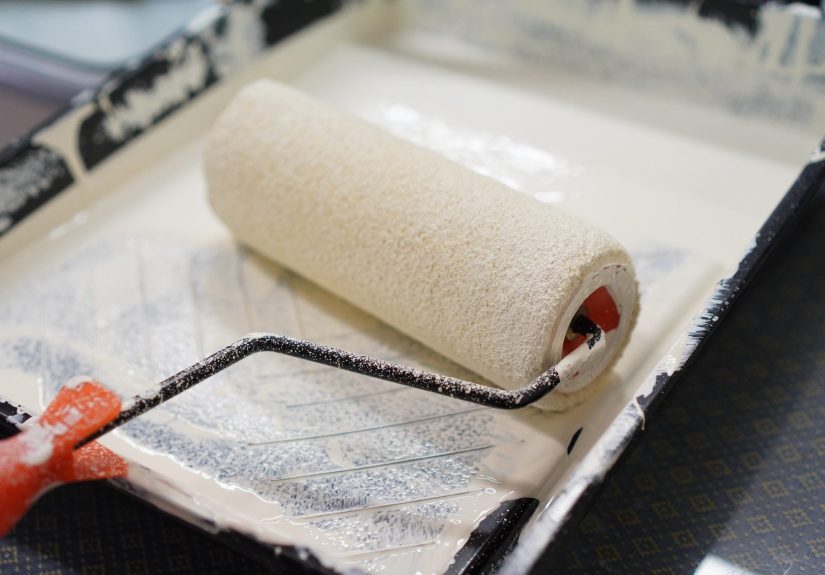
DIY Paint Roller Setup That Actually Makes Sense
When people hear “DIY paint roller,” they sometimes imagine building one from pool noodles, cardboard tubes, and blind optimism. Let’s not do that. A smarter interpretation is creating a more efficient roller setup with simple household workarounds that save money, time, and shoulder strain.
1. Turn a broom or push-broom handle into a budget extension pole
If your roller frame and broom handle thread together securely, you’ve got an instant extension tool for ceilings and high walls. This helps you keep better pressure on the roller, reduces ladder climbing, and makes your strokes more even. Your back will send a thank-you note.
2. De-lint the roller before the wall becomes a fur exhibit
New roller covers often shed lint. Press painter’s tape over the roller cover a few times before using it. It’s quick, cheap, and much better than trying to pick fuzzy bits out of semi-dry paint while muttering words not suitable for a family blog.
3. Slightly dampen the roller for latex paint
A lightly damp roller cover can help it load more evenly with water-based paint. The key word is lightly. You want the cover barely moist, not soggy like it just came back from swim practice.
4. Use a mini roller for tight areas and small projects
A standard 9-inch roller is excellent for broad wall sections, but a mini roller shines on narrow spaces, closets, furniture sides, and awkward sections near trim. For tiny jobs, a disposable makeshift tray, such as a clean cut-open plastic jug, can work better than hauling out the full tray setup.
Choose the Right Roller Nap Before You Blame the Paint
Roller nap is the thickness of the fuzzy cover, and yes, it matters. A lot. Using the wrong nap is one of the fastest ways to get splatter, stipple that looks too heavy, or thin coverage that makes you question your life choices.
Best roller nap by surface
For smooth or semi-smooth walls, a 3/8-inch to 1/2-inch nap is usually the sweet spot. It holds enough paint for efficient coverage without leaving heavy texture behind. For very smooth surfaces like doors, cabinets, or metal, a 1/4-inch nap often gives a smoother finish. For textured walls, ceilings, masonry, or rougher surfaces, step up to a thicker nap so the paint can reach into all those nooks and crannies instead of just skimming the peaks like a lazy tourist.
If you’ve ever painted a textured wall with too-short a nap, you already know the result: patchy coverage, weird holidays, and a second coat that feels less optional and more inevitable.
Prime When It Matters, Not Just When It Sounds Fancy
Some DIYers hear “paint and primer in one” and immediately assume primer has retired to a beach town in Florida. Not quite. Primer still earns its paycheck in several situations.
Use primer when:
You’re painting new drywall. You’re covering stains, smoke marks, or water spots. You’re switching from a dark color to a much lighter one. You’re painting over porous repairs. You’re dealing with bare wood, glossy surfaces, or areas with uneven absorption. Primer helps paint stick better, look more uniform, and cover more predictably.
Think of primer as the stage manager. Nobody buys a ticket for it, but the show goes better when it’s doing its job.
How to Prep a Wall for a Better Finish
Clean first
Wipe down walls with warm water and a sponge, and use a stronger cleaner where grease or grime is present. Kitchens, hallways, kids’ rooms, and anywhere near a light switch tend to collect more residue than you think. Paint sticks better to a clean surface, and your roller will glide more consistently instead of dragging across hidden dust.
Patch and sand second
Fill small holes and cracks with spackling compound, let it dry fully, and sand smooth. If you skip sanding, the patch may flash through the finish coat and appear as a raised or dull spot. A wall can be freshly painted and still look unfinished if the repair work underneath is lumpy.
Tape carefully, not angrily
Use painter’s tape in longer sections when possible, and press the edges down firmly. A putty knife helps seal the tape edge and can reduce paint bleed. That said, tape is a helper, not a magician. If it’s crooked, loose, or slapped onto dusty trim, it can betray you.
The Order of Painting Matters More Than You Think
A smart painting sequence saves cleanup and improves the final look. In most rooms, start with the ceiling, then move to the walls, and finish with trim. That way, any drips or minor splatter from above can be covered as you work downward. It’s less “artistic layering” and more “not making extra work for yourself.”
Within each wall, cut in first and then roll while the brushed edges are still wet. That helps the brushed border blend better with the rolled field so you don’t end up with a visible picture frame effect around the room.
How to Cut In Without Losing Your Nerve
Cutting in means painting the edges and corners that your roller cannot reach. Use a quality angled brush and paint a band a few inches wide around ceilings, corners, baseboards, windows, and doors. Feather the edge slightly so it blends into the rolled section.
One helpful trick is to work one wall at a time. Cut in that wall, then roll it before the edges dry. This helps maintain a wet edge and keeps the sheen more consistent. Also, remove outlet covers when possible instead of trying to paint around them like you’re defusing a bomb. It’s cleaner, easier, and far less fiddly.
How to Roll Paint Like You Know What You’re Doing
Load the roller evenly
Dip the roller into the tray and roll it back and forth on the ramp until it’s covered but not dripping. A roller that is too dry drags and skips. A roller that is overloaded spits paint like it’s auditioning for chaos.
Work in manageable sections
Paint in sections roughly 3 to 4 feet wide, depending on your comfort level and wall size. Start near the top and work downward. Many painters like a W or M pattern to distribute paint quickly, then fill in the gaps with overlapping strokes. The exact letter matters less than keeping coverage even and the edge wet.
Don’t press too hard
Let the roller do the work. Pressing hard doesn’t squeeze out “bonus paint.” It usually creates ridges, splatter, and uneven texture. When the roller starts sounding dry or feeling sticky, reload it.
Overlap each section
Overlap the previous painted area as you move across the wall. This helps prevent lap marks and thin stripes. A lightly loaded final pass can smooth the texture if you notice roller lines beginning to form.
Nifty Painting Tips That Save Time, Sanity, and Cleanup
Use good tools
A quality roller cover and brush usually leave a smoother finish, carry paint more evenly, and shed less lint. Cheap tools often create expensive frustration.
Stir the paint well
Do this before you begin and again during longer projects. Color and sheen can vary if the paint isn’t mixed thoroughly.
Keep a damp rag nearby
Fresh mistakes are the easiest to fix. Once paint dries, your cleanup options get significantly more dramatic.
Don’t overfill the tray
Half-full is usually plenty. Overfilling turns a useful tool into a spill opportunity with handles.
Paint two coats if needed
Even when the first coat looks decent, the second coat often improves coverage, depth, and uniform sheen. This is especially true for bold colors, patched walls, and rooms with strong natural light.
Common Mistakes to Avoid
Skipping wall prep: Paint highlights flaws instead of hiding them.
Using the wrong nap: Smooth walls can look too textured, and rough walls can stay patchy.
Letting cut-in dry before rolling: This can create visible borders and sheen differences.
Stretching paint too far: Thin coverage almost always looks worse after it dries.
Ignoring primer when the surface needs it: Uneven absorption and weak adhesion are not fun surprises.
Trying to rush the second coat: Follow label instructions for dry and recoat times. The wall is not on a reality show. It does not need dramatic pacing.
Final Thoughts
A good paint job is really a collection of small decisions done well: the right roller cover, a clean wall, smart prep, careful cutting in, and steady rolling with a wet edge. None of it is mystical. It’s just methodical. Once you understand the rhythm, painting becomes less of a household ordeal and more of a satisfying upgrade you can actually control.
So yes, a DIY paint roller setup can absolutely help you work smarter. But the real magic is not the roller alone. It’s the combination of better prep, better technique, and better patience. That’s how you get walls that look fresh, clean, and intentionally finished instead of merely “recently survived.”
Real-World Experience: What DIY Painting Actually Feels Like
The first time I painted a room by myself, I made the classic rookie mistake of thinking paint was the project. It turns out paint is only the visible part of the project. The real work happened before the lid ever came off the can. I had skipped proper cleaning, ignored a few tiny nail holes, and figured the old roller in the garage was “probably still fine.” It was not fine. It shed lint, left streaky texture, and rolled over dust that I had somehow failed to notice for years. The result was not terrible from twenty feet away, but up close it looked like the wall had grown sideburns.
That project taught me something valuable: neat painting is less about talent and more about process. On the next room, I slowed down. I wiped the walls, patched dents, sanded the repairs, removed the outlet covers, and used painter’s tape with the kind of care usually reserved for wrapping fragile gifts. I also switched to a fresh roller cover, de-linted it with tape, and attached the frame to a broom handle to reach the top half of the wall without repeatedly climbing up and down a ladder. That one change alone made the job faster and strangely more enjoyable. There is something very satisfying about standing on the floor and rolling smoothly up the wall like a person with a plan.
I also learned that choosing the right nap can save a paint job before it begins. In one small guest room with smooth drywall, a shorter nap gave me cleaner results and less splatter. Later, in an older hallway with more texture and patched areas, a thicker nap helped the paint reach the surface evenly without leaving random dry spots. Before that, I assumed a roller was a roller. Now I treat roller covers the way cooks treat knives: they all work in theory, but the right one makes life much easier.
The biggest improvement, though, came from working one wall at a time. I would cut in, then roll immediately while the edges were still wet. Suddenly the wall looked cohesive instead of outlined. The brush marks blended better, the sheen looked more even, and I stopped getting those faint boxed-in borders that scream “weekend amateur.” Well, whisper “weekend amateur.” Walls can be judgmental, but they’re usually subtle about it.
Over time, painting became one of those home projects that feels intimidating until you build a repeatable routine. Set up the room. Clean. Patch. Sand. Tape. Prime if needed. Cut in. Roll in sections. Reload before the roller gets dry. Don’t panic. Don’t mash the roller into the wall like you’re trying to force the paint into confession. And always keep a rag nearby for the little surprises. The more I followed that rhythm, the better my rooms looked. More important, the work felt calmer. Painting stopped being a mess to survive and became a skill to refine, one wall at a time.


