Table of Contents >> Show >> Hide
- First Things First: Can You Even Paint the Apartment?
- Why Apartment Painting Is Different From Painting a House
- Older Apartments and the Big Safety Topic: Lead Paint
- Pick the Right Paint, Not Just the Prettiest Paint
- How Much Paint Do You Need?
- Prep Work: The Least Exciting Part and the Most Important
- Ventilation Matters More Than People Think
- Color Choices That Work Well in Apartments
- Common Apartment Painting Mistakes
- Should You DIY or Hire a Pro?
- How to Protect Your Deposit
- Apartment Painting Experiences: What People Usually Learn the Hard Way
- Final Thoughts
- SEO Tags
Apartment painting sounds simple. You buy a roller, pick a color with a name like “Quiet Mist” or “Weekend Latte,” and suddenly you feel qualified to host your own home makeover show. Then reality arrives wearing old sweatpants and carrying a lease agreement. That is when you realize apartment painting is not just about color. It is about permission, prep work, safety, finish selection, cleanup, and making sure your security deposit does not vanish into the great landlord abyss.
The good news is that painting an apartment can be one of the fastest and most affordable ways to make a space feel fresh, brighter, cleaner, and more personal. The less-good news is that a sloppy paint job has a special talent for making a room look worse than before. Brush marks, peeling corners, random drips on the baseboards, and that one patch where the color somehow looks like a completely different species of beige can haunt you for months.
If you are thinking about painting your apartment, this guide covers what really matters: what to check before you start, how to choose the right paint, what mistakes to avoid, how to protect yourself in older buildings, and how to leave the place looking polished instead of “creative.”
First Things First: Can You Even Paint the Apartment?
Before you buy a single drop cloth, read your lease. This is not the glamorous part, but it is the part that can save you money and a headache. Many apartment leases treat painting as an alteration, which means you may need written permission from the landlord or property manager before changing wall colors.
Do not rely on a casual hallway conversation that went something like, “Yeah, sure, probably fine.” Get approval in writing. Email is usually best. Ask exactly what is allowed and what is not. Some landlords are fine with painting if you use approved neutral colors. Others allow painting only if you agree to repaint the walls to the original color before move-out. Some buildings prohibit dark or highly saturated colors because they often need extra primer and more labor to cover later.
Here are smart questions to ask before you start:
Questions to Ask Your Landlord or Property Manager
Can I paint at all? Do I need to use a specific color family? Do I need written approval for each room? Do I have to repaint it before I leave? Will the building keep paint records for touch-ups? Are there preferred brands or finishes? If the unit was recently renovated, can painting affect my deposit?
This step may feel painfully adult, but it is a lot cheaper than losing part of your deposit because your “moody charcoal accent wall” was not part of the original plan.
Why Apartment Painting Is Different From Painting a House
Painting an apartment is its own little sport. You usually have less space to work with, less ventilation, more rules, and more pressure to keep things neat. In a house, you can often leave furniture in a spare room. In an apartment, the spare room is usually called “the same room.”
Apartment walls also tend to show wear in predictable ways: scuffs near light switches, dents from furniture, mystery marks that appear to have been made by a bicycle pedal, and old patch jobs that rise from the wall like tiny drywall volcanoes. That means prep matters even more than the actual painting.
Another difference is reversibility. In many apartments, the smartest design choices are the ones you can undo without drama. That is why renters often do best with light to mid-tone colors, clean lines, and finishes that are easy to touch up later.
Older Apartments and the Big Safety Topic: Lead Paint
If your apartment building was built before 1978, slow down before sanding, scraping, drilling into painted surfaces, or hiring anyone to disturb old paint. In older housing, lead-based paint may still be present under newer layers. That does not mean you need to panic or move into a tent. It does mean you need to be smart.
Lead paint becomes most dangerous when it is disturbed and creates dust or chips. That is why older apartment painting projects are not just cosmetic projects. They can become safety projects. If a contractor will disturb painted surfaces in pre-1978 housing, federal lead-safe rules may apply. That is especially important if there are children, pregnant people, or frequent child visitors in the home.
If you are renting an older apartment, ask what is known about the paint history. For pre-1978 rentals, landlords are generally required to provide a lead warning and an approved lead hazard pamphlet if the property falls under the federal disclosure rules. If you are planning anything beyond simple repainting over intact surfaces, ask more questions, not fewer.
Pick the Right Paint, Not Just the Prettiest Paint
Color gets all the attention, but finish and formula do most of the work. A beautiful color in the wrong finish can become an ongoing regret. Think of sheen as the paint’s personality. Some finishes are forgiving and low-key. Others are shiny, durable, and a little dramatic.
Best Paint Finishes for Apartments
Flat or matte: Great for hiding wall imperfections. Not always the easiest to scrub clean, so use with caution in high-traffic areas.
Eggshell: A popular choice for apartment walls because it offers a soft look with a bit more durability than flat paint.
Satin: Slightly more washable and durable, making it useful for hallways, kids’ rooms, or areas that get touched often.
Semi-gloss: Best for trim, doors, bathrooms, and kitchens where moisture and cleaning are part of daily life.
For most apartment living rooms and bedrooms, eggshell is the sweet spot. It looks polished without turning every wall bump into a spotlight. For bathrooms and kitchens, satin or semi-gloss usually makes more sense because those rooms deal with humidity, splashes, and frequent wiping.
What About Low-VOC or Zero-VOC Paint?
In an apartment, where fresh air can be limited and the smell of paint can bounce around like an annoying roommate, low-VOC or zero-VOC paint is worth considering. VOCs are compounds that can affect indoor air quality. Lower-VOC formulas can reduce indoor pollution load, but do not assume “low-VOC” means “no smell, no problem, party on.” Tints and other materials can still produce odor, and you still need good ventilation.
Water-based latex paint is usually the easiest option for apartment painting. It dries faster, cleans up with water, and is simpler for most DIY jobs than oil-based formulas.
How Much Paint Do You Need?
This is where optimism gets expensive. A gallon does not cover “an entire apartment unless you believe in miracles.” Coverage varies by brand, color, surface texture, and whether you are painting over a darker shade. In general, many interior paints cover somewhere around 250 to 400 square feet per gallon. Primer often covers less.
If you are changing from a dark wall to a light one, or from a glossy wall to a new finish, expect to need more material and more patience. Buy enough for two coats unless the product and wall condition truly support one-coat coverage. Then buy a little extra for touch-ups. Future-you will be grateful when a chair scrapes the wall six months later.
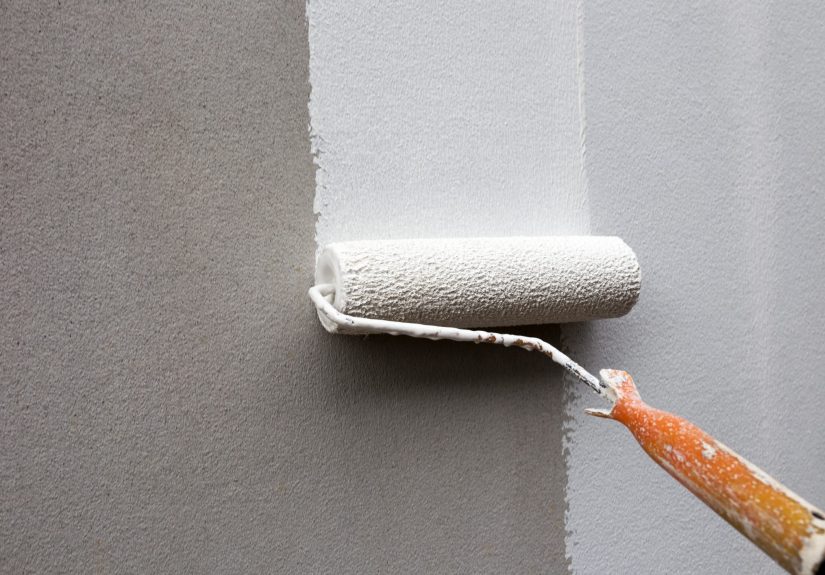
Prep Work: The Least Exciting Part and the Most Important
Professional-looking apartment painting is mostly prep disguised as painting. If the walls are dusty, greasy, cracked, or flaky, the paint is going to tell on you. Loudly.
Prep Checklist Before You Paint
Move or cover furniture. Remove wall art, outlet covers, and switch plates. Lay down drop cloths. Clean the walls with mild soap and water where needed, especially in kitchens, around light switches, near door frames, and any spot that has collected mystery fingerprints over the years. Fill nail holes and small dents with spackle. Sand repairs smooth. Wipe away dust. Caulk gaps if necessary. Tape trim and edges if that helps you work cleaner.
Skipping prep is how you end up with a finish that peels, bubbles, looks streaky, or highlights every patch job. Clean walls help paint stick better. Smooth repairs help the wall look intentional instead of “I tried to fix this with confidence and a butter knife.”
Ventilation Matters More Than People Think
Painting in an apartment without proper airflow is a bad idea. Even when using newer low-odor formulas, ventilation helps reduce indoor pollutants and makes the whole project more tolerable. Open windows when possible, use exhaust fans, and create airflow that moves air out of the space rather than just around it. A fan pointed toward an open window can help. If outdoor conditions are poor, such as heavy smoke or unhealthy air, use common sense and avoid making indoor air quality worse.
Also, do not store opened paint cans in a closet and forget about them like tiny chemical time capsules. Seal paint well, label it clearly, and store it according to the manufacturer’s instructions.
Color Choices That Work Well in Apartments
Apartment color strategy is not just about trends. It is also about light, room size, and how much flexibility you want later. In smaller apartments, soft neutrals, warm whites, muted greens, gentle grays, and calm greige tones often work beautifully because they make rooms feel open and versatile. They also play nicely with furniture, rugs, and changing décor.
That does not mean you are legally required to live in a beige cloud. If you love color, use it strategically. An accent wall can work, but only if the room truly supports it and your lease allows it. Deep navy, olive, clay, or dusty blue can look amazing in a bedroom or dining nook. Just remember that the bolder the color, the harder it may be to cover later.
If you are unsure, test samples first. Paint a sample board or small patch and look at it morning, afternoon, and night. Apartment lighting is sneaky. A color that looks elegant at noon can look like wet oatmeal at 8 p.m.
Common Apartment Painting Mistakes
1. Painting Without Permission
This is the classic mistake. Even a great paint job can become a costly problem if it violates your lease.
2. Choosing the Wrong Finish
Flat paint in a humid bathroom and high-gloss paint on a bumpy wall are both recipes for regret.
3. Underestimating Prep
Paint does not hide all sins. In fact, a fresh coat often introduces them to better lighting.
4. Buying Too Little Paint
Color matching later is possible, but exact consistency between batches is not always guaranteed. Running out mid-project is annoying and sometimes visible.
5. Not Priming When Needed
If the old color is bold, the wall is patched, or the surface is glossy or stained, primer can save time and improve the result.
6. Rushing the Second Coat
Paint needs time to dry. Recoating too soon can lead to streaks, lifting, and texture issues.
7. Forgetting About Move-Out
Keep records of the brand, color, finish, and approval email. Tiny bits of documentation can protect your deposit later.
Should You DIY or Hire a Pro?
That depends on the size of the job, the condition of the walls, and your tolerance for ladders, edging, and cleanup. A simple bedroom repaint in a modern apartment is often very DIY-friendly. A whole-unit repaint with damaged walls, tall ceilings, trim work, and old layers of questionable paint is a different beast.
Hire a pro if the walls need serious repair, if the apartment may contain lead-based paint hazards, if the building has strict rules, or if you need a fast turnaround. DIY if the job is small, the surfaces are in decent shape, and you are willing to be patient. Be honest with yourself. The most expensive paint job is often the one you do twice.
How to Protect Your Deposit
Treat apartment painting like a mini paper trail project. Save the written approval. Save receipts. Take photos before and after. Write down the paint brand, color name, sheen, and whether you used primer. If the landlord approved a specific color, save that message forever, or at least until you get your deposit back and can finally unclench.
Before move-out, inspect the walls in daylight. Patch small holes, do touch-ups carefully, and clean smudges. If your lease requires you to return the walls to their original color, do not leave it for the last weekend. Repainting an entire unit while packing boxes is how legends of renter despair are born.
Apartment Painting Experiences: What People Usually Learn the Hard Way
There is a certain kind of confidence that appears right before an apartment painting project begins. It usually sounds like this: “It is just one room. How hard can it be?” Several hours later, that same person is standing on a drop cloth, staring at a roller, and realizing that the room contains approximately three times more corners than expected.
One of the most common experiences renters talk about is how much prep they wish they had done before opening the paint can. The walls may have looked fine at first glance, but once daylight hit them, every tiny dent, old nail hole, and uneven patch started showing off. People often discover that filling holes, sanding, wiping dust, and taping trim takes longer than the actual painting. It is not glamorous, but it is the difference between “freshly updated” and “surprisingly lumpy.”
Another very real experience is underestimating how powerful color can be in a small apartment. A shade that looked rich and cozy in the store can feel heavy once it covers four walls in a room with limited natural light. On the flip side, renters who pick a soft neutral often talk about how much bigger and brighter the apartment suddenly feels. A good apartment color does not just decorate a room. It changes how the room behaves.
Then there is the finish mistake. Plenty of people learn that lesson the fun way, which is to say, the annoying way. Flat paint may look smooth and elegant at first, but in a hallway or near a dining area, every scuff can show up like an accusation. Too much gloss, though, can spotlight every surface flaw. The renters who are happiest with the final result often choose a finish for the room’s reality, not just the room’s vibe.
Ventilation is another lesson that seems obvious until you are living inside the smell. People often assume that if they buy a newer water-based paint, the room will be fine after a couple of hours. Then the odor lingers, the windows are not doing enough, and they realize airflow matters more than they thought. Experienced painters learn to open windows early, use fans properly, take breaks, and avoid turning a small apartment into a sealed paint chamber.
Many renters also say the smartest thing they did was keep a small labeled container of leftover paint. That leftover paint becomes a superhero later. It fixes scratches from moving furniture, chipped corners near doorways, and those mysterious marks that appear when no one is looking. The tiny touch-up stash can save a wall and possibly part of a security deposit.
And perhaps the biggest lesson of all is that apartment painting feels more manageable when you stop trying to do everything in one dramatic marathon. The best experiences usually come from breaking the job into steps: get permission, choose samples, prep carefully, paint methodically, let coats dry, then do touch-ups in good light. The people who rush tend to remember the pain. The people who plan tend to remember the transformation.
In the end, apartment painting is rarely just about paint. It is about making a temporary space feel more like your space, while still respecting the rules, the building, and your future self. Done well, it can make an apartment feel cleaner, calmer, brighter, and more intentional. Done badly, it becomes a cautionary tale told over pizza to your friends. Choose wisely.
Final Thoughts
Apartment painting can absolutely be worth it. It is one of the few changes that can dramatically shift the feel of a space without requiring a full renovation budget. But it works best when you treat it like a real project, not an impulsive weekend stunt fueled by iced coffee and overconfidence.
Start with the lease. Get written permission. Be especially careful in pre-1978 apartments. Choose the right finish for the right room. Prep more than you think you need to. Ventilate well. Keep records for move-out. And remember: the goal is not just to make the apartment prettier. The goal is to make it look intentional, livable, and easy to maintain.
When apartment painting is done right, the room does not scream, “Look, I painted!” It quietly says, “Wow, this place feels so much better.” That is the sweet spot.


