Table of Contents >> Show >> Hide
- What Is a Keepsake Bin?
- Why Designing a Keepsake Bin Matters
- Step 1: Decide the Purpose of Your Keepsake Bin
- Step 2: Choose the Right Keepsake Bin
- Step 3: Sort Before You Store
- Step 4: Protect Photos, Papers, and Fragile Items
- Step 5: Add Labels That Tell the Story
- Step 6: Design the Inside Layout
- Step 7: Store the Keepsake Bin in the Right Place
- Step 8: Digitize What You Can
- Step 9: Make It Beautiful Without Sacrificing Function
- Step 10: Build a Maintenance Routine
- What Should You Put in a Keepsake Bin?
- What Should You Leave Out?
- Specific Keepsake Bin Ideas
- Common Keepsake Bin Mistakes
- Experience Section: Real-Life Lessons from Designing a Keepsake Bin
- Conclusion
A keepsake bin is not just a box. It is a tiny museum, a family archive, a time machine, and occasionally, the place where glitter-covered preschool art goes to live a dignified second life. When you design a keepsake bin well, you do more than organize sentimental itemsyou protect stories, reduce clutter, and make it easier to enjoy your memories without turning your closet into an emotional obstacle course.
The best keepsake bins are thoughtful, practical, and personal. They are built around what matters most: photographs, letters, children’s artwork, travel souvenirs, milestone documents, heirlooms, cards, medals, recipes, fabric swatches, small objects, and the little treasures that seem ordinary today but priceless later. A concert ticket may not look like much, but ten years from now it might say, “Remember when we were young, loud, and willing to stand for three hours?” That is the magic of keepsakes.
This guide will show you how to design a keepsake bin that is beautiful, organized, durable, and easy to maintain. You will learn what to keep, what to skip, how to choose the right storage materials, how to label everything, and how to build a system that future-you will actually use.
What Is a Keepsake Bin?
A keepsake bin is a dedicated storage container for meaningful objects you want to preserve but do not need to display every day. Unlike a junk drawer with ambition, a keepsake bin has a purpose. It gives sentimental items a defined home so they are not scattered across closets, drawers, bookshelves, and “I’ll deal with this later” piles.
A well-designed keepsake bin can hold personal memories, family history, school milestones, baby items, travel mementos, wedding memories, military keepsakes, sports awards, letters, old photographs, and small heirlooms. It can be simple or elaborate, budget-friendly or archival-grade. The goal is not perfection. The goal is protection, access, and meaning.
Why Designing a Keepsake Bin Matters
Sentimental clutter is tricky because it is not really about the object. It is about the story attached to it. That is why throwing everything into one oversized tote rarely works. The bin becomes heavy, chaotic, and impossible to enjoy. Worse, fragile items may fade, bend, yellow, crack, or get damaged by moisture, heat, adhesive, insects, or poor-quality materials.
Designing a keepsake bin helps you solve three problems at once. First, it protects valuable memories from physical damage. Second, it helps you decide what is truly worth keeping. Third, it creates a system that can grow with your life without taking over your home. A keepsake bin should feel like a curated collection, not a storage unit for guilt.
Step 1: Decide the Purpose of Your Keepsake Bin
Before buying a bin, ask one simple question: What story should this bin tell?
Some keepsake bins are organized by person. For example, each child may have a bin with school papers, artwork, report cards, photos, birthday cards, and small souvenirs. Other bins are organized by life event, such as a wedding, graduation, military service, family vacation, new home, or retirement. You can also create a family archive bin for documents, genealogy records, letters, inherited recipes, and heirloom photos.
Choosing the purpose first prevents the classic mistake of making one giant “miscellaneous memories” bin. That bin sounds harmless until you open it and find a hospital bracelet, six birthday cards, a seashell, a broken ornament, and one mysterious key that unlocks either a diary or absolutely nothing.
Good Keepsake Bin Categories
Useful categories include baby memories, school years, family history, travel, wedding, holidays, military service, creative work, sports achievements, letters and cards, and memorial keepsakes. If you are designing bins for multiple family members, keep the structure consistent. For example, every child’s bin might include folders labeled “Baby,” “Preschool,” “Elementary,” “Middle School,” “High School,” and “Special Moments.”
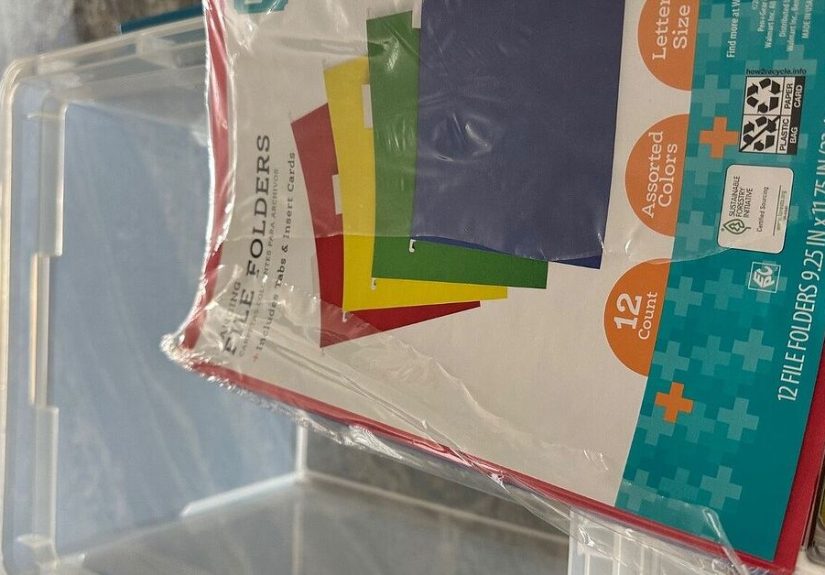
Step 2: Choose the Right Keepsake Bin
The container matters. A cute box is wonderful, but a sturdy, protective box is better. Ideally, choose a lidded bin that keeps dust out, is easy to lift, fits your storage area, and protects the contents from light and accidental crushing.
For everyday keepsake storage, a durable plastic bin with a tight-fitting lid may be practical, especially if you need moisture resistance. For long-term preservation of photographs, papers, and delicate items, acid-free archival boxes are a smarter choice. Archival storage materials are designed to reduce chemical damage, yellowing, and deterioration over time. If you are storing old letters, vintage photographs, certificates, newspaper clippings, or fragile documents, invest in acid-free folders, photo-safe sleeves, and lignin-free paper materials.
What Size Should a Keepsake Bin Be?
Choose a size you can comfortably lift when full. A bin that requires a gym membership to move is too large. Medium-sized storage boxes are usually better than giant tubs because they force you to curate. If one bin becomes too full, that is not always a sign you need a bigger bin. It may be a sign you need better categoriesor a gentle conversation with the 47 drawings of the same rainbow.
Best Materials for Keepsake Storage
Look for acid-free boxes, acid-free folders, lignin-free paper, unbuffered or buffered photo-safe enclosures depending on the item, polyester, polypropylene, or polyethylene sleeves, and photo storage products marked as having passed the Photographic Activity Test. Avoid sticky albums, rubber bands, pressure-sensitive tape, paper clips, staples, and ordinary cardboard for long-term storage of valuable paper or photo items.
Step 3: Sort Before You Store
Do not design your keepsake bin by simply dumping everything into it. Start with a sorting session. Spread items on a clean table and group them by type, person, event, or year. Then ask: Does this item tell a story? Does it represent a meaningful moment? Would I want to see it again? Would someone else understand why it matters?
You do not have to keep every sentimental object to honor the memory. Sometimes one item represents an entire season of life. One birthday card from Grandma may be more meaningful than twenty cards with only signatures. One school art piece may capture a child’s personality better than an entire stack of worksheets. Be selective, but not cold. This is not a courtroom. It is your life.
The Keep, Photograph, Share, Release Method
Use four simple decisions. Keep the object if it is meaningful and physically worth preserving. Photograph it if the memory matters but the item is too bulky, damaged, or repetitive. Share it if another family member would value it more. Release it if it no longer carries joy, usefulness, or personal meaning.
This method is especially helpful for children’s artwork, greeting cards, event programs, souvenirs, and inherited objects. You can love a memory without storing every object attached to it.
Step 4: Protect Photos, Papers, and Fragile Items
Photographs and paper keepsakes are among the most common items in a keepsake bin, and they are also some of the easiest to damage. Light, heat, humidity, adhesive, acidic paper, and poor handling can speed up fading and deterioration. Store photos in photo-safe sleeves or envelopes. Keep paper documents flat when possible, and use acid-free folders to separate categories.
If you have newspaper clippings, remember that newsprint is highly acidic and can yellow quickly. Make a photocopy or digital scan for regular viewing, then store the original separately in an acid-free folder if it has sentimental or historical value. For handwritten letters, do not laminate them. Lamination may seem protective, but it can permanently alter or damage paper. Instead, place letters in archival sleeves or folders.
How to Store Children’s Artwork
Children’s artwork deserves a system because it multiplies like rabbits with markers. Choose the best pieces from each year, photograph oversized projects, and store flat paper art in large acid-free folders or a document box. Add a label with the child’s name, age, date, and a small note about the story behind the piece. “Made after discovering purple paint” is a historically important detail.
How to Store Fabric Keepsakes
Fabric keepsakes may include baby clothes, christening gowns, military uniforms, wedding handkerchiefs, quilts, sports jerseys, or handmade blankets. Wash or clean items before storage when appropriate, and make sure they are completely dry. Wrap delicate textiles in acid-free tissue and avoid storing them in plastic bags for long periods if moisture could become trapped. Do not pack fabric too tightly, because hard folds can create stress over time.
Step 5: Add Labels That Tell the Story
A keepsake without context can become a mystery object. Labels turn a bin into a story. At minimum, label the outside of the bin with the person, category, and date range. Inside, label folders, envelopes, and small boxes clearly. Use simple wording such as “Emma: School Memories, 2018–2026” or “Family Letters: 1970s–1990s.”
For individual items, add small notes on acid-free paper. Include who, what, where, when, and why it matters. Do not write directly on the front of photographs. If you must write on the back, use a photo-safe pencil or marker designed for that purpose, and write gently along the edge. Better yet, place photos in sleeves and label the sleeve.
Create an Inventory Sheet
An inventory sheet is a simple list of what is in the bin. It can be handwritten, printed, or digital. Include the bin title, categories, important items, date range, and any special handling notes. This is especially helpful for family archives, inherited items, and boxes you plan to pass down. Future family members will thank you for not making them guess whether “Aunt Linda’s blue ribbon” was from baking, swimming, or competitive sarcasm.
Step 6: Design the Inside Layout
The inside of a keepsake bin should be easy to browse. Use folders for flat paper, small boxes for tiny objects, envelopes for cards, photo cases for prints, and fabric bags or tissue for textiles. Keep heavy items at the bottom and delicate items on top. Avoid overstuffing the bin. Items should not slide around wildly, but they also should not be crushed.
Think in layers. The bottom layer can hold heavier objects, albums, or boxed items. The middle layer can hold folders, envelopes, and photo sleeves. The top layer can hold an inventory sheet, recent additions, and delicate pieces. If the bin is deep, use smaller labeled containers inside it so you do not have to dig like an archaeologist looking for a third-grade spelling bee certificate.
Use Dividers and Subfolders
Dividers make the bin easier to maintain. For a child’s keepsake bin, create sections by school year. For a travel bin, divide by destination. For a family archive, divide by person or branch of the family. For a wedding bin, create sections for planning, ceremony, cards, photos, fabric pieces, and small mementos.
Step 7: Store the Keepsake Bin in the Right Place
Where you store the bin can be just as important as what you store it in. Avoid attics, garages, damp basements, outdoor sheds, and places with big temperature or humidity swings. These areas may be convenient, but they can expose keepsakes to heat, moisture, pests, mold, and dust. A bedroom closet, interior cabinet, office shelf, or climate-stable storage area is usually a better choice.
Keep the bin away from direct sunlight and water sources. Do not place it directly on concrete floors, especially in basements or garages. If you must store bins low, elevate them on a shelf. For irreplaceable items, consider keeping digital copies and a small emergency grab-and-go folder with essential documents or family history records.
Step 8: Digitize What You Can
A keepsake bin protects physical memories, but digital backups add another layer of security. Scan photographs, letters, certificates, recipes, artwork, and fragile papers. Save digital files in clearly named folders, such as “Family Photos 1980s,” “Grandma Rose Letters,” or “Liam School Art Grade 2.” Use consistent file names with dates when possible.
A practical digital backup system includes more than one copy. Keep files on your computer, an external drive, and a secure cloud service. Digital organization does not replace the physical keepsake bin, but it makes sharing easier and protects the information if the original is lost or damaged.
Step 9: Make It Beautiful Without Sacrificing Function
Design matters because a beautiful keepsake bin invites you to use it. Add a clean label, choose a container that fits your home, and use matching folders or envelopes if that makes the process feel more enjoyable. You can decorate the outside with a nameplate, ribbon, printed title card, or simple color-coded label.
For display-friendly keepsake boxes, choose decorative lidded boxes for bookshelves, cabinets, or bedroom storage. For long-term storage, prioritize protective materials first and style second. The best design blends beauty with preservation. A box can look lovely and still behave like a responsible adult.
Step 10: Build a Maintenance Routine
A keepsake bin is not a one-time project. It needs a simple maintenance habit. Set a reminder to review it once or twice a year. Many families do this at the end of the school year, after the holidays, or before a birthday. Add new items, remove duplicates, update labels, and check for damage.
Make a “pending memories” folder or basket for new items throughout the year. When it fills up, sort it into the bin. This prevents every drawer in your house from becoming a keepsake bin in disguise.
What Should You Put in a Keepsake Bin?
Good keepsake bin items include favorite photos, handwritten letters, meaningful cards, children’s artwork, report cards, awards, certificates, ticket stubs, travel postcards, family recipes, small heirlooms, baby bracelets, locks of hair, fabric pieces, medals, military patches, wedding invitations, funeral programs, journals, and small objects connected to important milestones.
The key is meaning. Keep items that tell a story, represent a person, capture a season, or spark a strong memory. Do not keep items only because you feel guilty. Guilt is not a storage strategy. It is just clutter wearing a dramatic hat.
What Should You Leave Out?
Avoid storing food, candles, liquids, heavily scented items, dirty textiles, unstable plastics, batteries, leaking pens, anything damp, and objects that could attract pests. Do not store highly fragile antiques without proper support. Avoid mixing dirty outdoor souvenirs with clean paper or fabric items. If you want to keep sand, soil, dried flowers, or natural objects, place them in sealed, labeled containers and make sure they are completely dry.
Also avoid keeping every version of the same memory. Ten nearly identical birthday cards may not be necessary. Choose the most meaningful one or two. A keepsake bin should preserve highlights, not become a full documentary with director’s commentary.
Specific Keepsake Bin Ideas
Baby Keepsake Bin
Include a hospital bracelet, first outfit, birth announcement, baby cards, tiny shoes, first haircut envelope, favorite photo, milestone notes, and a letter from parents. Use small labeled envelopes and acid-free tissue for fabric items.
School Keepsake Bin
Create one folder per grade. Keep a school photo, report card, favorite art piece, writing sample, award, and a short note about the child’s interests that year. This creates a compact and meaningful timeline.
Wedding Keepsake Bin
Store the invitation, vows, program, guest notes, fabric swatches, dried bouquet sample, photos, menu, place cards, and small decor pieces. Add a note about favorite moments from the day.
Travel Keepsake Bin
Organize by trip. Include maps, postcards, tickets, printed photos, currency, travel journals, and small souvenirs. Label each section with destination and date.
Family History Bin
Use archival folders for letters, old photographs, genealogy notes, recipes, military records, certificates, newspaper clippings, and oral history transcripts. Add context wherever possible.
Common Keepsake Bin Mistakes
The first mistake is keeping too much. If everything is special, nothing is easy to find. The second mistake is using poor materials, such as ordinary cardboard, tape, rubber bands, or sticky photo albums for long-term storage. The third mistake is failing to label items. Memories fade faster than we expect, and names, dates, and places matter.
Another common mistake is storing bins in extreme environments. Heat, moisture, pests, and sunlight can quietly damage keepsakes for years before you notice. Finally, many people forget to review their bins. A small annual review keeps the collection useful, current, and manageable.
Experience Section: Real-Life Lessons from Designing a Keepsake Bin
The first time you design a keepsake bin, you may think the hard part will be choosing the container. It usually is not. The hard part is deciding what deserves space. A bin has edges. Memories do not. That is where the emotional work begins.
One practical lesson is to sort when you have enough time and emotional energy. Do not start a keepsake project at 10 p.m. unless you enjoy sitting on the floor at midnight reading old birthday cards with one sock missing. Sentimental organizing moves slower than ordinary decluttering because every item can start a story. Give yourself permission to pause. You are not just cleaning; you are curating a life.
Another lesson is that labels are love letters to the future. A photo may seem obvious today, but in twenty years someone may not know who is standing beside the red car, why everyone is laughing, or what happened five minutes after the picture was taken. A simple note can turn a random photo into family history. Write the date, location, names, and memory while you still remember. Future generations should not have to solve your storage bin like a mystery novel.
It also helps to create limits before you begin. For example, decide that each school year gets one folder, each vacation gets one envelope, or each person gets one medium bin. Limits do not make memories less important. They make the collection easier to enjoy. When space is limited, you naturally choose the items with the most meaning. That is how a keepsake bin becomes thoughtful instead of overwhelming.
Parents often struggle with children’s artwork. The secret is to keep representative pieces, not every piece. Choose artwork that shows personality, progress, humor, or a specific stage. Save the first wobbly self-portrait, the story with creative spelling, the painting made with heroic amounts of orange, and the note that says “I love you” with backward letters. Photograph the rest. You will still preserve the memory without needing a second house for construction paper.
Another helpful experience is to include a “story card” with unusual objects. A seashell, keychain, ribbon, or tiny toy may mean everything to you, but nothing to someone else unless you explain it. A short note such as “Collected on our first beach trip after moving to California, July 2019” gives the object emotional weight. Without the note, it is just a shell. With the note, it is a chapter.
Finally, the best keepsake bins are not frozen in time. They change as your life changes. Some items may feel important now and less important later. Others may become more meaningful with age. Review the bin gently. Add new stories. Remove what no longer belongs. Let the collection breathe. A keepsake bin should not feel like a sealed vault of obligation. It should feel like opening a door and finding your favorite moments waiting neatly inside, dust-free and still smiling.
Conclusion
To design a keepsake bin, start with purpose, choose the right container, sort with intention, protect fragile materials, label everything clearly, and store the bin in a safe, stable location. The goal is not to keep every sentimental item you have ever touched. The goal is to preserve the memories that still speak to you.
A thoughtful keepsake bin makes family history easier to protect and easier to enjoy. It gives your memories a home, your closets a break, and your future self a beautiful gift. Whether you are saving baby shoes, love letters, travel tickets, school art, or inherited recipes, the right keepsake bin turns scattered objects into a meaningful collection. And honestly, that is much better than letting your memories live forever in a grocery bag labeled “Important Stuff??”
Note: This article is based on synthesized guidance from reputable U.S. preservation, archival, museum, and home-organization resources. It is written as original web-ready content with no inserted source links or publishing artifacts.


