Table of Contents >> Show >> Hide
- Why Window Sills Get Dirty So Fast
- The Best DIY Window Sill Cleaning Spray Recipe
- Important Safety Rules Before You Spray
- How to Clean Window Sills Step by Step
- How to Handle Mold-Prone Window Sills
- DIY Window Sill Spray Variations
- How Often Should You Clean Window Sills?
- Common Mistakes to Avoid
- Extra Tips for a Cleaner Finish
- Real-Life Experiences With DIY Window Sill Cleaning Spray
- Conclusion
- SEO Tags
Window sills are the tiny shelves of shame in every home. They quietly collect dust, pollen, dead bugs, mystery crumbs, pet hair, rain spots, and that grayish grime that seems to arrive by teleportation. You wipe them once, feel proud for six minutes, and then sunlight hits the corner just right and reveals a whole documentary about neglect.
The good news? You do not need a cabinet full of dramatic chemical sprays to clean them. A simple DIY window sill cleaning spray can handle most everyday dirt, sticky residue, and mild mineral buildup with ingredients you probably already own: distilled water, white vinegar, and a small amount of dish soap. Add a microfiber cloth, an old toothbrush, and a little patience, and your window sills can go from “forgotten apartment ledge” to “fresh, bright, and no longer suspicious.”
This guide explains how to make a homemade window sill cleaner, how to use it safely on common surfaces, what not to mix, how to deal with stubborn window tracks, and how to keep sills cleaner longer. We will also cover real-life cleaning experiences at the end, because window sills have personalities, and some of them are absolute goblins.
Why Window Sills Get Dirty So Fast
Window sills sit at the intersection of indoor air, outdoor air, moisture, dust, and daily life. That means they are basically the airport terminal of household grime. Every time you open a window, tiny particles come inside. When humidity rises, moisture can settle near the glass and frame. When pets nap in the sun, fur joins the party. When plants sit on the sill, water rings and soil specks appear. Nobody invited them, but they came anyway.
Common window sill messes include:
- Dust and pollen: Especially common in spring and near busy roads.
- Condensation marks: Moisture can leave streaks, discoloration, or residue.
- Bug debris: Tiny insects love window corners like they paid rent.
- Mildew-prone grime: Damp, shaded areas can develop musty buildup.
- Sticky residue: Kitchen steam, candle soot, fingerprints, and airborne grease can cling to painted or vinyl sills.
- Track dirt: Window tracks trap grit in grooves that seem designed by someone who hates sponges.
A good window sill cleaning spray should loosen dirt without damaging paint, vinyl, aluminum, glass, or sealed surfaces. It should also be simple enough to use regularly, because the best cleaning routine is the one you will actually do before the dust becomes emotionally attached.
The Best DIY Window Sill Cleaning Spray Recipe
This recipe is designed for routine cleaning on most sealed, non-stone window sills, including painted wood, vinyl, fiberglass, aluminum, and laminate-style surfaces. Always spot-test first, especially on older paint, natural stone, unsealed wood, or delicate finishes.
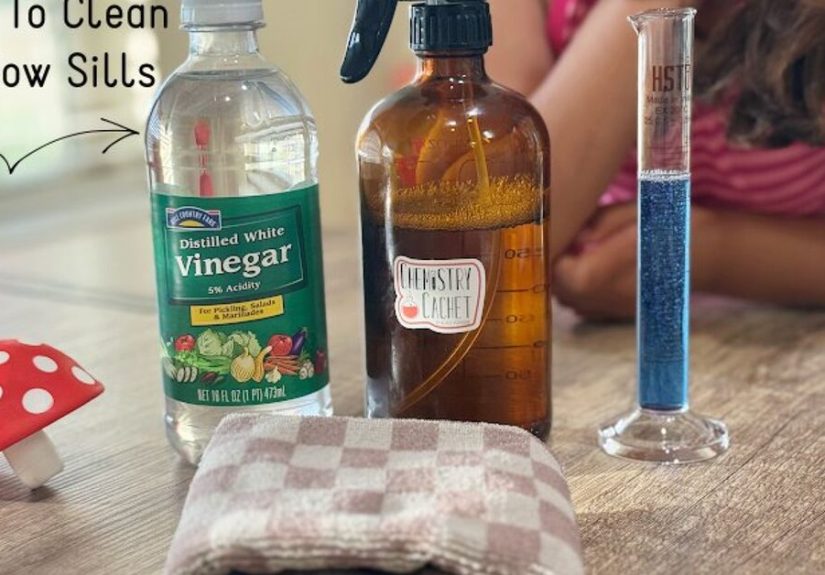
Ingredients
- 1 cup distilled water
- 1 cup white vinegar
- 1 teaspoon mild dish soap
- Optional: 5 drops lemon essential oil for scent, only if safe for your household and pets
Supplies
- Clean spray bottle
- Microfiber cloths
- Old toothbrush or small detail brush
- Cotton swabs for corners
- Vacuum with crevice tool
- Gloves, especially if the sill is very dirty or mold-prone
How to Make It
- Rinse a clean spray bottle with warm water and let it dry.
- Add 1 cup distilled water.
- Add 1 cup white vinegar.
- Add 1 teaspoon mild dish soap.
- Gently swirl the bottle. Do not shake it like a protein drink unless you want a foam volcano.
- Label the bottle: “Window Sill Cleaner: Vinegar + Dish Soap.”
Distilled water helps reduce mineral spots, vinegar helps loosen mineral residue and light grime, and dish soap helps break up oily dirt. Together, they make a practical homemade window sill cleaner for weekly or monthly maintenance.
Important Safety Rules Before You Spray
DIY cleaning should be simple, not a chemistry audition. The most important rule is this: never mix this vinegar-based spray with bleach, ammonia, hydrogen peroxide, toilet cleaner, drain cleaner, or any commercial disinfectant. Mixing cleaning products can create irritating or dangerous fumes. If you previously used another cleaner on the sill, rinse the area with water and let it dry before using this recipe.
Also, this spray is a cleaner, not a disinfectant. For most window sills, cleaning is enough. If someone in the home is sick or you need to disinfect a high-touch area, use a proper disinfectant according to the product label, not a homemade guess. Your window sill does not need a science fair; it needs responsible cleaning.
Do Not Use Vinegar On These Surfaces
Vinegar is useful, but it is acidic. Avoid using vinegar-based spray on marble, limestone, travertine, unsealed stone, waxed wood, or delicate antique finishes. On natural stone sills, use warm water with a few drops of mild dish soap instead. On unsealed wood, use as little moisture as possible and dry immediately.
How to Clean Window Sills Step by Step
A spray alone cannot perform miracles if the sill is covered in dry debris. The best method is dry-clean first, spray second, scrub third, and dry last. This prevents turning dust into mud, which is exactly as glamorous as it sounds.
Step 1: Remove Loose Dirt
Start by opening the window if weather allows. Use a vacuum crevice tool to remove loose dirt, dead bugs, crumbs, and dust from the sill and track. If you skip this step, the spray will turn dry debris into sludge, and then you are no longer cleaningyou are making window soup.
Step 2: Spray Lightly
Mist the window sill with your DIY cleaning spray. Do not soak the surface, especially if it is painted wood. Let the spray sit for two to five minutes. This gives the vinegar and dish soap time to loosen stuck-on grime.
Step 3: Scrub Corners and Grooves
Use an old toothbrush or small cleaning brush to work along edges, seams, and corners. For narrow tracks, wrap a microfiber cloth around a butter knife or use cotton swabs. Be gentle around weather stripping, old caulk, and painted edges.
Step 4: Wipe Clean
Wipe the sill with a damp microfiber cloth. Rinse the cloth often if the sill is heavily soiled. Follow with a dry microfiber cloth to remove leftover moisture. Drying matters because window areas are already prone to condensation. Leaving water behind is like sending a handwritten invitation to mildew.
Step 5: Inspect the Track
If the window track still looks dirty, repeat the spray-and-brush method. For packed-in grime, sprinkle a very small amount of baking soda into the track, lightly mist with the spray, let it fizz briefly, then scrub and wipe thoroughly. Baking soda can help as a mild abrasive, but it must be fully removed so it does not leave a chalky residue.
How to Handle Mold-Prone Window Sills
Dark spots on a window sill can be dirt, mildew, or mold. The cause is usually moisture: condensation, leaks, poor airflow, wet plant pots, or humid indoor air. Cleaning helps, but if moisture keeps returning, the problem will return too. Think of cleaning as removing the mess and moisture control as canceling its subscription.
For a small, surface-level mildew-prone area on a non-porous sill, wear gloves, ventilate the room, spray lightly, scrub with a brush, wipe with a disposable towel, and dry completely. If the area is large, keeps returning quickly, smells strongly musty, appears inside porous wood, or is related to water damage, consider professional help. Mold cleanup can become a health and building issue, not just a “grab a cute spray bottle” issue.
Ways to Reduce Moisture Around Window Sills
- Open curtains or blinds during the day to improve airflow.
- Wipe condensation from windows when it appears.
- Use bathroom and kitchen exhaust fans.
- Move houseplants off sills if they spill water or trap humidity.
- Check caulk, weather stripping, and window seals for leaks.
- Use a dehumidifier if indoor humidity is consistently high.
DIY Window Sill Spray Variations
Different window sill materials and messes need slightly different approaches. Here are safer variations for common situations.
For Painted Wood Sills
Use the main recipe, but spray the cloth instead of spraying the sill directly. Wipe gently and dry right away. Painted wood can tolerate light cleaning, but soaking can lead to peeling, swelling, or finish damage. Wood is dramatic when wet; respect its boundaries.
For Vinyl or Aluminum Sills
Vinyl and aluminum are usually easier to clean. Spray the surface lightly, let it sit for a few minutes, scrub corners, wipe, and dry. These materials often handle the vinegar-dish-soap blend well, but still test first if the finish is older or discolored.
For Greasy Kitchen Window Sills
Kitchen window sills near stoves can collect airborne grease. Add one extra drop of dish soap to the recipe, but do not overdo it. Too much soap leaves residue that attracts more dust. The goal is clean, not bubble bath.
For Natural Stone Sills
Skip the vinegar. Mix 2 cups warm water with 3 drops mild dish soap. Wipe with a damp microfiber cloth, rinse with a second cloth, and dry completely. Acidic cleaners can etch stone surfaces, leaving dull marks that no amount of regret will polish away.
How Often Should You Clean Window Sills?
For most homes, cleaning window sills once a month is enough. If you live near a busy road, keep windows open often, have pets, burn candles, or deal with seasonal pollen, clean them every two weeks. In humid rooms like bathrooms and kitchens, inspect sills weekly for moisture and mildew-prone buildup.
A realistic schedule looks like this:
- Weekly: Quick dry dusting with microfiber.
- Monthly: Spray, scrub, wipe, and dry.
- Seasonally: Deep clean tracks, screens, locks, and frames.
- After storms: Check for leaks, water stains, and debris.
The secret is not heroic cleaning. It is tiny maintenance before the sill turns into an archaeological dig.
Common Mistakes to Avoid
Using Too Much Spray
More liquid does not mean more clean. Overspraying can push moisture into seams, paint cracks, and wood edges. Mist lightly and wipe thoroughly.
Skipping the Dry Wipe
Drying is not optional. Window areas already deal with temperature changes and condensation. A dry finish helps prevent streaks, residue, and moisture problems.
Mixing Products
Never layer vinegar spray over bleach cleaner, ammonia-based glass cleaner, or disinfecting wipes. Use one product at a time, rinse when needed, and let surfaces dry between products.
Ignoring the Cause of Repeating Grime
If the same black or musty buildup comes back quickly, look for moisture. Check for condensation, leaks, damaged caulk, or blocked airflow. Cleaning the symptom without fixing the cause is like mopping while the faucet is still running.
Extra Tips for a Cleaner Finish
- Use white microfiber cloths if you are worried about dye transfer on painted sills.
- Keep a dedicated toothbrush for cleaning, and label it clearly unless you enjoy household confusion.
- Clean the glass after cleaning the sill, not before. Dirty track water can splash upward.
- Remove curtains or lift blinds before spraying to avoid spotting fabric.
- Clean screens seasonally because dirty screens blow dirt back onto clean sills.
- Store the spray away from sunlight and heat, and remake it every few weeks for freshness.
Real-Life Experiences With DIY Window Sill Cleaning Spray
The first time many people try a DIY window sill cleaning spray, they expect it to behave like a commercial cleaner with a dramatic lemon-cloud entrance and instant sparkle. In reality, the magic is quieter. The spray softens grime, the brush does the detail work, and the microfiber cloth delivers the satisfying “oh, that was the original color?” moment.
One of the most common experiences is discovering that the sill was not actually stainedit was just wearing a tiny sweater of dust. A light mist of vinegar, water, and dish soap often loosens that gray film around bedroom and living room windows. After a two-minute wait, the grime wipes away with surprisingly little effort. The key is patience. If you spray and immediately wipe, you may work harder than necessary. Letting the cleaner sit briefly gives it time to break the bond between dirt and surface.
Kitchen window sills usually tell a different story. They often collect sticky residue from cooking oils, steam, and airborne particles. In that case, the dish soap matters more than the vinegar. A single teaspoon in the bottle is enough for routine grime, but greasy sills may need a second pass. The best approach is to spray the cloth, wipe the surface, then use a fresh damp cloth to remove soap residue. If the sill feels slightly tacky after cleaning, too much soap was used or not enough rinsing happened. No shamesoap is sneaky.
Bathroom window sills can be the most dramatic because of humidity. A sill may look clean one week and suspicious the next. The spray can remove surface grime, but the real improvement comes from changing habits: running the fan longer, opening the door after showers, wiping condensation, and keeping towels or bottles away from the window ledge. Many people find that once they reduce moisture, they need the spray less often. That is the cleaning equivalent of working smarter, not scrubbing harder.
For sliding window tracks, expectations need adjustment. A spray bottle alone will not reach every narrow groove. The winning combo is vacuum first, spray second, brush third, wipe last. An old toothbrush is useful, but a small stiff detail brush can be even better for corners. Cotton swabs help with tiny edges, though you may go through several if the track has been ignored since the previous presidential administration. For thick dirt, a tiny sprinkle of baking soda can add scrubbing power, but it must be wiped out completely. Otherwise, it dries into pale dust and makes the track look like it survived a powdered donut incident.
Pet owners often notice faster buildup. Dogs press noses to glass, cats lounge on sills like royalty, and fur floats into corners with Olympic dedication. In homes with pets, fragrance-free cleaning is usually the safer and simpler choice. Essential oils may smell nice, but they are not always ideal around animals. A plain vinegar, water, and dish soap formula works well and avoids turning cleaning day into a perfume parade.
Another useful lesson: clean window sills on a bright day, but not in harsh direct sun. Bright light helps you see grime, while extreme sun can dry the spray too quickly and leave streaks. Morning or late afternoon is often ideal. Open the window if possible, keep a dry cloth nearby, and work one sill at a time. Trying to spray every window in the house before wiping is how you accidentally create a sticky scavenger hunt.
The most satisfying part of using a DIY spray is how low-pressure it feels. You are not dragging out a bucket, gloves, twelve bottles, and the emotional soundtrack of a deep-cleaning montage. You are grabbing one labeled bottle and a cloth. That makes maintenance easier, and easier maintenance means cleaner windowsills over time. Tiny habits win here. A thirty-second wipe every week can prevent the kind of grime that requires a full Saturday, three podcasts, and a snack break.
Ultimately, the best experience with DIY window sill cleaning spray comes from understanding its job. It is not a miracle potion. It is a practical, affordable, surface-friendly cleaner for routine dust, light grime, and minor buildup. Pair it with dry dusting, proper scrubbing tools, moisture control, and common-sense safety rules, and your window sills will look brighter, smell fresher, and stop silently judging you every time the sun comes out.
Conclusion
A DIY window sill cleaning spray is one of the easiest homemade cleaners to make and use. With distilled water, white vinegar, and a small amount of dish soap, you can tackle everyday dust, pollen, sticky residue, and light buildup without overcomplicating the job. The best method is simple: vacuum loose debris, spray lightly, let it sit, scrub the edges, wipe clean, and dry thoroughly.
Just remember the safety basics. Do not mix cleaning products, do not use vinegar on natural stone or delicate finishes, and do not ignore recurring moisture problems. A clean sill is lovely, but a dry, well-ventilated sill is the real champion. Treat your window sills to regular maintenance, and they will reward you by looking fresh instead of fossilized.


