Table of Contents >> Show >> Hide
- Why DIY block printed fabric is so satisfying
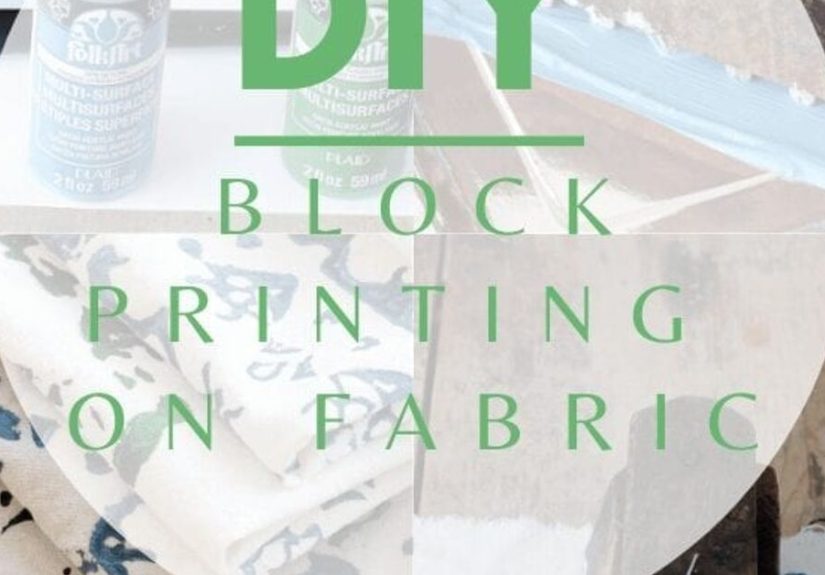
- What you need to make block printed fabric at home
- Choose the right fabric before you print a single thing
- Pick the right printing medium
- How to design a block print that actually works
- Step-by-step: how to block print fabric at home
- Step 1: Prep your work area
- Step 2: Practice on scrap fabric
- Step 3: Roll out a thin, even layer of ink
- Step 4: Ink the stamp or block
- Step 5: Position carefully
- Step 6: Press evenly
- Step 7: Lift straight up
- Step 8: Repeat the pattern
- Step 9: Let the print dry fully
- Step 10: Heat set or cure the design
- How to get a more polished, “wow, you made that?” result
- Common block printing problems and how to fix them
- Fun project ideas for your printed fabric
- What block printing teaches you fast
- Experiences from real-life block printing at home: the good, the messy, and the surprisingly gorgeous
- Conclusion
If you have ever looked at gorgeous patterned napkins, pillow covers, table runners, or handmade tote bags and thought, “Wow, I would love to make that,” good news: you absolutely can. Block printed fabric looks fancy, artistic, and slightly intimidating, which is craft-world code for surprisingly doable once you stop overthinking it. With the right fabric, the right ink, a decent stamp or carved block, and a tiny bit of patience, you can turn plain cloth into something that looks thoughtful, custom, and suspiciously expensive.
This DIY block printing tutorial walks you through the whole process, from choosing fabric and tools to printing clean repeats and fixing the classic beginner mistakes. Whether you want to decorate tea towels, make custom fabric for sewing projects, or simply spend a Saturday pretending your dining table is a small design studio, this project delivers big visual payoff without requiring a fancy workshop.
And the best part? Handmade block printed fabric does not need to look machine-perfect to be beautiful. In fact, the tiny variations are the charm. If one leaf is slightly crooked or one flower lands a hair higher than the next, congratulations: your project now has “artisan character,” which is a much nicer phrase than “my stamp wandered.”
Why DIY block printed fabric is so satisfying
Block printing sits in that magical sweet spot between art and practical craft. You get the thrill of making a pattern by hand, but you also walk away with something useful. A printed linen napkin can dress up a table. A stamped cotton panel can become a pillow cover. A yard of custom fabric can become zip pouches, fabric bins, tote bags, or quilt accents. You are not just making art for the wall. You are making art that can survive snack time.
It is also beginner-friendly. You do not need to be an illustrator, a textile designer, or someone who owns a studio with exposed brick and mysterious jars of pigment. You can start with simple shapes, repeat them across the surface, and still get an elegant result. In many cases, the simplest motifs look the most polished: leaves, dots, stripes, petals, diamonds, vines, and geometric shapes all print beautifully.
What you need to make block printed fabric at home
Basic supplies
- Plain fabric, preferably cotton, linen, canvas, muslin, or a cotton-linen blend
- A carving block, foam stamp, woodblock, or ready-made stamp
- Fabric ink or textile paint
- A brayer or foam roller
- A smooth tray, palette, or plate for rolling out ink
- Cardboard, freezer paper, or scrap paper to protect your work surface and prevent bleed-through
- Pencil and paper for sketching motifs
- Ruler or measuring tape
- Iron or other curing method recommended for your ink or paint
- Paper towels or cloth rags for quick cleanup
Optional but helpful extras
- Painter’s tape for marking straight repeat lines
- Fabric-safe chalk or washable marker
- A light box or tracing paper for transferring designs
- Pressing cloth for heat setting
- Practice swatches, because test prints save tears
Choose the right fabric before you print a single thing
Start with natural or mostly natural fibers if you want the easiest, cleanest results. Cotton and linen are the crowd favorites because they take textile paint and fabric ink well, press nicely, and give crisp impressions. Muslin is excellent for practice. Cotton canvas works beautifully for tote bags and pillows. Linen has a slightly more textured look that feels extra charming and handmade.
Before printing, wash and dry your fabric first. This step matters more than beginners think. New fabric can contain sizing, finishes, or other residues that interfere with even ink absorption. Prewashing also helps prevent unpleasant surprises later, like a beautifully printed napkin shrinking into dollhouse territory after its first real wash. Skip fabric softener, then iron the fabric so you are printing on a smooth surface instead of a wrinkled mountain range.
If you are printing on a pillowcase, tote, shirt, or finished fabric item, slide a piece of cardboard or thick paper inside. This keeps ink from transferring to the back layer and saves you from making an accidental “double-sided design” you never actually planned.
Pick the right printing medium
This is where many projects go sideways. Not every paint belongs on fabric, and not every ink behaves the same way. For block printing on fabric, use fabric ink or textile paint specifically made for fabric. Some products are ready to cure permanently with little or no heat setting, while others need to be heat set with an iron, heat press, or another recommended method. Always check the label because the instructions vary by brand and formula.
If you want a soft hand feel, look for inks designed for fabric printing. If you want opaque color and a more painted look, textile paint may suit you better. Metallics and bold colors can be gorgeous, but they also show uneven inking more easily, so practice first before marching straight onto your final fabric like a fearless but underprepared hero.
How to design a block print that actually works
The biggest beginner mistake is choosing a design that is too detailed. Tiny lines, skinny stems, fussy lettering, and complicated negative space may look beautiful on paper but can turn into a muddy little mystery once ink enters the conversation. Start with bold, simple shapes. Think leaves, scallops, petals, circles, stars, diamonds, or folk-inspired florals.
A good test is this: if you can clearly recognize the shape from a few feet away, it will probably print well. If it looks like something you need to explain with a laser pointer, simplify it.
You also want to think about repeat. Will your motif be tossed randomly across the fabric? Aligned in neat rows? Staggered like bricks? Clustered in corners? Repetition is what transforms a single stamp into a true textile pattern, so sketch a few layout ideas before you begin. Even a very basic motif can look refined when repeated consistently.
Step-by-step: how to block print fabric at home
Step 1: Prep your work area
Cover the table with paper or plastic. Lay your fabric flat. If the fabric is thin or your project is double-layered, place cardboard underneath. Keep your ink tray, brayer, stamps, and paper towels nearby. Once you start printing, you want everything within easy reach because textile ink waits for no one.
Step 2: Practice on scrap fabric
Do not skip this. Really. A test swatch helps you figure out how much ink your stamp needs, how much pressure gives the cleanest result, and whether your motif is crisp enough. It also tells you if your color looks fabulous or weirdly like sad mustard. Better to discover that on a scrap than on your final table runner.
Step 3: Roll out a thin, even layer of ink
Pour a small amount of fabric ink or paint onto your tray. Use a brayer to roll it out until the surface looks smooth and evenly coated. You want enough ink to cover the raised surface of the block, but not so much that it globs into corners and squishes out around the edges. Thick blobs create smudges. Thin, even coverage creates cleaner prints.
Step 4: Ink the stamp or block
Roll the brayer over the stamp a few times, or dab paint with a foam brush if that works better for your material. The goal is even coverage. If some areas are overloaded while others are dry, your print will look patchy. Consistency matters.
Step 5: Position carefully
Place the stamp where you want it. If you are aiming for a repeating pattern, mark light guide lines with a ruler or use painter’s tape to create boundaries. This helps keep rows straight and spacing consistent. Eyeballing it can work, but it can also lead to that dramatic moment when row three drifts off like it has its own life goals.
Step 6: Press evenly
Press the block firmly and evenly onto the fabric. Do not rock it back and forth unless you are intentionally going for a distressed look. Uneven pressure causes blurry edges, partial prints, and mysterious ghosting. Large stamps can benefit from firm pressure with your hands or even a clean brayer over the back of the block to ensure full contact.
Step 7: Lift straight up
Peel or lift the block straight upward. No sliding. No twisting. No dramatic flourish. Just up. This keeps the edges crisp and helps preserve the shape of your motif.
Step 8: Repeat the pattern
Re-ink the block as needed and continue printing across the fabric. Work slowly enough to keep spacing consistent, but not so slowly that you forget the rhythm. Many beautiful printed textiles are made from a simple repeat done with care. A row of leaves, dots, or flowers can look wonderfully polished when the spacing is intentional.
Step 9: Let the print dry fully
Set the fabric aside and let it dry according to the product instructions. Do not stack printed fabric. Do not fold it. Do not impatiently “just check one corner” with your finger and create a bonus fingerprint in the middle of your masterpiece.
Step 10: Heat set or cure the design
Once the print is completely dry, cure it exactly as your product directs. Some textile paints and inks need heat setting with a dry iron and a pressing cloth, often on the reverse side or with protective paper. Others cure differently or may not need heat setting at all. This step is what helps make the design washable and durable, so do not guess. Follow the label like it holds the fabric-printing secrets of the universe, because in this case, it kind of does.
How to get a more polished, “wow, you made that?” result
Keep the motif simple but the layout intentional
One leaf repeated in a smart pattern can look more sophisticated than a busy, overcomplicated design. Alternate colors, rotate the stamp, or stagger rows for movement.
Use negative space wisely
Do not feel pressure to fill every inch of fabric. Breathing room makes a design feel cleaner and more modern. Sparse prints on linen can look especially elegant.
Limit your palette
Two or three colors usually feel more cohesive than six random ones arguing on the same pillow cover. Earth tones, indigo and white, black and flax, sage and mustard, or dusty pink with rust all work beautifully.
Embrace a handmade rhythm
The charm of block printed fabric is not factory perfection. It is warmth, texture, and character. Tiny inconsistencies make the piece feel real. The trick is to make them look intentional, not chaotic.
Common block printing problems and how to fix them
Problem: The print looks blotchy
Fix: Use less ink and apply it more evenly. Blotchy prints usually happen when the block is overloaded or when the ink is not spread smoothly across the surface.
Problem: The edges are blurry
Fix: Reduce pressure and avoid rocking the stamp. Make sure the fabric is flat and supported underneath.
Problem: Some parts did not print
Fix: Increase even pressure and check whether the stamp surface was fully inked. For textured fabrics, a firmer press may help.
Problem: Ink bled through the fabric
Fix: Insert cardboard or thick paper under the top layer, and use less ink next time.
Problem: The design faded after washing
Fix: Make sure you used a fabric-safe medium and followed the exact curing instructions. Wash finished items gently and preferably inside out.
Fun project ideas for your printed fabric
- Block printed napkins for holidays or dinner parties
- Custom tea towels that look boutique-worthy
- Tote bags with bold graphic motifs
- Pillow covers in soft, repeating floral patterns
- Fabric panels for quilting or patchwork
- Handmade gift wrap using cotton muslin or flour sack towels
- Kids’ room banners or wall hangings
- Simple table runners and placemats
If you are nervous, start with napkins or tea towels. They are forgiving, useful, and incredibly satisfying. Also, if one turns out a little quirky, you can confidently call it “rustic.” Rustic is craft immunity.
What block printing teaches you fast
Block printing fabric at home teaches patience in the most practical way possible. It rewards prep, rhythm, and restraint. Too much ink? Trouble. Too much pressure? Trouble. Too much confidence after one perfect test print? Believe it or not, also trouble.
But it also teaches creative confidence. You begin with a blank piece of cloth and end with something no one else has. Your eye gets better. Your spacing improves. Your motifs become cleaner. And eventually you reach that very satisfying stage where plain fabric no longer looks “plain.” It looks like possibility.
Experiences from real-life block printing at home: the good, the messy, and the surprisingly gorgeous
One of the most interesting things about learning how to make block printed fabric at home is that your first session rarely goes exactly the way you picture it. In your mind, you are an effortlessly stylish maker in a sunlit room, calmly printing perfect botanical motifs onto linen while a kettle whistles in the background. In reality, you are probably standing over a table covered in paper, trying to remember where you put the brayer, wondering why there is ink on your wrist when you are pretty sure you never touched the ink. This is normal. This is the authentic block printing experience.
The first real surprise for many beginners is how much better the project gets after the first few prints. The test swatches may look awkward. The first repeat may be uneven. The second one may be better. Then suddenly, by print number six or seven, your hands understand the pressure, your eyes understand the spacing, and the whole thing starts to click. That moment is extremely satisfying. You stop feeling like a person attempting a craft and start feeling like someone who actually knows what they are doing.
Another common experience is discovering that “imperfections” often make the finished piece better. A slightly lighter print next to a darker one gives movement. A tiny shift in the repeat makes the pattern feel handmade instead of sterile. Many people start out wanting flawless symmetry and end up falling in love with the softer, more organic look that happens naturally with hand printing. It feels warmer. More human. More alive.
There is also a practical joy in seeing ordinary fabric become something special. A plain cotton napkin can look forgettable in the package, but after a few rows of leafy stamps in olive green or indigo, it suddenly looks like something from a lovely little home shop where everything costs more than it should and somehow still seems worth it. That transformation is addictive. Once you print one thing successfully, you immediately start scanning your house for other candidates. Tote bag? Absolutely. Table runner? Obviously. Old pillow cover? You are one bold pattern away from a second life.
And yes, there will be mildly ridiculous moments. Someone will smudge a print by checking whether it is dry. Someone will stamp one motif upside down. Someone will realize too late that the rows were straight until the middle and then began drifting like a scenic road trip. None of that ruins the process. In fact, those moments become part of the story of the piece. Handmade projects are memorable because they carry the evidence of making. You can often remember exactly where you were, what color you mixed, which print surprised you, and which one made you laugh.
In the end, the experience of block printing fabric at home is not just about producing patterned cloth. It is about slowing down, working with your hands, solving little visual puzzles, and creating something beautiful from very simple tools. It feels creative, calming, occasionally chaotic, and deeply rewarding. And when someone asks where you bought that printed fabric, getting to say, “I made it,” is a tiny masterpiece all by itself.
Conclusion
Learning how to make stunning block printed fabric at home is one of those rare DIY projects that feels artistic, useful, and genuinely fun at the same time. You do not need a giant budget, formal design training, or a Pinterest-perfect studio. You just need fabric, a thoughtful motif, the right ink, and the willingness to test, print, and improve as you go.
Start simple. Print a few napkins, a tea towel, or a small panel for a pillow. Let the process teach you what works. Soon you will have custom fabric that looks personal, polished, and full of handmade charm. And honestly, once you realize you can turn plain cloth into something this beautiful with a little ink and a block, store-bought fabric may never seem quite as exciting again.


