Table of Contents >> Show >> Hide
- What “Under $10” Really Means (And How to Win the Challenge)
- The 3-Part Formula for Any Homemade Curtain Rod
- Method 1: The $10 ChampionEMT Conduit Curtain Rod
- Method 2: The Cozy ClassicWood Dowel Curtain Rod
- Method 3: The “I Spent $0” RodUpcycle Edition
- How to Measure and Hang Curtains So They Look Expensive
- Strength and Safety: Don’t Let Your Rod Become a Meme
- Style Upgrades That Don’t Have to Break the Budget
- Troubleshooting: Quick Fixes for Common DIY Curtain Rod Problems
- Conclusion
- Experiences & Lessons Learned (500+ Words of Real-World DIY Curtain Rod Wisdom)
Curtain rods are one of life’s little mysteries. They’re basically a straight stick that holds up fabric, yet some store-bought options cost the same as a decent dinner (with dessert). The good news: you can absolutely DIY a sturdy, good-looking curtain rod for under $10often with one trip to the hardware store and zero trips to the “why is this so expensive?” aisle.
This guide walks you through a few budget-proof methods (including the MVP: electrical conduit), shows you how to measure so your curtains don’t look like they’re wearing high-waters, and gives you real-world tips so your rod doesn’t sag like a spaghetti noodle two weeks later.
What “Under $10” Really Means (And How to Win the Challenge)
To keep this legit, we’re aiming for a single standard window rod (roughly 36–60 inches wide) with basic mounting. The secret is that the rod itself can be cheap, but accessories can sneak up on you. So the strategy is:
- Use inexpensive rod material (conduit or a wood dowel).
- Choose low-cost brackets (conduit straps, cup hooks, or simple L-brackets).
- Skip “decorative” extras unless you already have them (paint, finials, rings).
If you already own screws, a drill bit, or leftover spray paint, congratulationsyou’re basically sponsored by your past self.
The 3-Part Formula for Any Homemade Curtain Rod
1) The Rod
This is your “stick.” It needs to be straight, strong enough for the curtain weight, and long enough to extend beyond the window.
2) The Supports
Brackets, straps, hooksanything that keeps the rod from attempting a dramatic, gravity-powered escape.
3) The Finish
Optional but fun: paint, stain, or a clean “industrial” look. Budget tip: the cheapest finish is “leave it alone and call it modern.”
Method 1: The $10 ChampionEMT Conduit Curtain Rod
If you want strong, straight, and cheap, electrical conduit is the sweet spot. EMT conduit (that’s the thin-wall metal tube found in the electrical aisle) is a favorite because it comes in long lengths, is surprisingly rigid, and can be cut to size.
Shopping List (Budget Edition)
- 1/2-inch EMT conduit (often sold in 10-foot sticks)
- Two 1/2-inch conduit straps (these act like brackets)
- Screws (use what you have; otherwise buy a small pack)
- Optional: spray paint/primer, rubber end caps, or inexpensive knobs as finials
Example Cost Breakdown (Typical “I’m Trying to Stay Under $10” Window)
For a 48-inch window setup:
- Conduit: buy one 10-foot stick and cut it down (you’ll have leftovers)
- Two conduit straps: one on each side
- Fasteners: screws you already own (best case) or a small pack (still usually manageable)
The exact numbers vary by store and location, but conduit + straps is one of the most reliable ways to keep the total low while still getting a rod that won’t bow under heavier curtains.
Step-by-Step: EMT Conduit Rod (Simple Version)
- Measure the window width. Plan for the rod to extend past the window frame so the curtains can stack off the glass when open. A common guideline is extending several inches on each side (often 8–12 inches total wider than the window).
- Cut conduit to length. Many hardware stores can cut it for you. If you cut at home, use a metal-cutting tool and smooth the edges.
- Optional: paint it. Lightly clean the conduit, then spray paint for a matte black “industrial” vibe or a metallic finish. If you skip paint, you get a clean, silvery look that reads surprisingly intentional.
- Mark bracket locations. Use a level. Most installs place the rod several inches above the window trim to make the window feel taller.
- Install the conduit straps. Screw straps into studs when possible. If not, use wall anchors rated for the curtain weight.
- Snap the conduit into the straps. Slide curtains onto the rod first (learn from the people who didn’t).
Make It Better Without Spending More
- Prevent sag: For wide windows, add a third strap in the middle.
- Stop curtain snags: Sand any cut edge and cover it with tape or an end cap.
- Cheap “finials”: Use rubber caps, wine corks, wooden beads, or thrifted knobs.
Method 2: The Cozy ClassicWood Dowel Curtain Rod
If you want warm, minimal, and easy to stain, a wooden dowel is your friend. Many DIYers combine a dowel with simple brackets or hooks, then stain/paint it to match the room.
Budget-Friendly Supplies
- Wood dowel (common sizes: 1 inch or 1 1/4 inch)
- Two heavy-duty cup hooks OR simple brackets
- Sandpaper (even a small sheet works)
- Optional: stain, paint, clear coat
Step-by-Step: Dowel Rod That Doesn’t Look Like a School Project
- Cut dowel to length and sand the ends so they’re smooth and splinter-free.
- Decide on brackets. Cup hooks can be extremely cheap and fast for lightweight curtains (especially if you’re mounting into wood trim). For heavier drapes, use sturdier brackets and anchors.
- Finish the dowel. Even a quick wipe-on stain can make it look “custom,” not “craft day.”
- Mount level and hang. Measure twice. Drill once. Celebrate forever.
A Nice Trick for Extra-Long Dowel Rods
If you need a longer rod and can’t find a single dowel that length, some tutorials join dowels using a dowel screw by drilling a centered pilot hole. This can work for light-to-medium curtains, but for wide spans, conduit still wins on rigidity.
Method 3: The “I Spent $0” RodUpcycle Edition
If “under $10” still feels too rich for your blood (respect), you can upcycle:
- A straight tree branch (let it dry, sand it, seal it)
- A broom handle (clean, cut, paint)
- A closet pole offcut (often already finished)
Pair it with cheap hooks or leftover brackets, and you’ve got a rod with personality. Just keep the curtain weight in mind: charming is great; collapsing at midnight is less great.
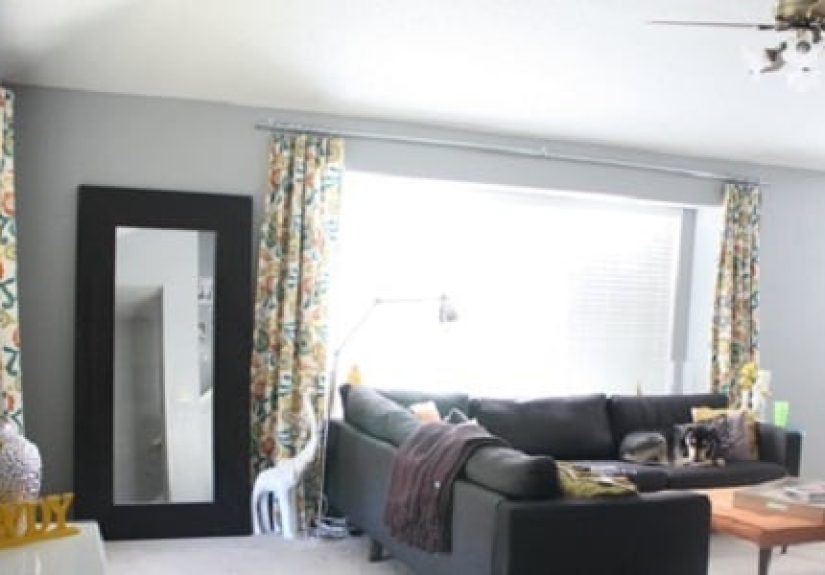
How to Measure and Hang Curtains So They Look Expensive
A DIY rod can look high-end if you nail the placement. Designers and installation guides tend to agree on a few basics:
- Hang the rod higher than you think. A common guideline is roughly 4–6 inches above the window trim, with a minimum clearance so curtains can move.
- Go wider than the window. Extending the rod beyond the frame helps the curtains stack off the glass and makes the window look larger. Many references suggest extending several inches on each side (often totaling 8–12 inches wider than the window).
- Keep it level. Even tiny tilts are noticeable. Use a level, or at least measure from the ceiling down on both sides.
Example: A 36-Inch Window
Window width: 36 inches. If you add 4–6 inches on each side, your rod might land around 44–48 inches. That little extra width is what makes the curtains look “styled” instead of “barely contained.”
Example: A 60-Inch Window (Where Sag Tries to Start a Fight)
For wider windows, plan a center supportespecially with heavier curtains. Conduit is great here because it stays straighter longer, and adding a third strap is usually cheap.
Strength and Safety: Don’t Let Your Rod Become a Meme
Curtains get tugged. Kids pull them. Pets judge them. Gravity never takes a day off. So give your rod the support it deserves:
- Hit studs when possible. Strongest option for brackets.
- Use appropriate wall anchors when you can’t. Basic how-to guides recommend drilling pilot holes and using anchors for support in drywall.
- Add a center bracket for long spans or heavier drapes.
- Choose a rod diameter that matches your curtains. Sheers are forgiving; blackout curtains are not.
Style Upgrades That Don’t Have to Break the Budget
“Finials” (The Fancy End Bits)
You can DIY finials with almost anything: cabinet knobs, wooden balls, corks, even a pair of thrifted chess pieces if you’re feeling dramatic. Paint makes mismatched items look intentional.
Rings vs. Rod Pocket
Clip rings slide easily and look polished, but they can add cost. Rod-pocket curtains are the budget champ, but can be harder to slideespecially on painted rods. If your curtains fight you every morning, a little wax or a smoother finish can help.
Paint Tricks
- Matte black: hides hardware and feels modern.
- Brass/gold: instantly “designer,” especially with wood dowels.
- Keep it raw: conduit can look clean and minimal without paint.
Troubleshooting: Quick Fixes for Common DIY Curtain Rod Problems
The rod sags in the middle
Add a center support. If you’re using a dowel, consider switching to conduit for wide spans or heavy curtains.
The curtains won’t slide
Smooth the rod surface (light sanding for wood; avoid gritty paint texture on conduit). Clip rings can also help if the fabric grabs.
The brackets feel wobbly
Re-check anchors, upgrade to stronger anchors, or move the bracket so at least one screw hits a stud. Wobbly brackets don’t “settle in.” They plot.
Conclusion
A homemade curtain rod under $10 isn’t just possibleit’s one of the most satisfying “small upgrade” DIYs you can do. Conduit is the best blend of cheap and sturdy, wood dowels bring warmth, and upcycled rods add character for nearly nothing. Measure carefully, hang the rod higher and wider for a more designer look, and give long spans a center support so your curtains stay up where they belong: not on your floor at 2 a.m.
Experiences & Lessons Learned (500+ Words of Real-World DIY Curtain Rod Wisdom)
DIY curtain rods tend to teach the same lessons over and overusually in the exact moment you think, “This will be fine.” Here are the most common experiences people run into when building budget rods, plus what actually helps.
First: the “under $10” goal is easiest when you treat it like a scavenger hunt instead of a shopping spree. The rod material might be cheap, but the tiny add-onsextra screws, anchors, spray paint, decorative endscan quietly nibble your budget. A lot of successful DIYers do a quick inventory first: check the junk drawer for screws, peek in the garage for leftover paint, and see if you already own a level or measuring tape. Suddenly the only “new” purchase is the conduit or dowel, and everything else becomes “creative reuse,” which is DIY-speak for “I refuse to buy another pack of screws.”
Second: many people underestimate how much curtains get abused in normal life. It’s not vandalismit’s just daily living. Curtains get yanked when you’re late, tugged when you’re trying to open them with one hand, and occasionally used as a dramatic cape by someone who is definitely not paying rent. That’s why conduit is such a fan favorite: it’s hard to bend, and it doesn’t pretend to be delicate. The first time someone installs a dowel rod with lightweight brackets and then hangs heavier curtains, they learn the universal DIY rule: “If it wiggles now, it will fall later.”
Third: measuring is where confidence goes to get humbled. A super common story: someone measures the window width, cuts the rod to match, installs everything perfectly… and then realizes the curtains cover part of the glass even when open. The fix is simple: make the rod wider than the window frame so the fabric can stack to the sides. Once people do this, they’re shocked how much bigger the window looks. The emotional journey is real: “I thought I didn’t care,” followed by, “Wait… why does this look like a magazine?”
Fourth: paint is both magic and a trap. Spray paint can make conduit look like a high-end metal rod, but the finish matters. If the paint dries gritty or sticky, curtains won’t glidethey’ll stutter. That’s when DIYers discover they’ve invented a new workout: “curtain tugging.” The best experiences usually involve either leaving conduit unpainted (simple and smooth) or using light coats with proper drying time. For wood dowels, a basic stain and a quick clear coat can feel “custom” without making the surface tacky.
Fifth: the “level” problem is sneakier than it looks. A rod can be off by a tiny amount and still appear crooked because ceilings, floors, and trim aren’t always perfectly square. People who get the cleanest results often measure from the ceiling down on both sides, then check with a level, then step back and eyeball it like they’re judging a reality show. The best DIYers do both: math and the squint test.
Finally: the biggest win isn’t saving moneyit’s getting exactly what you want. Store rods come in standard sizes and styles. DIY rods can be long enough for wide windows, strong enough for heavy curtains, and styled to match your space. When someone finishes a conduit rod with simple straps and it looks clean and modern, the most common reaction is: “Why did I ever pay for curtain rods?” Then they make another one. And another. Suddenly they’re the person their friends text when someone moves into a new apartment: “Hey… how do you do that $10 curtain rod thing again?”


